The Best Turkey Chili

I’m calling this the best turkey chili because it really is the only recipe you’ll ever want to use when making a pot of chili.

Two of our best friends, Adam & Ashley, live in Yadkinville, NC. We plan regular trips to visit them – exploring NC wine country that they get to call home, hiking, and eating really good food either home cooked or at a new restaurant.

The first time we had this turkey chili was upon our arrival to their home. It had simmered in the crock pot all day & was the perfect fuel welcoming us after our road trip from Wilmington (at the time) and filling us up before our next day hiking and vineyard exploring.

Crockpot Turkey Chili

From the combined kitchens of Ashley & Amanda

INGREDIENTS:

2lbs Ground Turkey

2 Cans Kidney Beans (I use 1 can of dark red and 1 can of cannellini beans)

1 Can of Black Beans

(All beans should be drained and rinsed before adding them to the crockpot)

2 Cans Diced Tomatoes (undrained) – I’ve also used the Italian seasoned diced tomatoes if it’s what I have in the pantry and it’s just as good.

8oz Can Tomato Sauce

1 Vidalia Onion – Diced (Original recipe calls for 2 small onions, either are fine, we just always have vidalia on hand)

1 Green Pepper – Diced

2-3 Cloves of Garlic – minced

2 tbsp of Chili Powder

2 teaspoons salt (or to taste)

1 teaspoon pepper

*I buy all unsalted products of diced tomatoes and beans as I prefer to control the sodium content while cooking.

DIRECTIONS:

Dice the onion and bell pepper. Mince the garlic. Add turkey, onion and bell pepper to a skillet, stirring occasionally until meat is browned.

(There is no need to add the onion and bell pepper if you plan to allow the chili to simmer in the crockpot 8 hours.) I’ve found that if I sautee the peppers and onions ahead of time, it speeds up the process when you have less time for the chili to simmer.

While the meat and onions are cooking, drain and rinse all beans.

Add tomato products, beans, garlic, chili powder and salt & pepper to taste to the crockpot.

Add the turkey once browned.

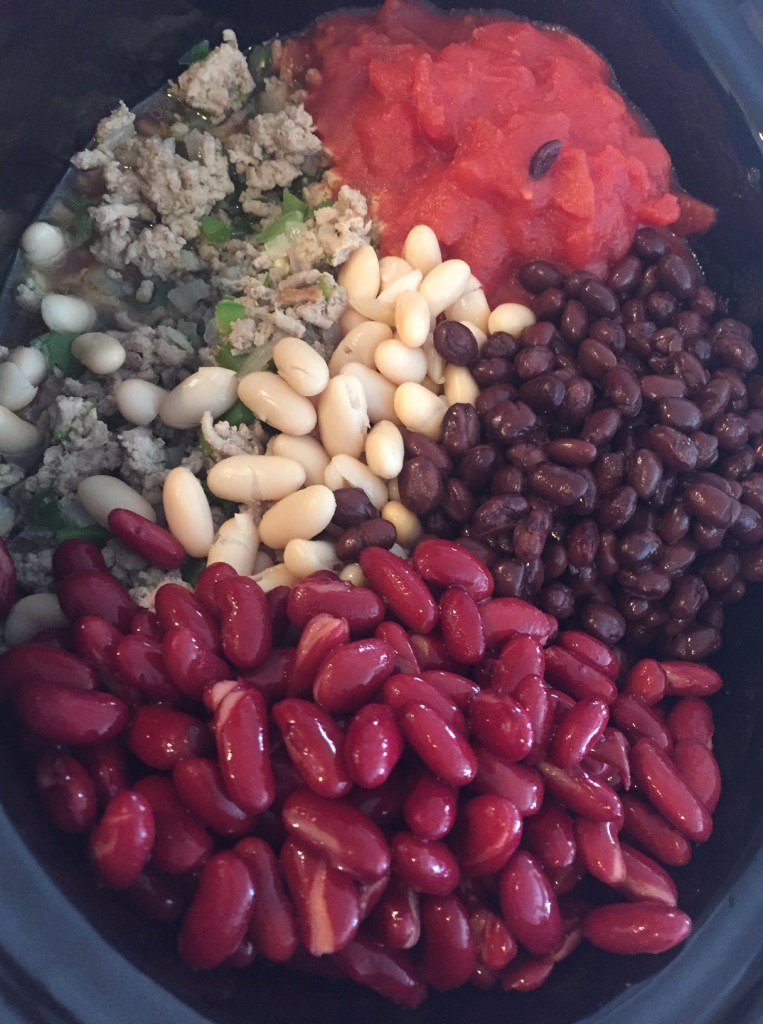
Stir ingredients until blended.

All ingredients added and set to simmer.

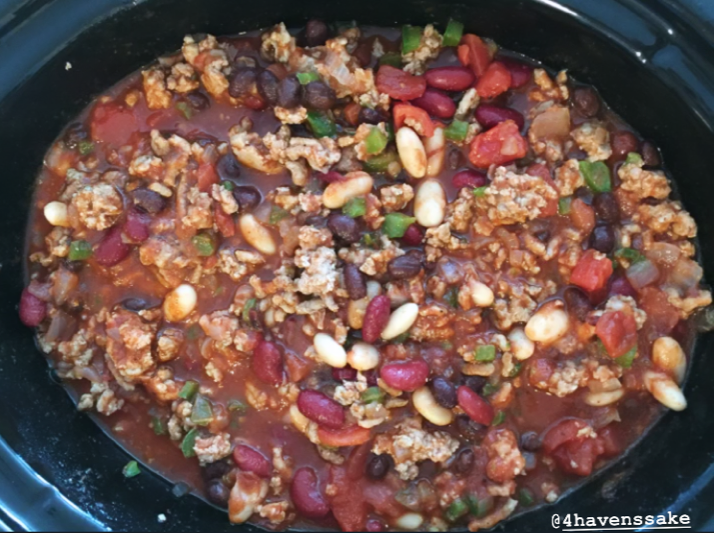
Set the crockpot to simmer either for 8 hours on low or 4 hours on high.

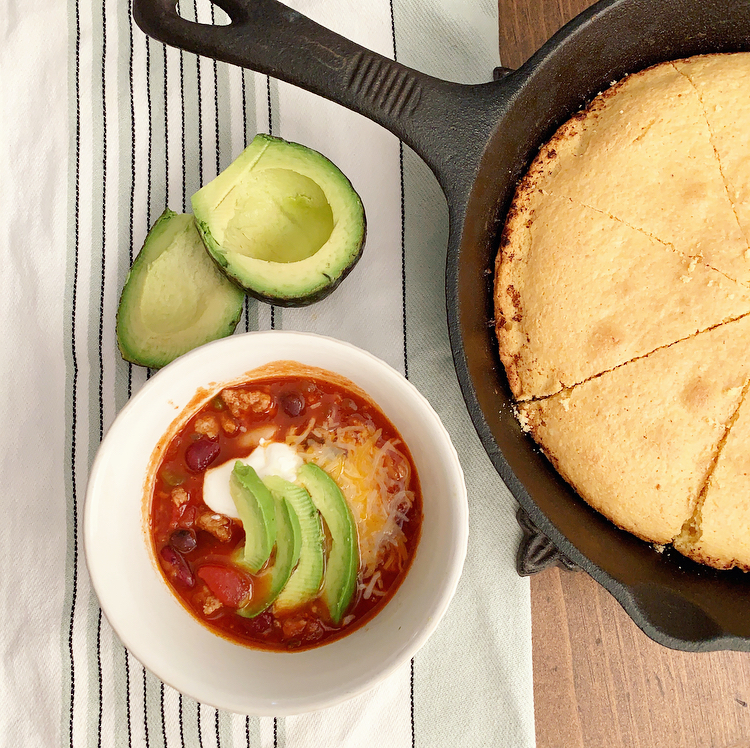
You can top your chili with sour cream (or greek yogurt), cheese, hot sauce and sliced avocado or eat it as is.

Chili pairs well with skillet cornbread. We love Jiffy.

*Tip for making the best skillet cornbread – add about 1-2 tbsp of butter to a skillet. Put the skillet it in the oven while it’s preheating and you’re mixing the cornbread ingredients. Once the oven preheats, carefully take out the hot skillet and add the cornbread mix. You’ll hear it simmer. It gives a nice caramelization to the edges of the cornbread before baking.

This chili does freeze well should you want to save some for a later date.

Hope you enjoy this easy crockpot Turkey Chili. I’d love to hear what you think.

Fall & Christmas DIY Reversible Sign

Fellow crafters I have a fun project for you. Share the idea with your friends and coordinate a time to host a “make and take” sign event like I did.

Fellow crafters I have a fun project for you. Share the idea with your friends and coordinate a time to host a “make and take” sign event like I did.

When I saw Ella Clair’s Fall sign on Pinterest, I was inspired to make it and take it a step further by having the reverse side of the sign a Christmas design. I’m all for multi-purpose home decor and the possibility of not having to store away 2 holiday signs was ideal.

Ella Clair’s design was more rectangular. I modified the design to accommodate this 2×2 plywood sheet and created a Christmas design in word for the reverse side.

You could also have a year round design on the reverse side in lieu of 2 holiday themes.

The first phase of this sign party started with good friends/neighbors on our street. We had the BEST time stenciling and hand painting our signs one cool evening in my neighbors garage. Collectively we had all of the supplies needed to paint the signs apart from the 2×2 plywood boards.

Here is what you need:

2×2 1/2 inch untreated plywood (You can get this exact size from Home Depot for around $6

Craft paint – Colors of your choosing. I had red & orange on hand so we just mixed the two with a smidge of black to make the perfect shade of rust.

Base paint – use any white paint you have on hand. We used White Dove by Sherwin Williams

Gray/Brown Paint – Used for the border, lettering and the arrow – Gargoyle by Sherwin Williams

Pencil

Printer

Painters Tape

Craft paint brushes

STEPS:

  1. Paint the board using any white paint you have on hand
  2. Once dry, use the painters tape to frame out a border on your board. I left approximately 1/2 inch from the edges.
  3. Paint the border, including the edges on the sides and allow to dry
  4. While paint is drying, print the fall design provided by Ella Claire, found here. Please respect her request that this is to only be used for personal use. If you visit her original blog post, she gives tips on how to add this template to a document as an image, then stretching it to the size needed. (I added the template to Excel as I found it easiest to stretch to the needed 2×2 size, much larger than her original)
  5. Download the Christmas design here
  6. Tape the pages together so the design lines up connecting the letters. You may have to trim some of the paper to prevent overlap.
  7. Shade the backside of the design with a pencil as you will then place the shaded side down on your white background a trace the outline of the design.
  8. Once you trace the outline of the design, remove the template and you will be left with the pencil outline to fill in with paint.
  9. Begin painting the lettering. Don’t worry about any mistakes and uneven lines. You will distress your sign as the last step and can hide areas to make appear distressed and intentional.
  10. Once your first side is complete, you will repeat the backside with the second seasonal design.
  11. Distress both sides as much or as little as you’d like using an electric sander and 220 grit paper.
  12. You may add a Polycrylic top coat if you think it will be outside and exposed to the weather elements. I didn’t complete this step as our sign is under a covered front porch. Paints are also permanent finishes once cured.

Happy painting friends!