Rolling with It: My First Wallpapering Success

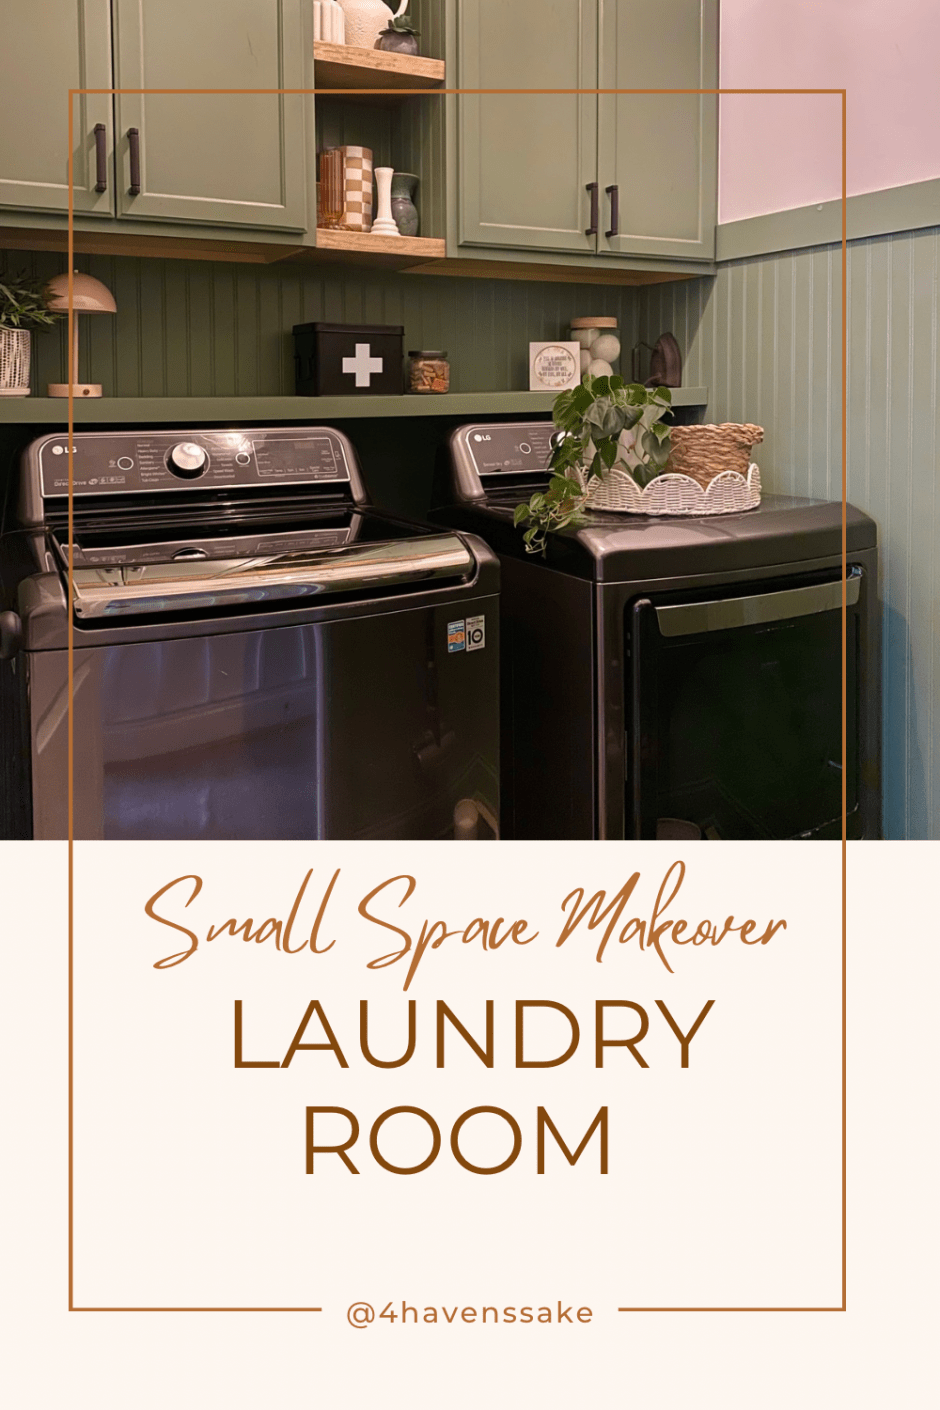
From a cluttered corner to a cozy clean zone, our small laundry room glow-up is complete after I finished my first successful wallpapering project in our home.

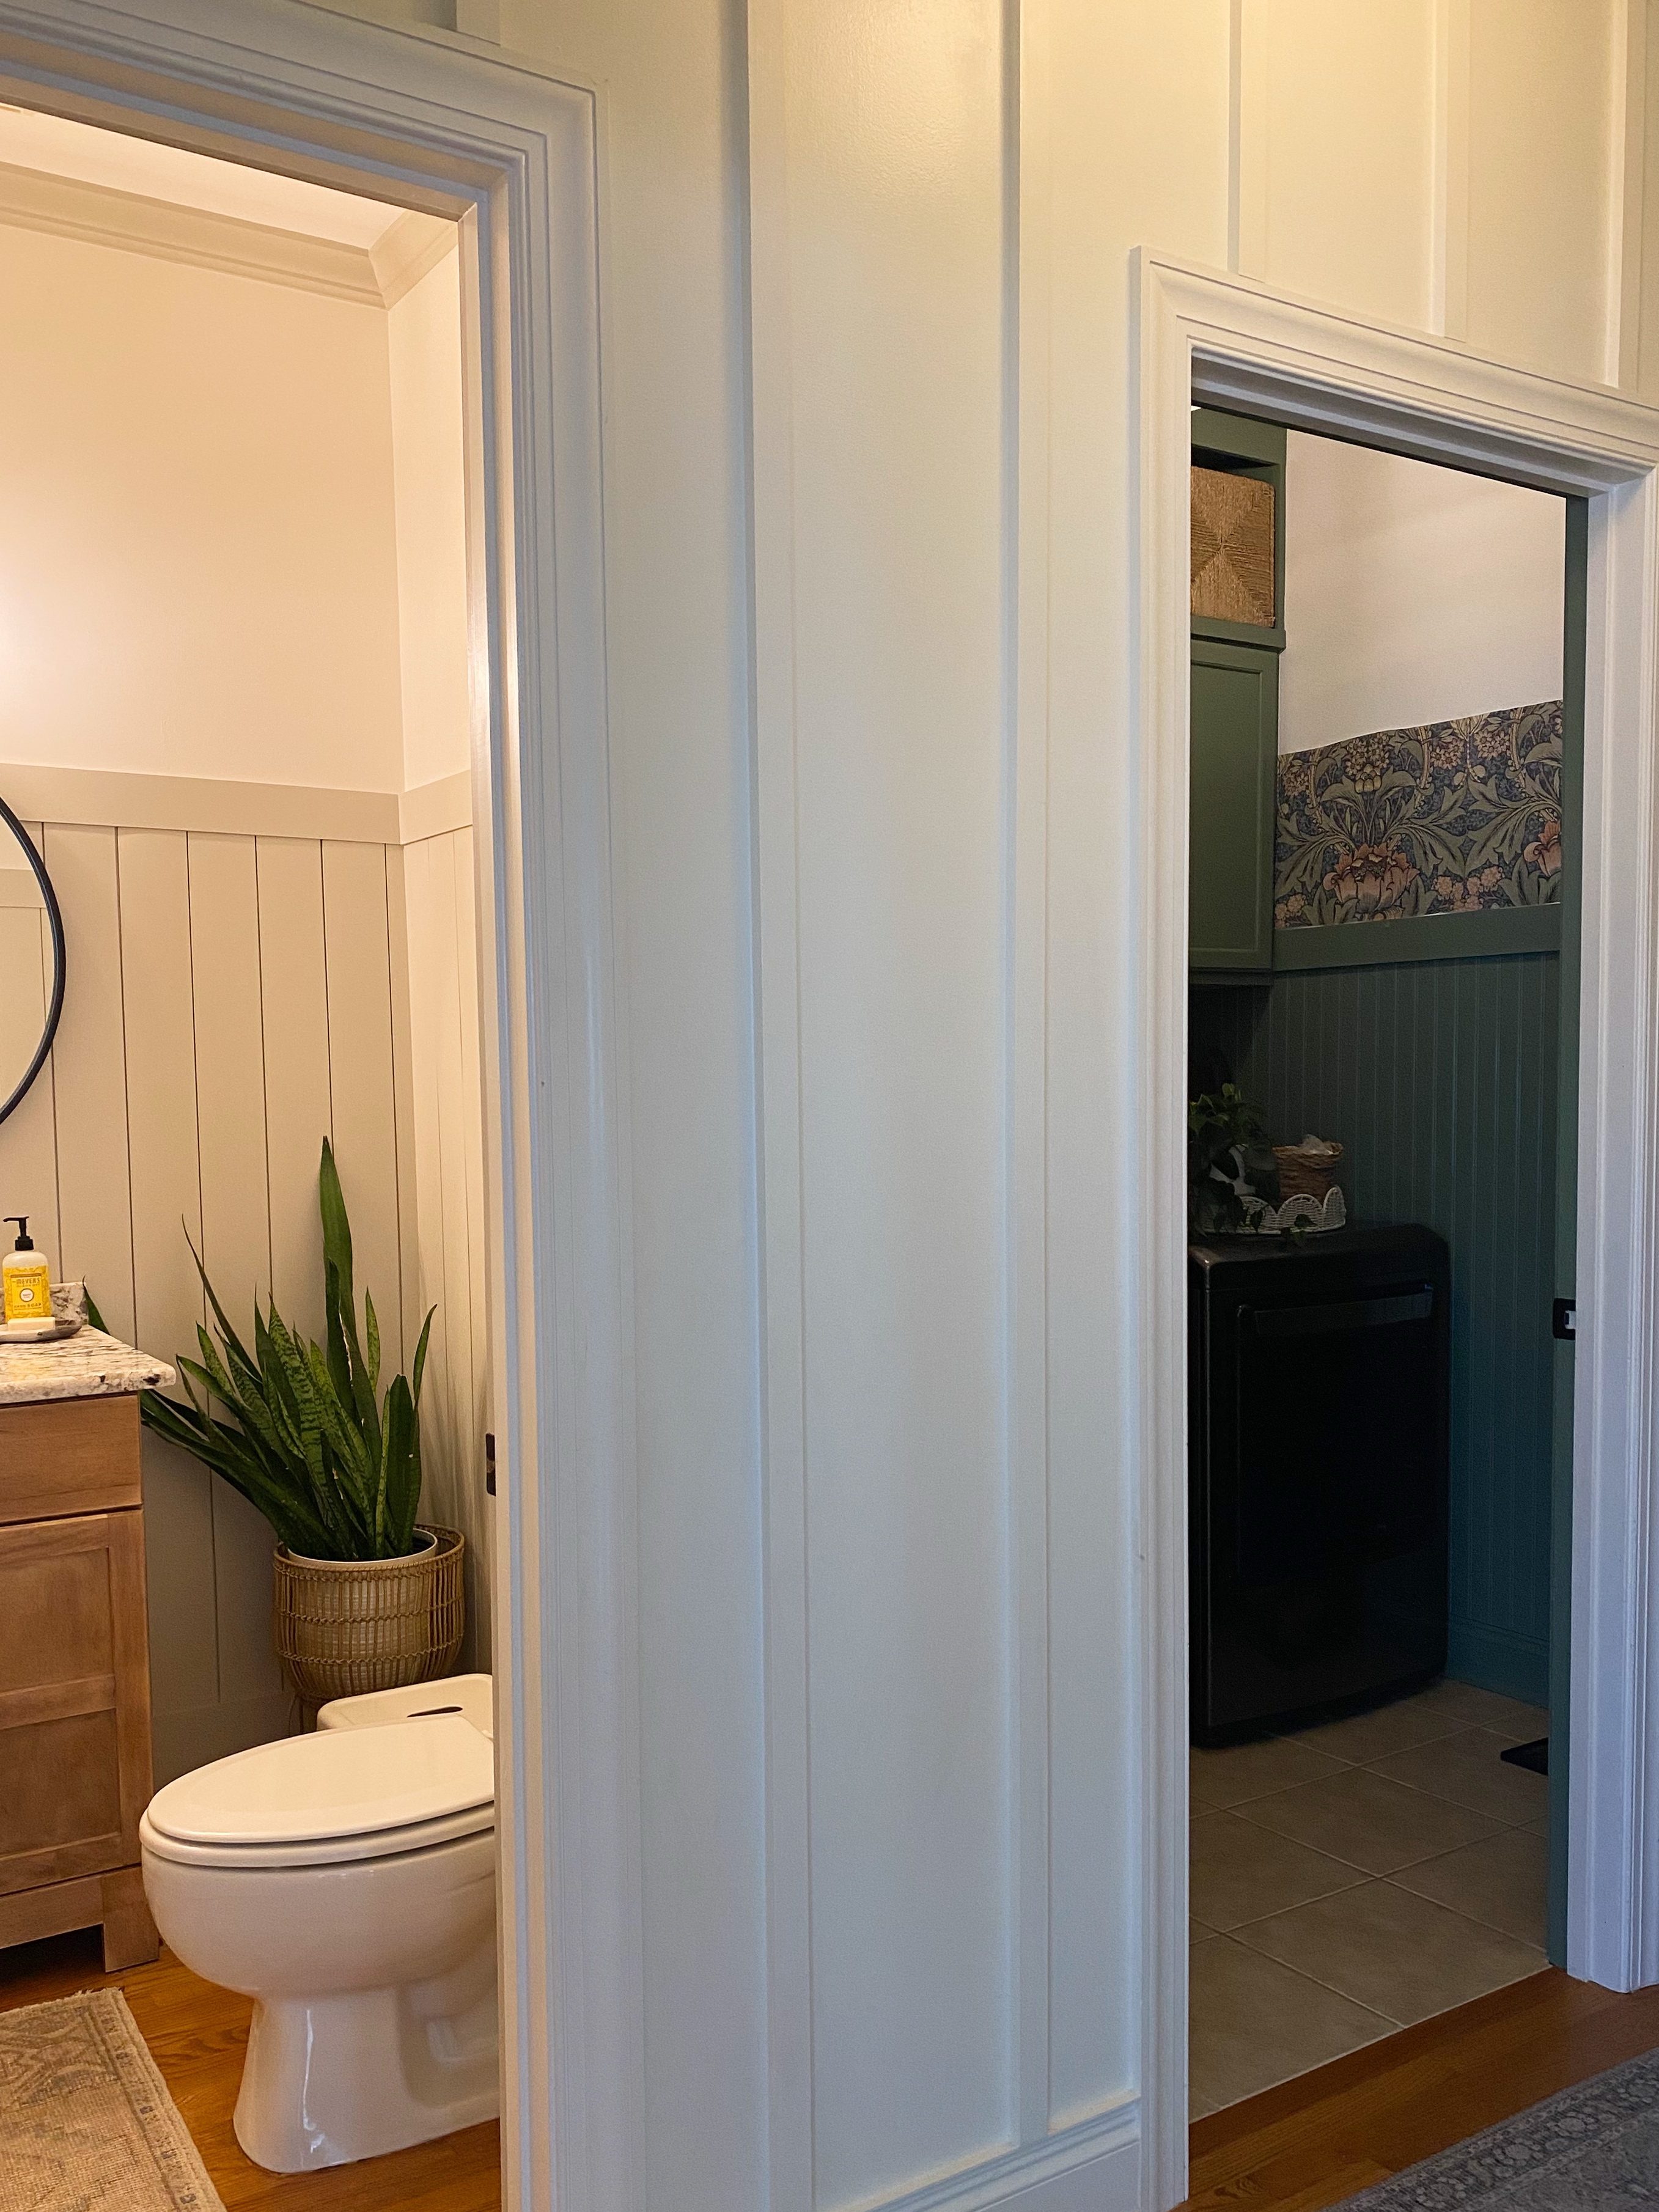
Let’s talk about one of the most-used, least-loved spaces in our home: the laundry room. For a long time, ours was more of a “dumping ground” than functional zone—open shelves full of visible clutter, a constant eyesore for guests who entered through our garage door or used the nearby guest bathroom.

After living with a half-updated version of the room for over a year, I finally decided it was time to really finish it—and that meant trying something totally new: wallpaper.

Spoiler alert: it totally transformed the space. And yes, I smile every time I walk past it.

Let’s take a quick trip down memory lane and revisit how much we had done in this space prior to wallpaper.

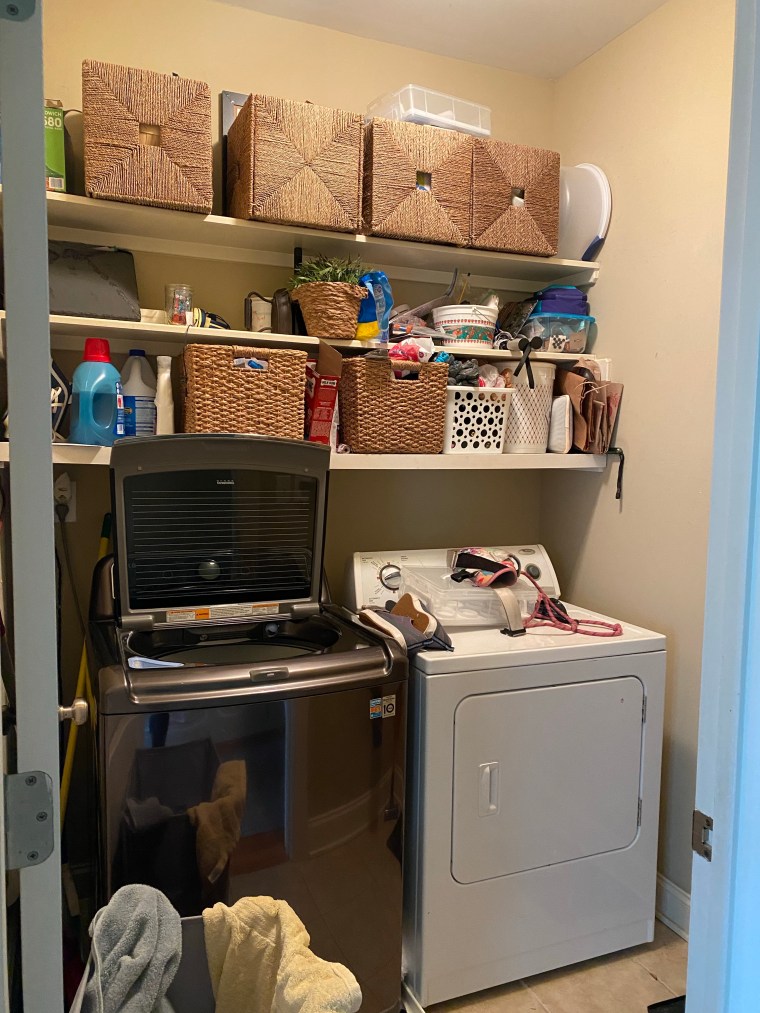
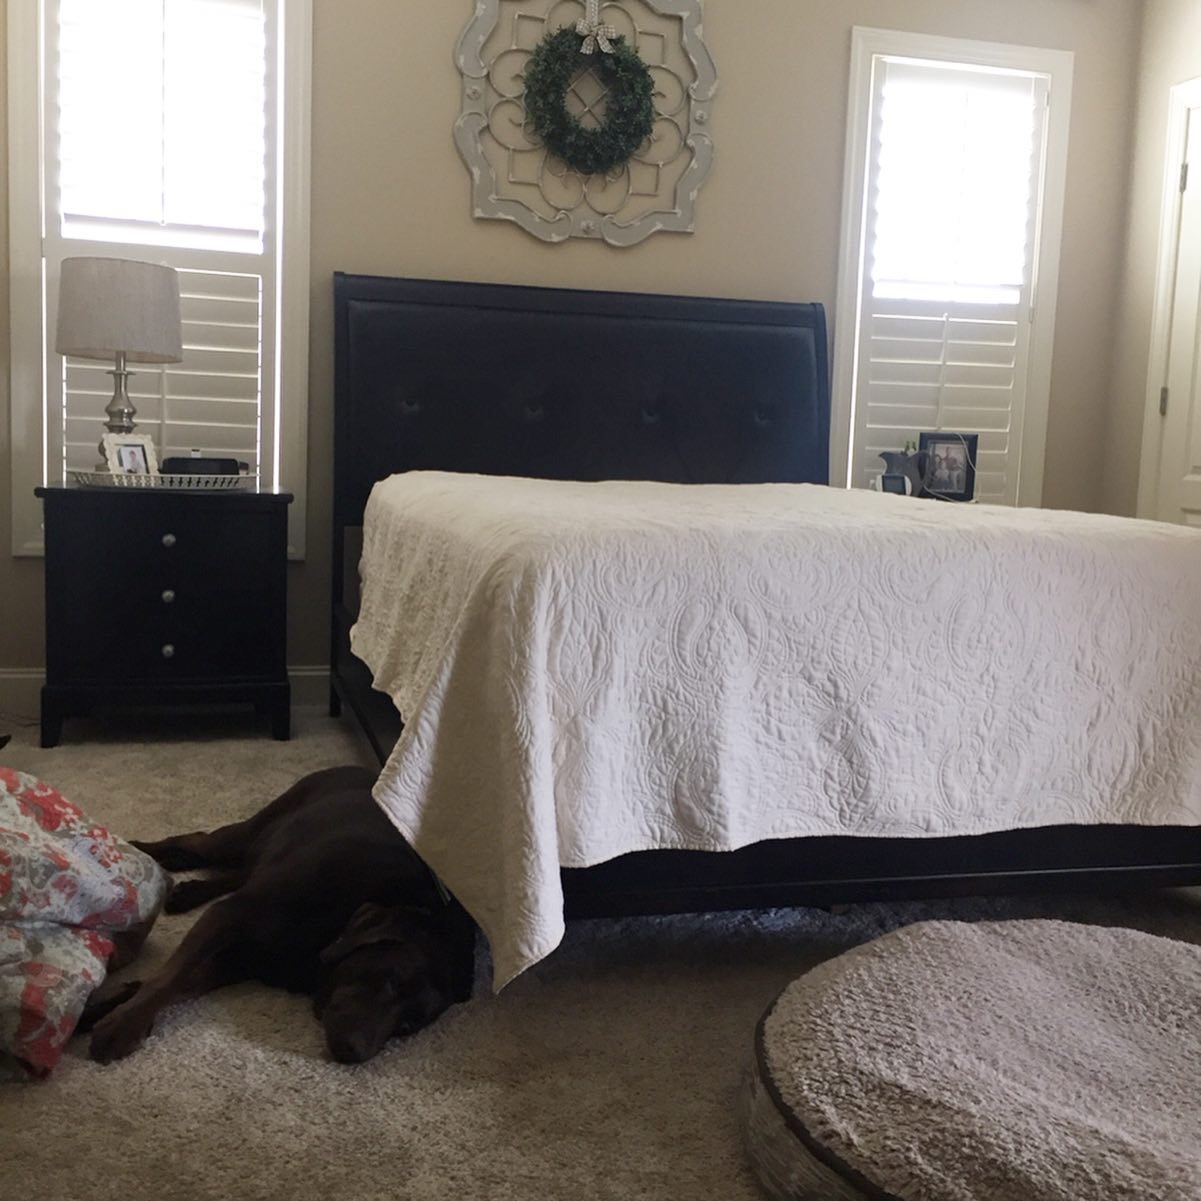
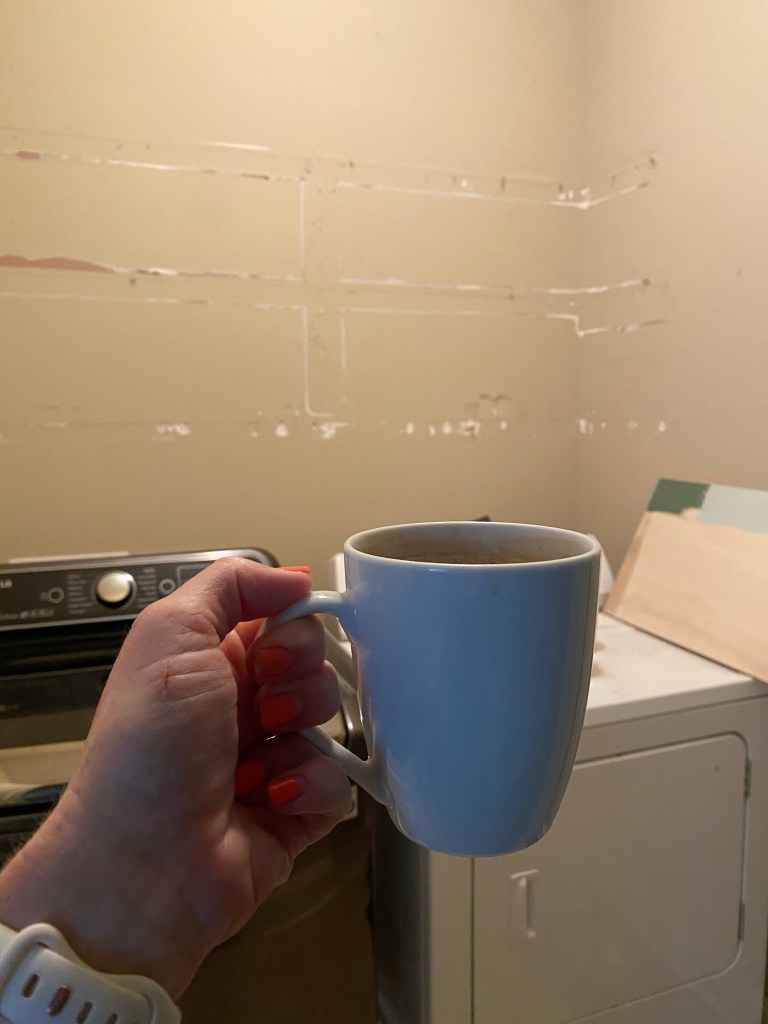
Before: The Struggle Was Real

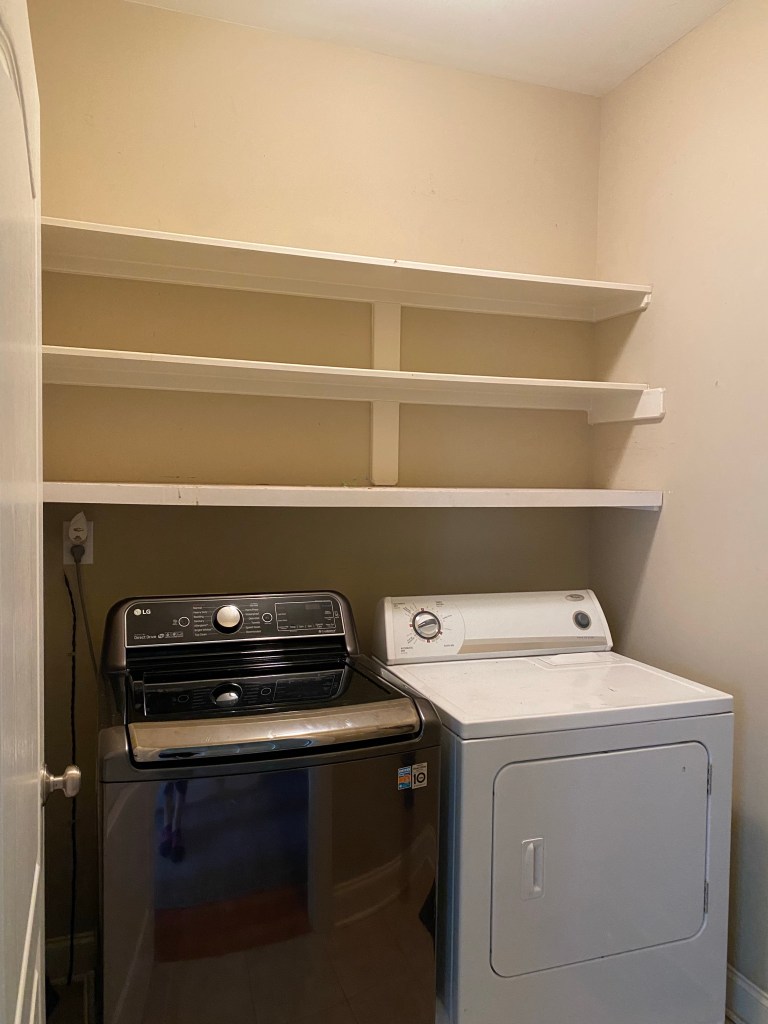
When we moved in, this small laundry room had basic open shelving, which seemed helpful at first—but quickly turned into a visual mess. Everything we needed was accessible, but also on full display. Not ideal, especially since this hallway sees so much guest traffic.

I knew the room had potential, but I needed a plan that was budget-friendly and achievable without a full remodel.

The Big Changes (One Step at a Time):

This wasn’t an overnight transformation—it came together piece by piece. If you want to read all about the steps listed below, I wrote about them in detail in this post.

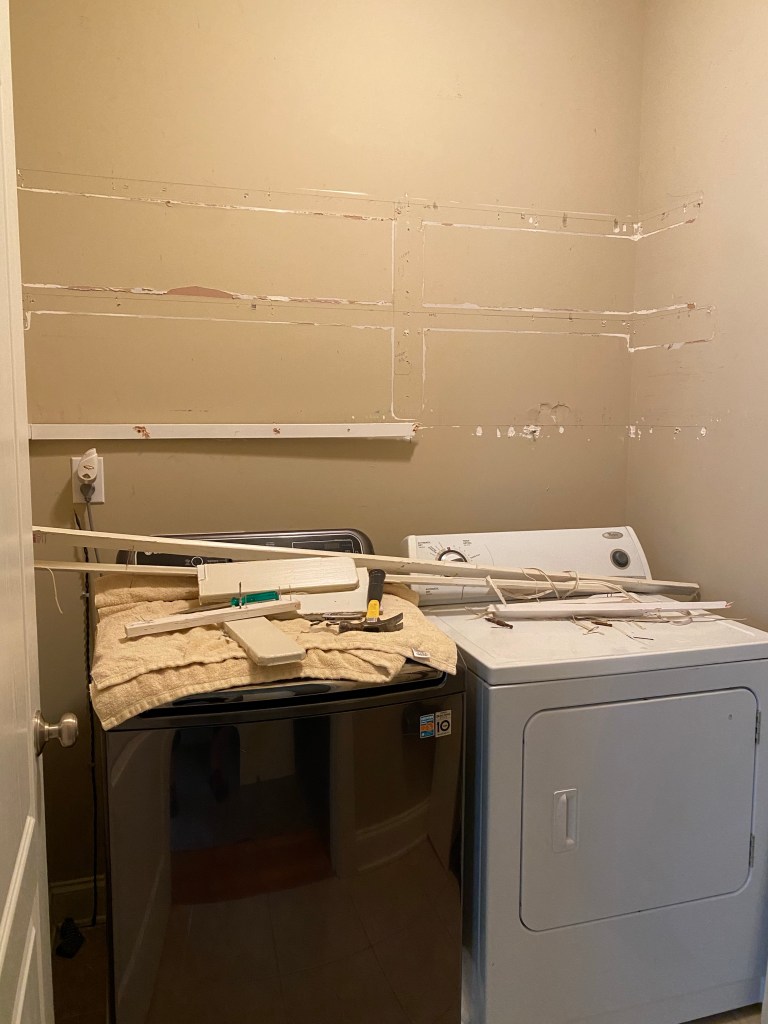
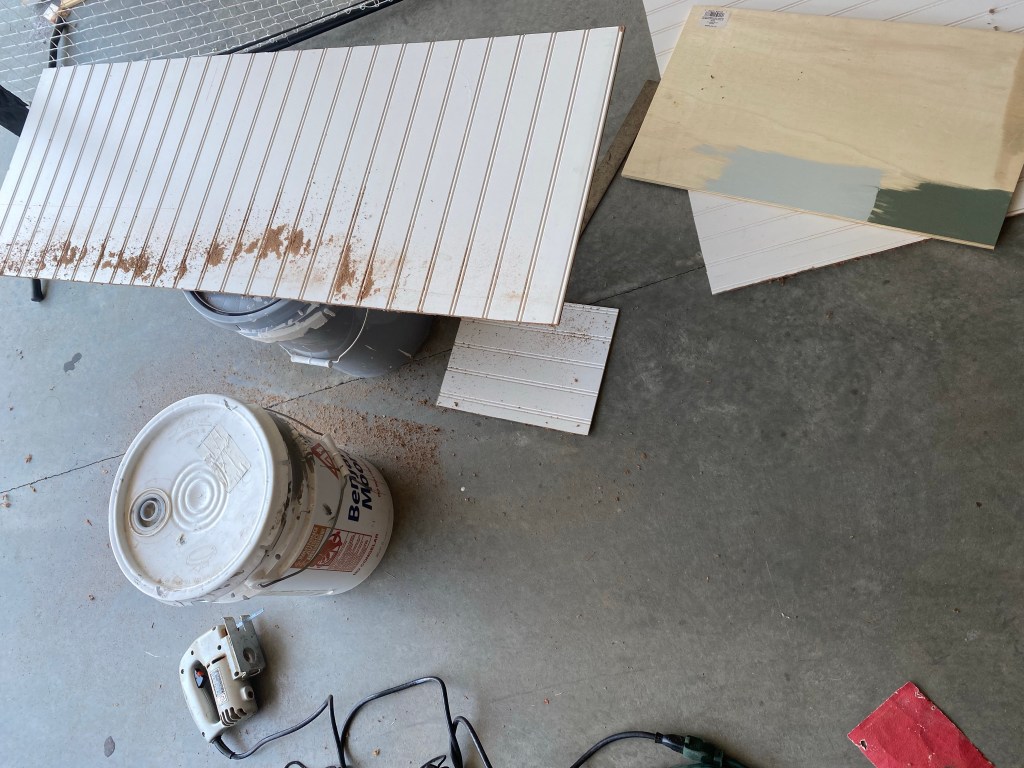
• Ripped out the open shelving (good riddance!)

• Patched and prepped the walls where the new setup wouldn’t cover

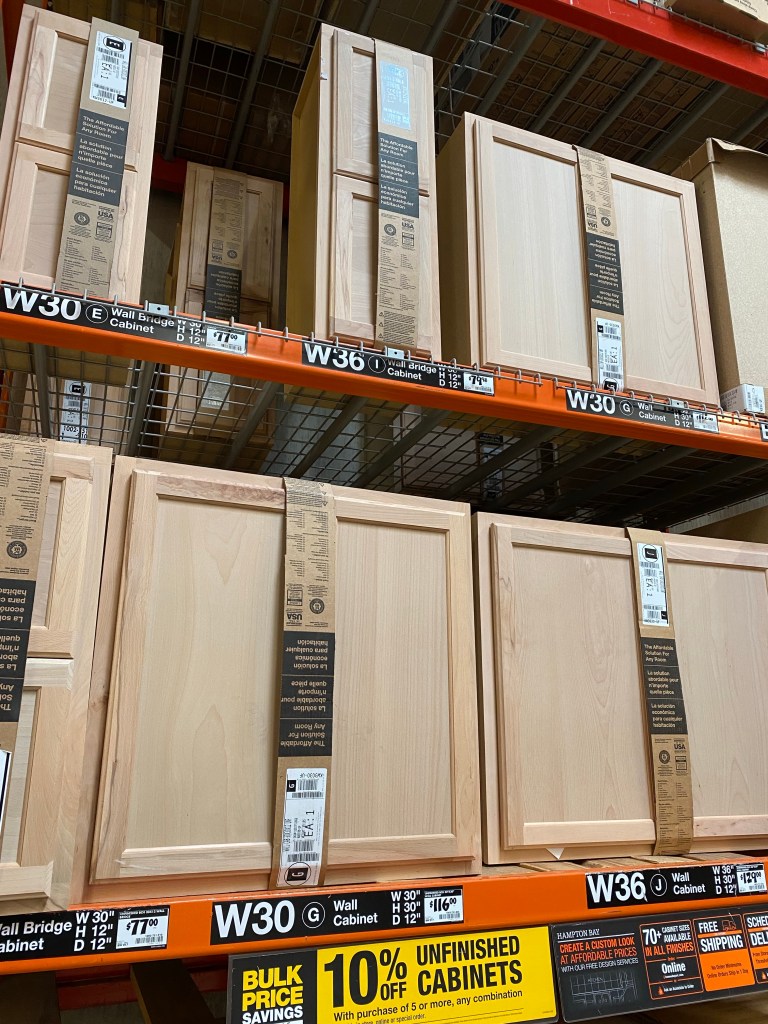
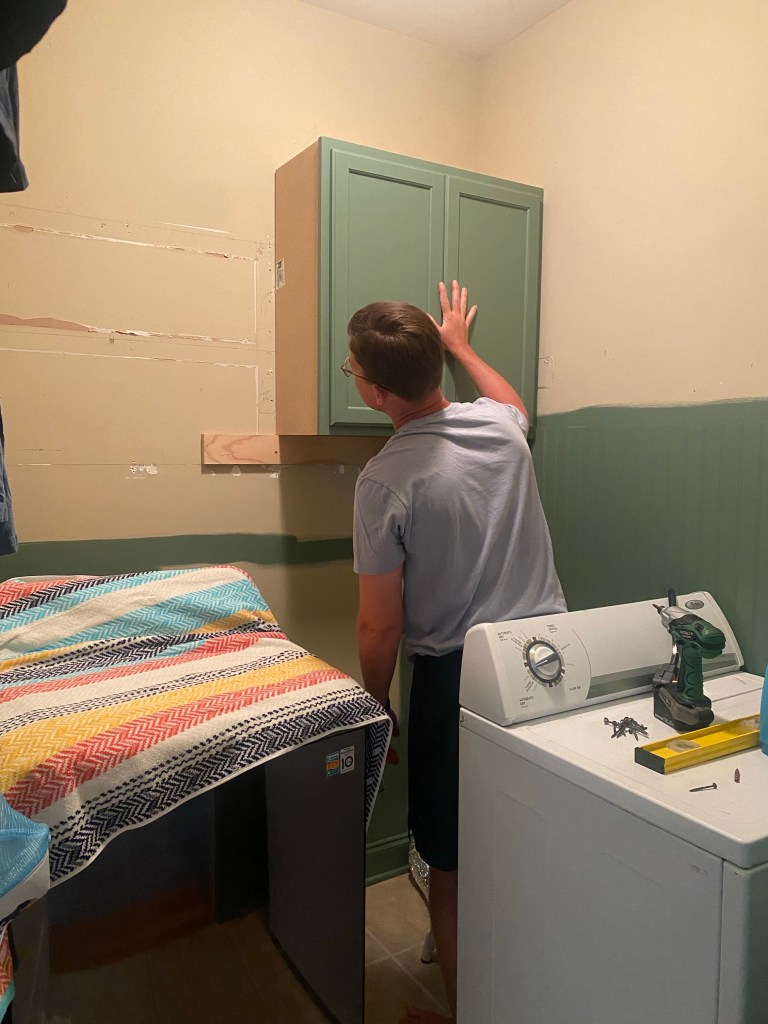
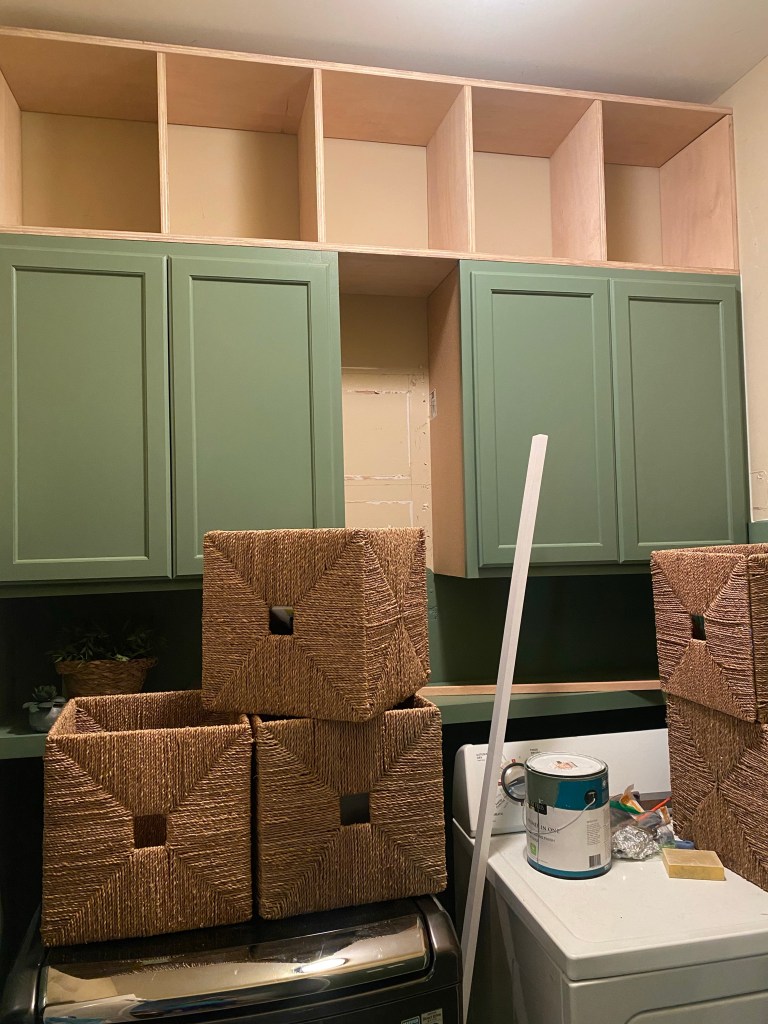
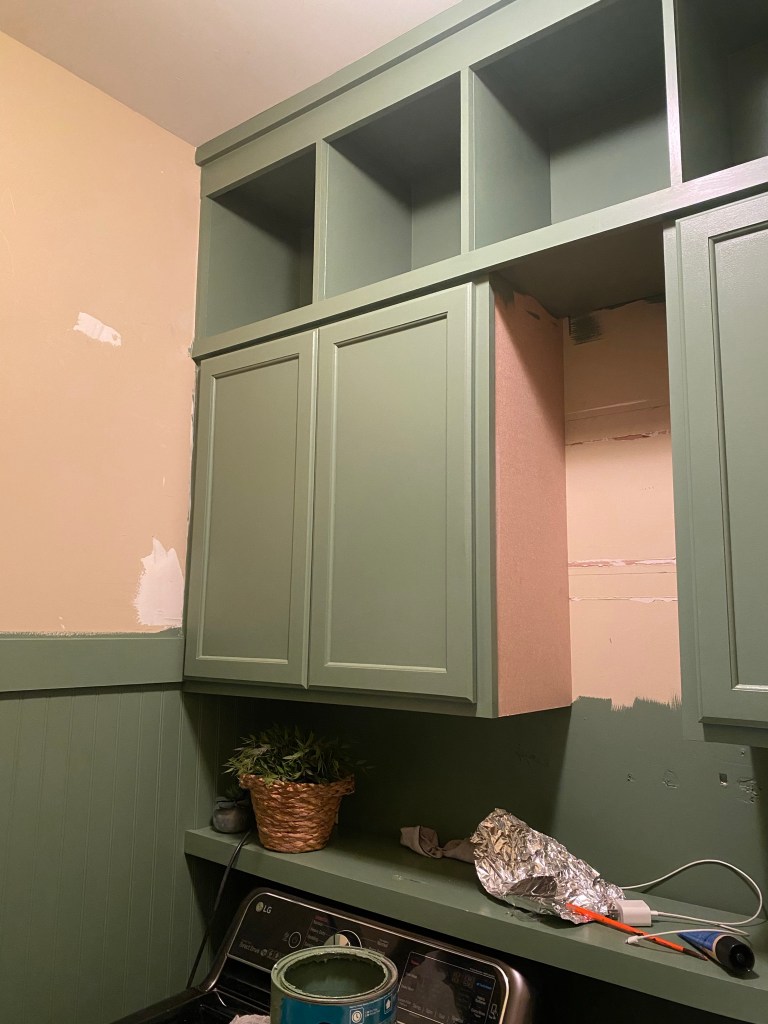
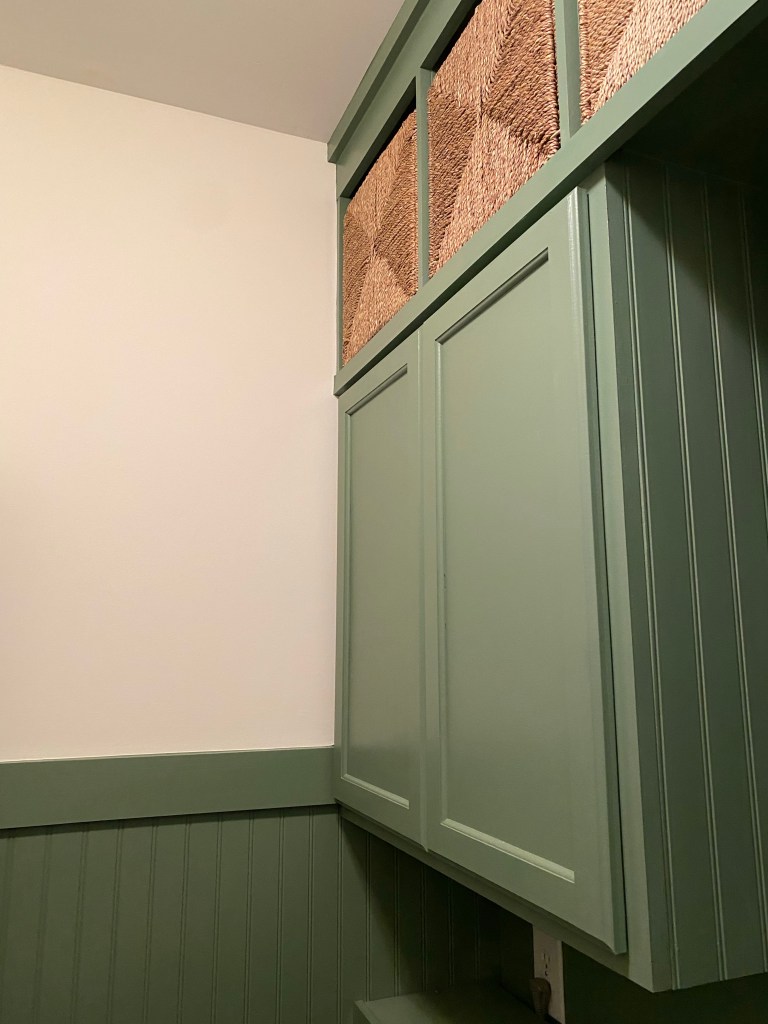
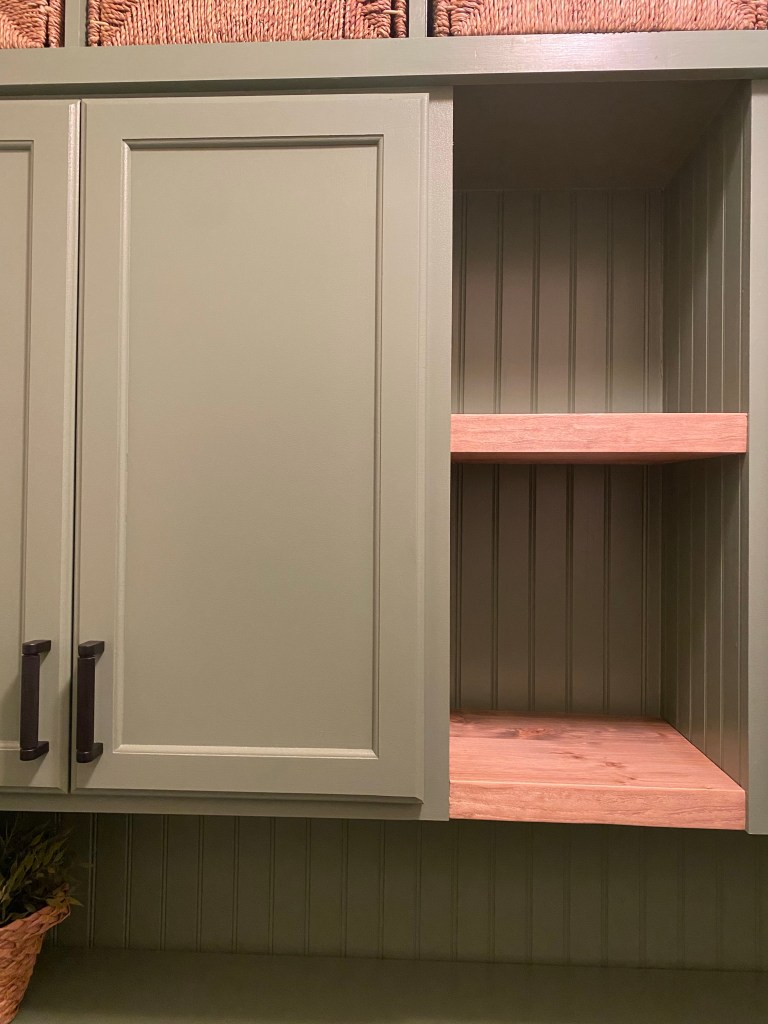
• Installed stock cabinets from Lowe’s (I primed, painted, and we installed them ourselves—teamwork win!)

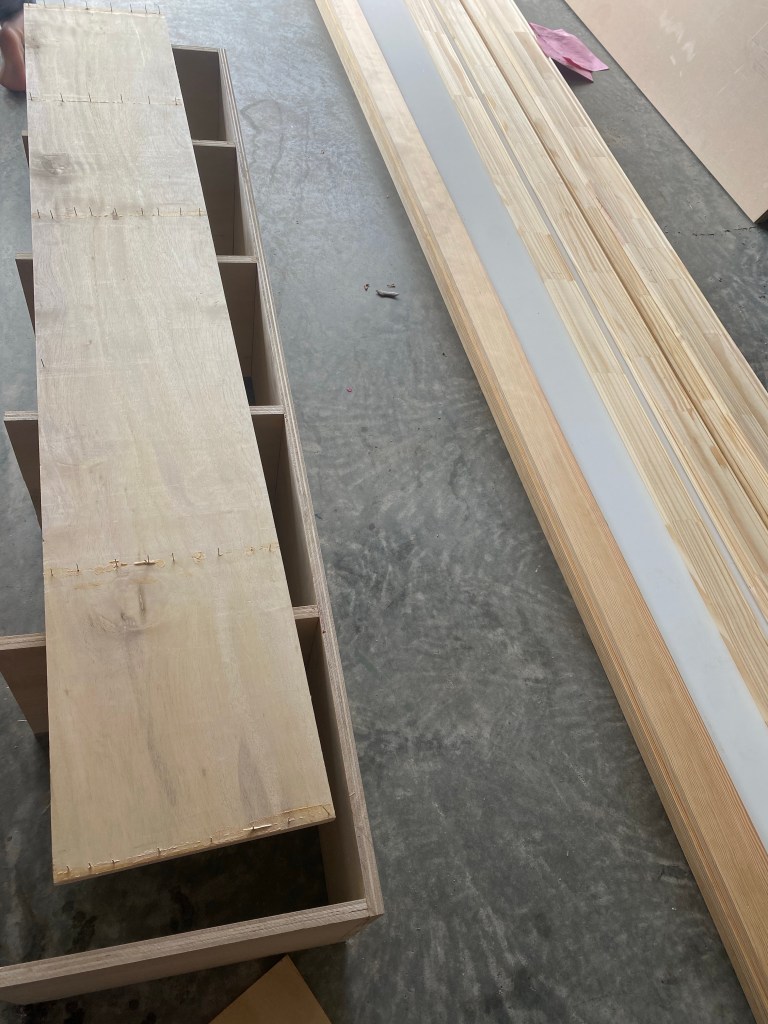
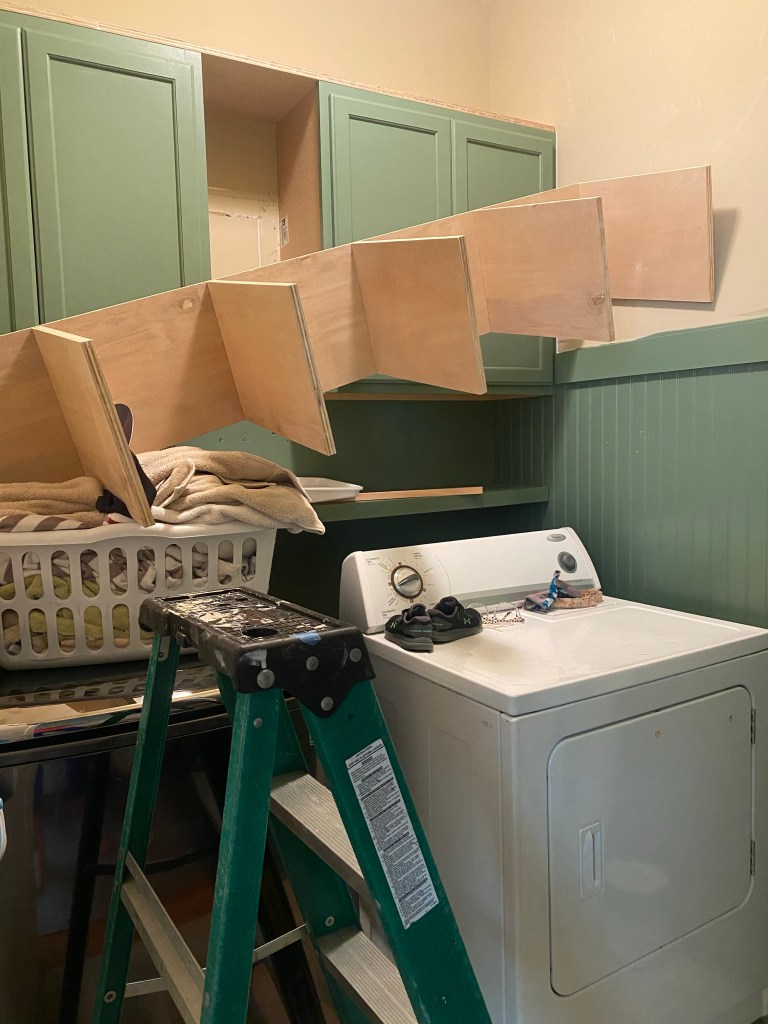
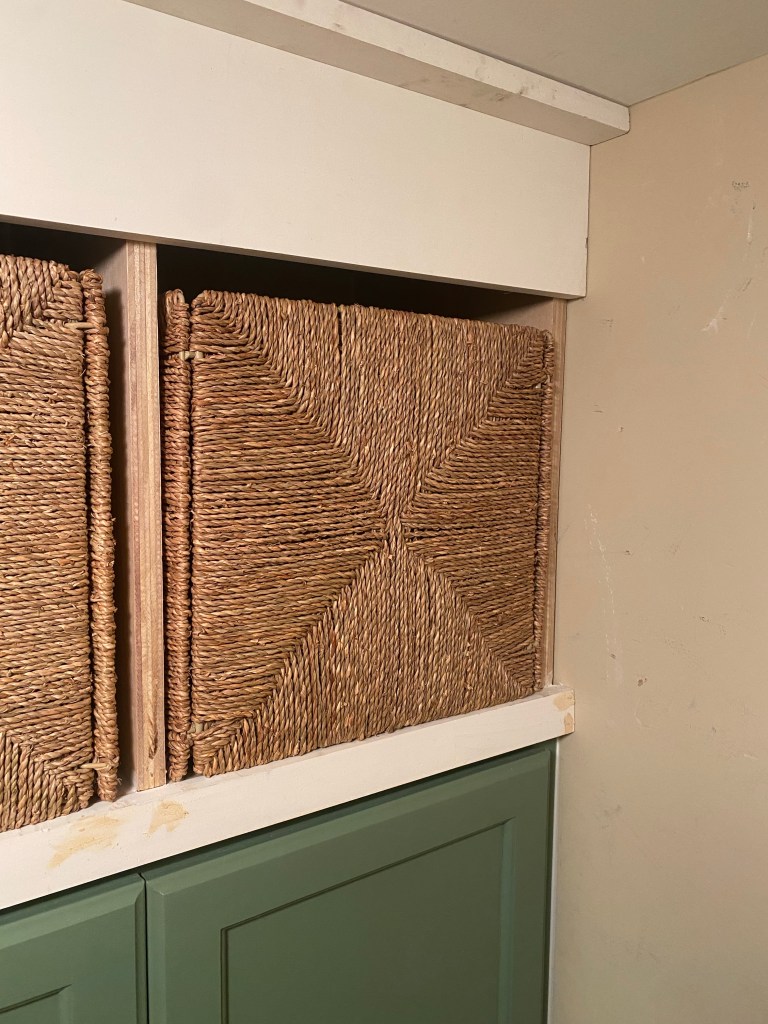
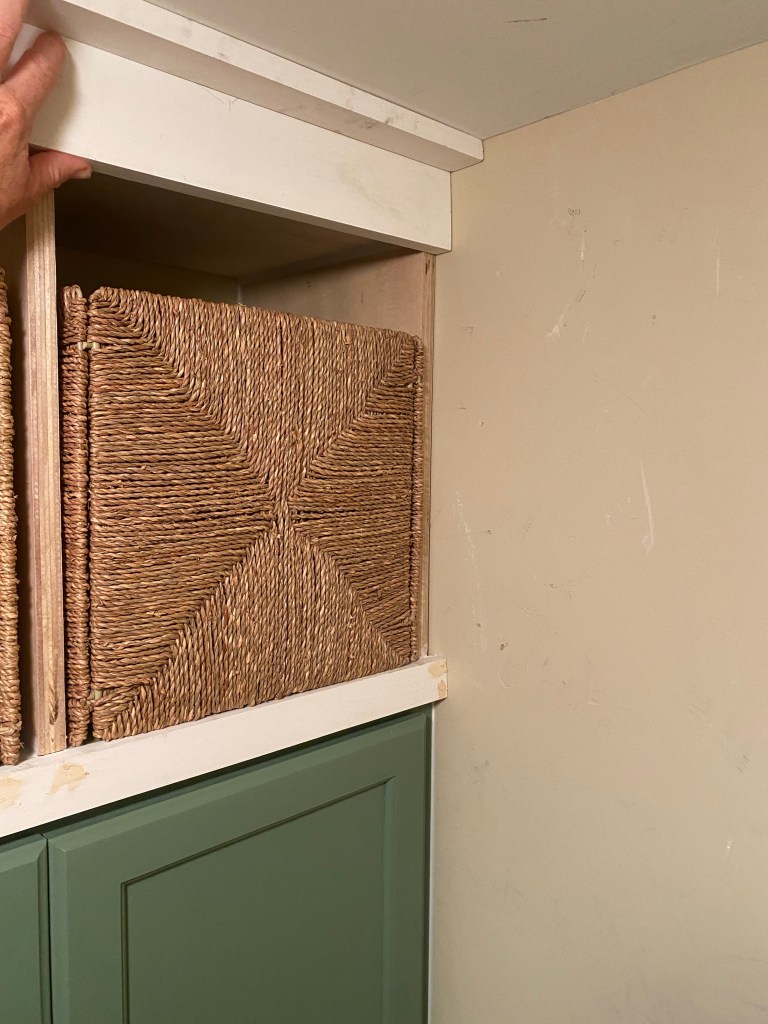
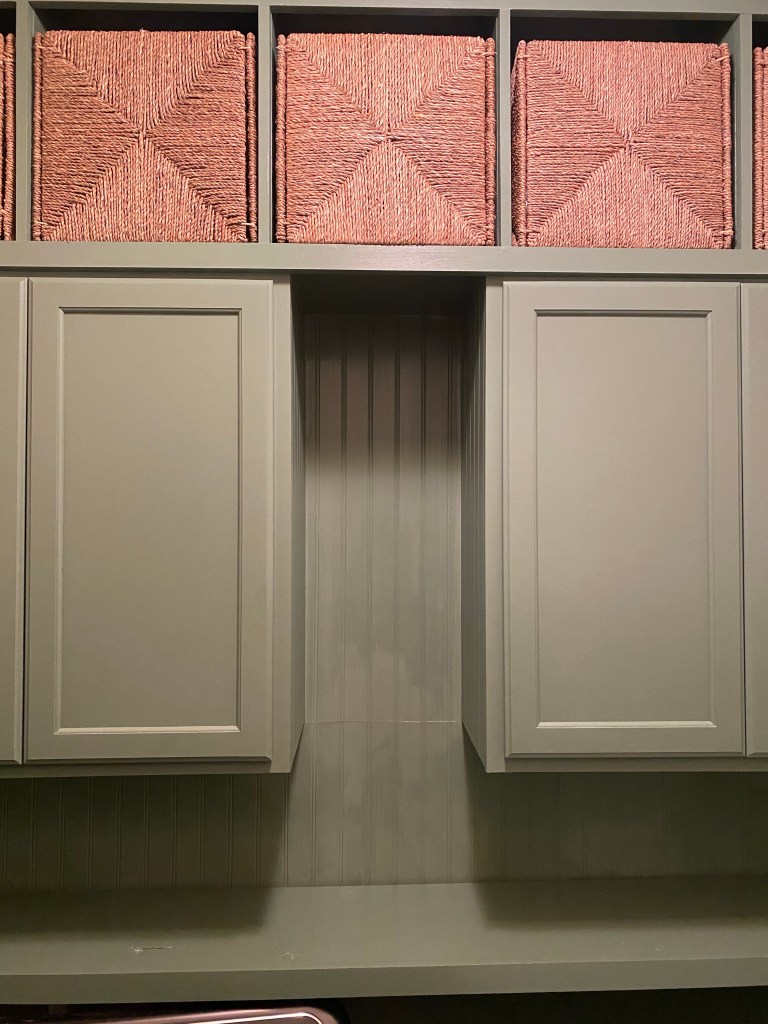
• Built custom cubbies above the cabinets to perfectly fit baskets we already had

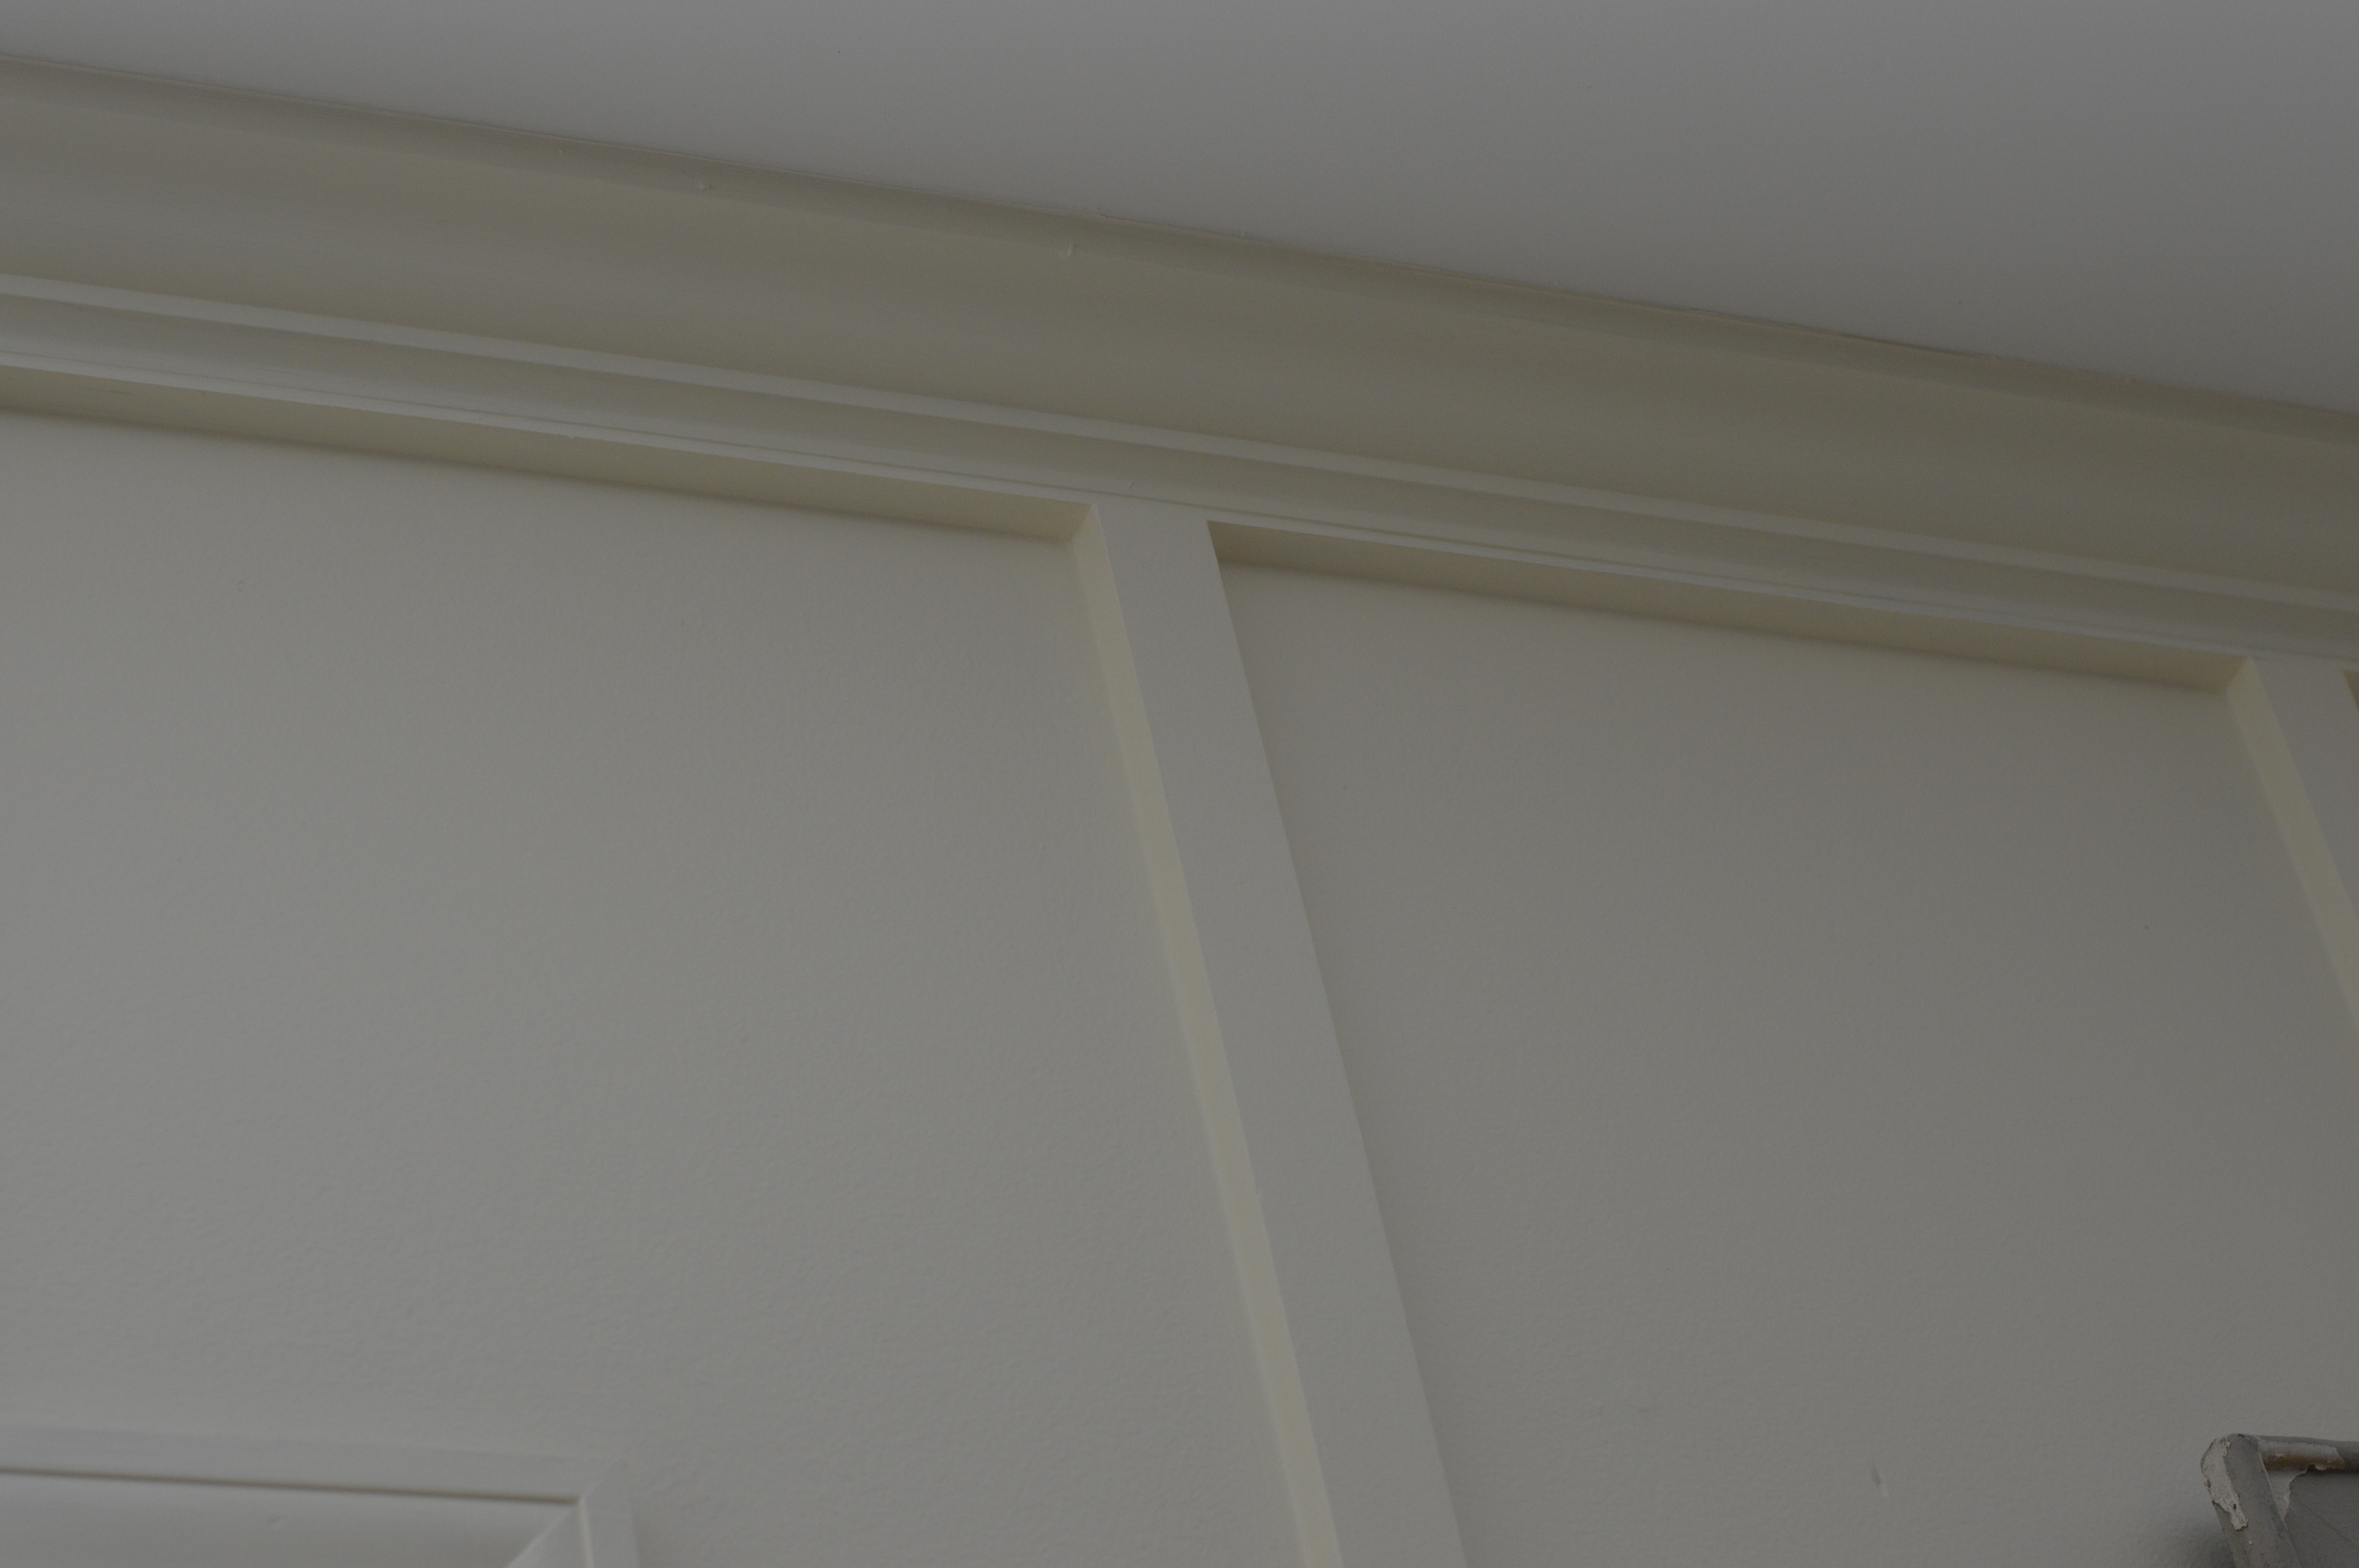
• Added beadboard and trim to bring in some texture and charm

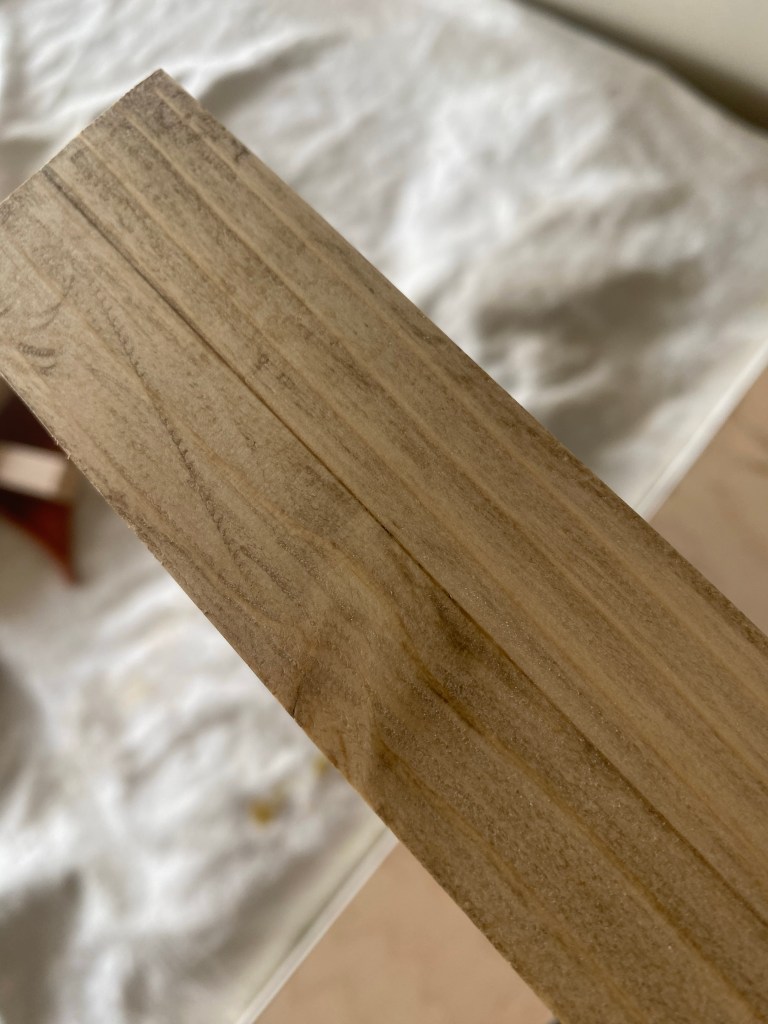
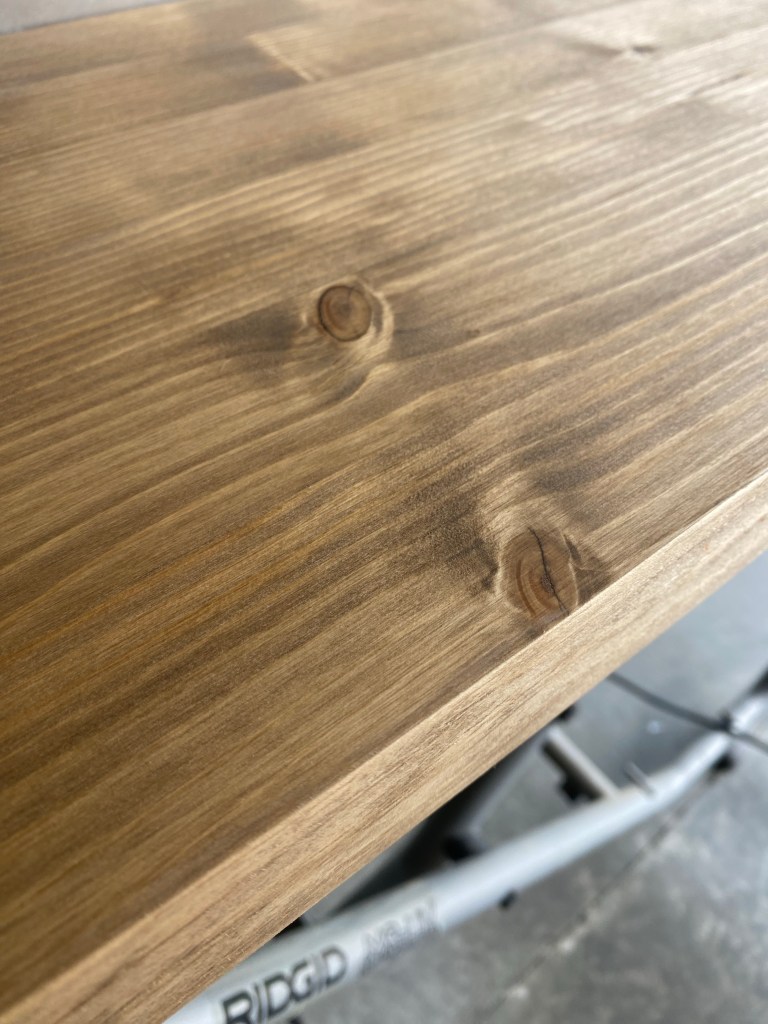
• Built custom shelves to go between cabinets (this was also a first). I accomplished making thick shelves by gluing together two pieces of wood then using edge banding to hide the seams. All was sanded and stained to match. They look like one thick shelf.

• Painted, caulked, filled nail holes—all the behind-the-scenes details that make the finish feel clean and professional

For about a year, we lived with those upgrades while I debated how to add that “something special.” I didn’t want it to just feel done—I wanted it to feel designed.

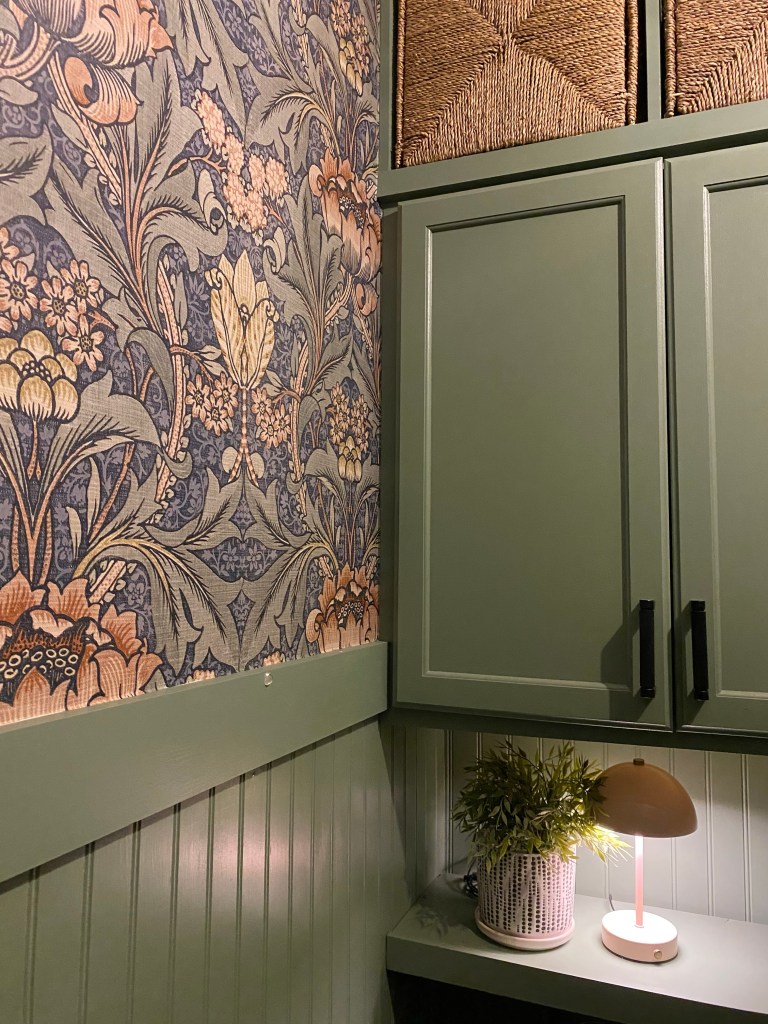
The Finishing Touch: My First Wallpapering Project

Enter: Bold Wallpaper

I’d never wallpapered anything before except for an attempt at a friends home in their powder bath. We were successful until we reached a corner and then we struggled. Enough time had passed after that attempt so I finally decided to go for it in our home—and I’m so glad I did. I chose a bold pattern that felt cheerful and cozy (and a little unexpected for a laundry space).

To make things easier, I used a spray adhesive in addition to the peel-and-stick wallpaper. I WISH we had known about this product when I tried helping my friend! Total game changer. It allowed the paper to stay more movable while applying, so I could reposition it without having to fully peel and restick it.

You’ll also need a wallpaper kit, like this one I used.

Also recommended, a laser level. This helps to keep your design straight as you apply each piece.

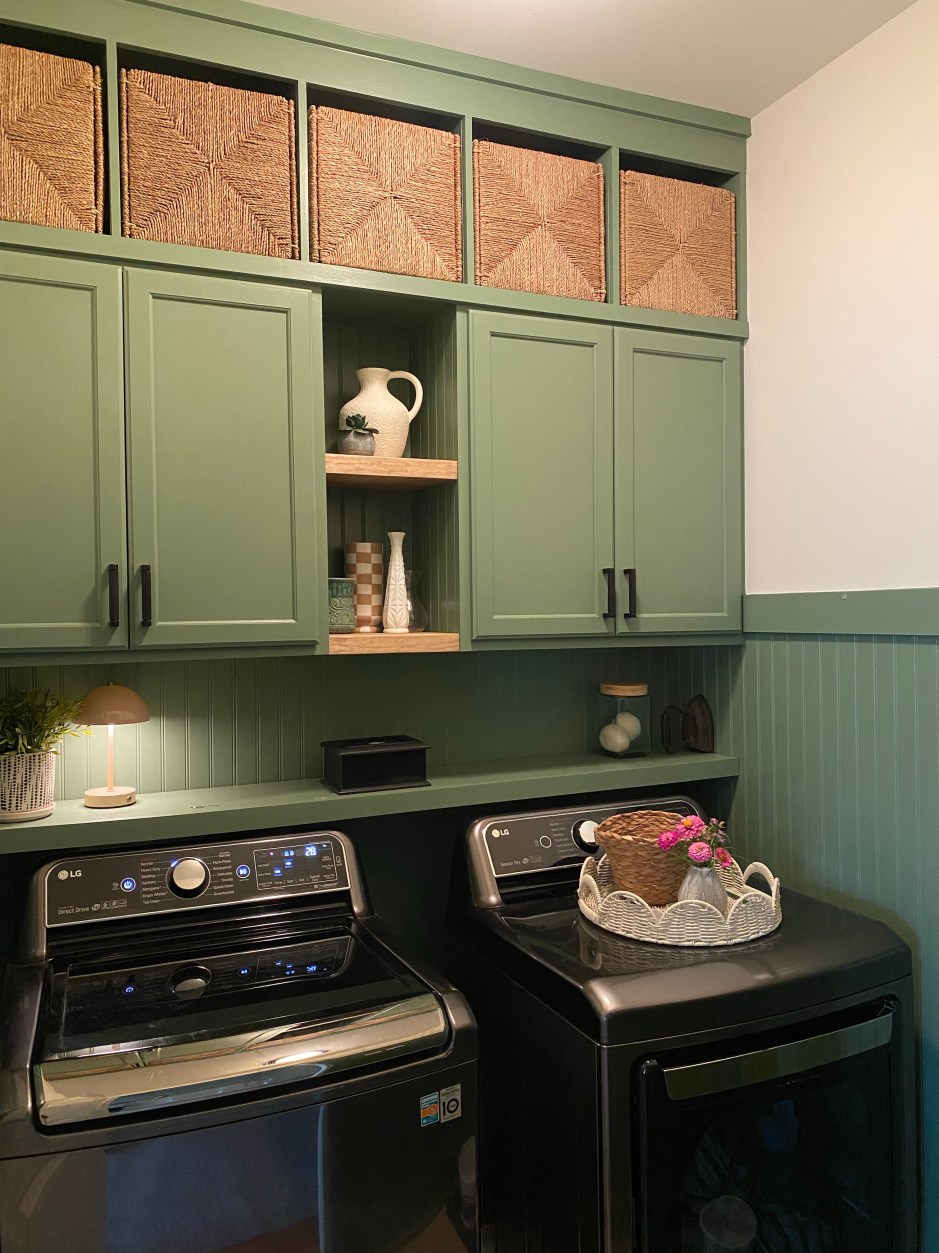
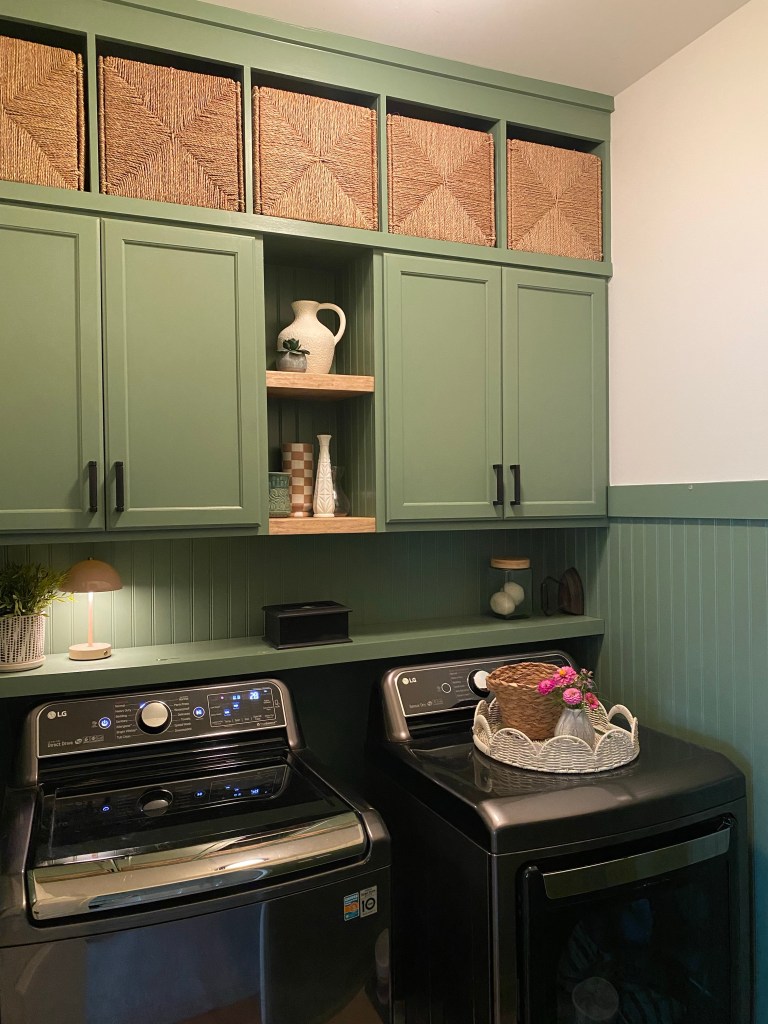
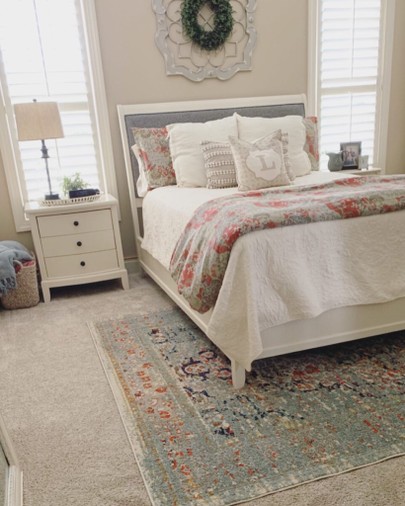
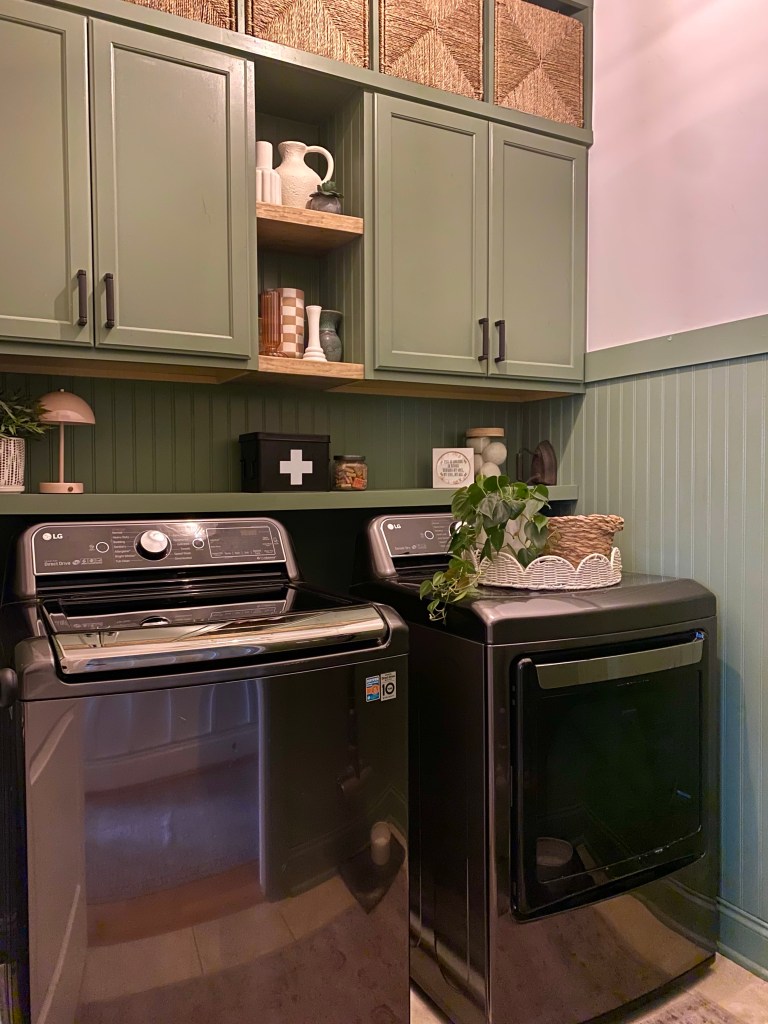
The After: A Space That Makes Me Smile

Now, this little laundry room feels like it belongs in our home. It’s functional, organized, and—dare I say—pretty!

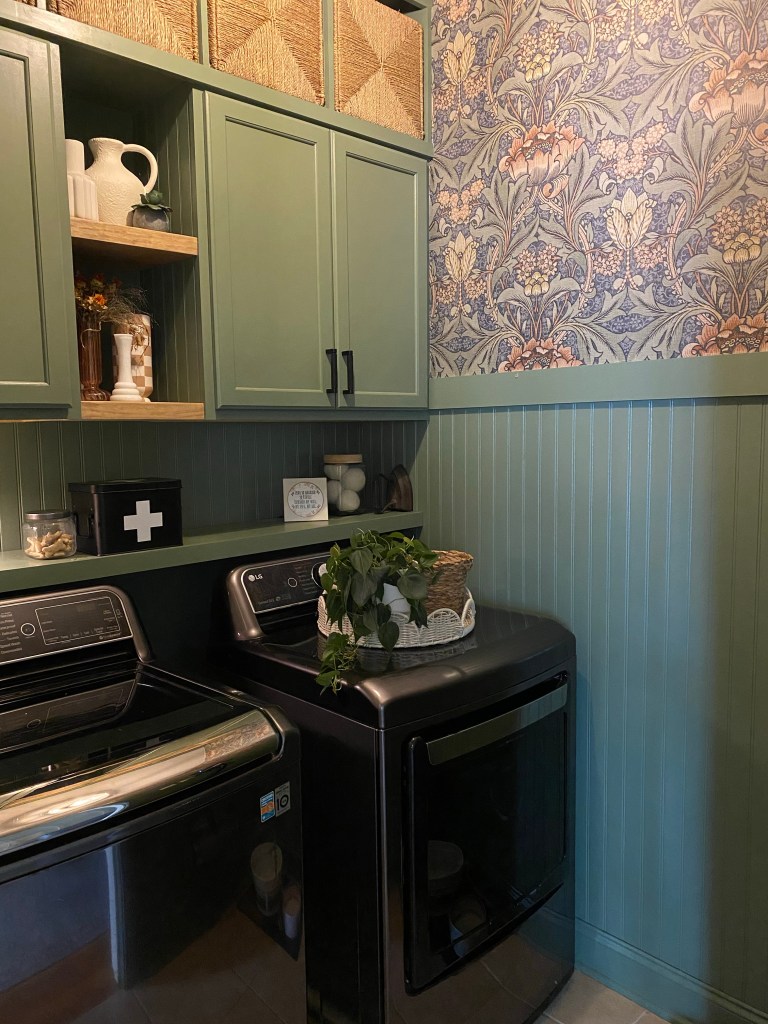
What used to be a space I tried to hide is now one I’m proud to show off. Proof that even the smallest, most utilitarian spaces deserve a little love (and sometimes, a bold wallpaper moment).

What I Learned (and Would Totally Do Again):

• Don’t underestimate what a few stock cabinets and some custom touches can do.

• If you’ve never wallpapered before, don’t be scared! Spray adhesive was key with peel and stick wallpaper.

• Letting a space evolve over time can help you land on the right final vision.

• Small spaces deserve design, too!

Before & After Photos

If you’re sitting on a half-finished space and waiting for the “right time” to complete it—consider this your sign. The little details (like wallpaper) might be just what it needs.

Have questions about how we did something? Drop them in the comments—I’m happy to share more!

Laundry Room Refresh

House projects are funny. You make a list of things you want to do, both big and small and either check them off little by little or stare at the same list for years. We’ve been in our home for 8+ years and have really only scratched the surface on projects we want to tackle and yet at the same time, we have done so much.

This particular project recently became a priority as I have found I need to hide the clutter and for everything to have a designated space. The clutter started to feel heavy in my mind and that was something I needed to offload.

Our laundry room always has the door open as our dog’s food and water bowls are in this space. Additionally, it had open shelving so it always looked messy.

The hallway where the laundry room is has also become the point of entry we use most. Guests often come in this door instead of the front door as well. While we can’t change the footprint of this area, I could control the appearance and functionality of this space.

Control the controllables.

Before: (YIKES)

Do you understand why I needed to clear this clutter by physically and mentally?

I knew I wanted cabinets with doors for storage and open cubbies to fit baskets above them.

My plan:

  • Buy unfinished stock cabinets that fit in the space
  • Prime and paint cabinets
  • Add hardware
  • Build cubbies to fit above then paint to match
  • Add trim at the ceiling
  • New light fixture
  • Add beadboard on the walls and eventually add a fun wallpaper

But first, demo and prep the walls for all the mentioned items above.

I kept the shelving boards to repurpose in one of the boy’s closets. I’ll share more on this in another post soon.

The sheetrock was damaged in areas but knowing cabinetry and wall treatments would hide the majority of it, I focused my attention on the remaining walls.

We decided to go with a dark green paint that we had on hand from a previous project, Dried Thyme.

One thing I’d like to note when you’re selecting paint colors and are tackling a project little by little, remember the big picture of the finished space. Think ahead to the final details you want, the flooring you will eventually add, ect. In this instance, I knew we had future plans to change out the flooring to a 12″ black hex tile.

I first painted the walls green, Dried Thyme, to the height I wanted to add beadboard and trim cap. For visual confirmation on the height I wanted for the trim, I painted a horizontal line of the green paint and measured to make sure that height worked well with the height we would be hanging the cabinets.

It was time to buy the cabinets. I recommend you search online before you visit the hardware store. I have found that not all stores carry the same products and in our case, the closest Home Depot doesn’t stock prefab cabinetry but the next town over does.

Prepping the cabinets is important.

Basic process included:

  • Remove all staples from packaging
  • Remove doors
  • Lightly sand the rough areas with 220 grit paper
  • Remove residue with tack clothe
  • Prime, prime, prime – Important if you don’t want to paint multiple coats of the main color
  • Allow to dry then paint
  • Allow to dry, lightly sand any rough spots and repeat prep and paint process
  • Allow paint to cure before putting the doors back on (I waited a nearly a week to be certain but mainly because life was also happening with 3 kids and my husband traveling with work)

I knew there was no way I was going to hang these cabinets by myself. Could it be done? Yes. Did I want to avoid getting injured or damaging the washer and dryers? 100% yes.

With the help of my husband, we added a temporary bracket for the cabinets to rest on while we anchored them into studs in the wall. This actually proved to be very difficult as the studs were not exactly located at the 4 corners of the cabinets on the walls.

We made it work and added extra screws for safe measure.

Next up, making the cubbies to fit above the cabinets. This is a smaller space and I knew I wanted it to feel larger than it is which I could accomplish by making the cubbies reach the ceiling height.

I measured A LOT and made my next trip back to Home Depot. I had them rip down the 3/4 plywood sheet into the depth of the boxes needed.

Let’s be honest, using a table saw is not something I’m comfortable doing alone and I was tackling this project on another week that my husband was traveling for work.

I loaded up the strips of plywood and beadboard for the remains walls and ventured back home where I would cut them down to length.

I am not going to provide a step by step tutorial of how I built these boxes for multiple reasons:

  1. I had to deconstruct them to install then reassemble them in place
  2. I didn’t add a backer board and instead, caulked the seams and painted the wall to give the illusion they have the backer board.
  3. This unit was made to fit baskets I already had.

I do recommend having your baskets before determining the size cubbies you’re going to make. This will ensure it looks intentional and was made custom for the space.

The walls in this space are not square and caused the issue of us not being able to install the build easily. While the measurements fit the intended space, it didn’t fit in the middle of the room where it needed to start for us to shimmy it into place.

It was a disaster. Our marriage survived the struggle but it was questionable for a moment. (I’m totally kidding but in full transparency, our patience was put to the test.)

After disassembling the majority of the cubby and putting it back up, we anchored it in place and I got to work prepping for paint.

Next up, determining trim for the top of the cubby.

I ended up going with a height that was between the two options pictured above and am very happy with it.

After more caulk and paint, this unit was complete.

While this space is small, it was packed with so many steps to get to the finish line. There was also a long wait time between steps due to busy schedules, waiting for paint to dry, hardware to arrive, and more. I tried to multi-task when possible. When the paint was drying on the cubby boxes, I was outside cutting the beadboard and nailing it in place.

Continuing the beadboard was not part of the original plan. I had been given thin brick tile that I was planning to use as the backspace but with the height of the beadboard, the matching green shelf and cabinets, the best option for this space was to continue with the beadboard. It looks seamless and intentional.

The seam wasn’t an issue as I placed it where there would be one floating shelf.

After the final touchup of paint was done, I was nearing the finish line.

The finishing touch needed was to add floating shelving between the two cabinets.

We took a family outing one weekend to find supplies and ended up having to DIY this to get the look I wanted. We purchased 2 project boards from Lowe’s. I glued and clamped them together while allowing it to cure more than the recommended time.

Next up, cut them down to size to fit. I then filled the seam with a mixture of sawdust and wood glue in an attempt to make this thicker board appear to be one. Unfortunately after sanding and staining them, it was visible which you can see from the first picture above.

My backup plan was to add edge banding and stain it to match. This worked out perfectly!

If you’re in a season of feeling like you’re not making much progress on you home project list, let this be a note of encouragement for you to take a moment to look back at what you have accomplished. You may find you’ve come further along than you realize and are well on your way to creating your Haven and a home that works for you and your family.

If you want to see the behind the scene failures and successes, please follow along on Instagram @4havenssake.

Fall & Christmas DIY Reversible Sign

Fellow crafters I have a fun project for you. Share the idea with your friends and coordinate a time to host a “make and take” sign event like I did.

Fellow crafters I have a fun project for you. Share the idea with your friends and coordinate a time to host a “make and take” sign event like I did.

When I saw Ella Clair’s Fall sign on Pinterest, I was inspired to make it and take it a step further by having the reverse side of the sign a Christmas design. I’m all for multi-purpose home decor and the possibility of not having to store away 2 holiday signs was ideal.

Ella Clair’s design was more rectangular. I modified the design to accommodate this 2×2 plywood sheet and created a Christmas design in word for the reverse side.

You could also have a year round design on the reverse side in lieu of 2 holiday themes.

The first phase of this sign party started with good friends/neighbors on our street. We had the BEST time stenciling and hand painting our signs one cool evening in my neighbors garage. Collectively we had all of the supplies needed to paint the signs apart from the 2×2 plywood boards.

Here is what you need:

2×2 1/2 inch untreated plywood (You can get this exact size from Home Depot for around $6

Craft paint – Colors of your choosing. I had red & orange on hand so we just mixed the two with a smidge of black to make the perfect shade of rust.

Base paint – use any white paint you have on hand. We used White Dove by Sherwin Williams

Gray/Brown Paint – Used for the border, lettering and the arrow – Gargoyle by Sherwin Williams

Pencil

Printer

Painters Tape

Craft paint brushes

STEPS:

  1. Paint the board using any white paint you have on hand
  2. Once dry, use the painters tape to frame out a border on your board. I left approximately 1/2 inch from the edges.
  3. Paint the border, including the edges on the sides and allow to dry
  4. While paint is drying, print the fall design provided by Ella Claire, found here. Please respect her request that this is to only be used for personal use. If you visit her original blog post, she gives tips on how to add this template to a document as an image, then stretching it to the size needed. (I added the template to Excel as I found it easiest to stretch to the needed 2×2 size, much larger than her original)
  5. Download the Christmas design here
  6. Tape the pages together so the design lines up connecting the letters. You may have to trim some of the paper to prevent overlap.
  7. Shade the backside of the design with a pencil as you will then place the shaded side down on your white background a trace the outline of the design.
  8. Once you trace the outline of the design, remove the template and you will be left with the pencil outline to fill in with paint.
  9. Begin painting the lettering. Don’t worry about any mistakes and uneven lines. You will distress your sign as the last step and can hide areas to make appear distressed and intentional.
  10. Once your first side is complete, you will repeat the backside with the second seasonal design.
  11. Distress both sides as much or as little as you’d like using an electric sander and 220 grit paper.
  12. You may add a Polycrylic top coat if you think it will be outside and exposed to the weather elements. I didn’t complete this step as our sign is under a covered front porch. Paints are also permanent finishes once cured.

Happy painting friends!

Board & Batten Accent Wall

For $40 in material, you can update any room with a simple accent wall.

The motivation behind our master bedroom refresh was my vision to lighten up the space completely. Some of my favorite rooms have been spaces we stayed at on vacations. The retreat-like ambiance always relaxes us the most so having that in our room where we sleep every night & wake up every morning became my goal.

First, I started by refinishing our dark, black furniture with this chalk paint recipe and by updating the black leather headboard insert with a beautiful gray twill fabric.

You can watch my step by step for recovering the headboard insert in highlights here.

Refinishing the furniture alone was a major update to the room. We’ve never been a big fan of the tan walls, partly because our first home had so much of that color before we made the change over to agreeable gray.

The accent wall was going to be behind our bed, on the main wall. This wall also happens to be the only one in the room with windows. A couple of years ago, we updated the windows with plantation shutters which we absolutely LOVE but something about them looked unfinished on that wall. I wanted the shutters and new accent wall to blend and look like one big statement.

Adding floor to ceiling board & batten and painting it the same color as the shutters and trim became the vision for the space.

We agreed on using 1×2 primed MDF.

The first thing I had to do was add trim to the crown and baseboard on this wall that allowed for the MDF to bump up flush to the edge.

I used this product, cove moulding, from Home Depot.

Once it was painted to match the existing trim, it made the crown and baseboard look like a chunkier piece of trim.

See the before and after:

Notice how the after picture shows the MDF boards are flush to the added cove moulding?

After measuring the length of the wall, we determined an approximate number of 1×2 boards needed, 10 (4 of which were not full length due to the two windows) and approximately 15.5-16 inches apart.

The spacing had to be adjusted slightly because the wall length wasn’t 100% exact on either side of the windows. Thankfully, my mom was at the house when I was struggling to make these adjustments. Simple math sounded like the logical solution but then the boards weren’t centered evenly over the windows. Long story short, we finally worked out the spacing solution, adjusted when needed and overall, you don’t notice there are any differences in spacing between any of the MDF strips.

The BEST part about this project was getting to use my father-in-laws nail gun.

It’s not just any nail gun. It’s cordless, doesn’t require an air compressor and uses CO2 cartridges. (I’m going to need one for myself.) Most air compressors are loud so it was nice using this nail gun as I was DIYing this project during toddler naptime. The nail gun was fairly quiet, quiet enough to not wake said sleeping toddler.

If you’re in the market for a finish nailer. I encourage you consider this one as an option and compare as you won’t also have to buy an air compressor.

Simple Steps for adding board & batten when you have existing crown and baseboards that you don’t want to remove.

  1. Add cove moulding with a finish nailer to the length of the existing crown and baseboards.
  2. Caulk seams, putty nail holes with wood putty, let it dry then sand lightly with 220 grit block
  3. Now you can paint this newly updated trim and the wall the intended color of your accent wall. (I recommend doing this before adding the board & batten strips as it will make painting easier when they are added.)
  4. Add the first board and batten strip flush to the edge of the wall. Don’t worry about any gaps that may exist due to wall inconsistencies, you will be caulking this prior to painting once the strips are up.
  5. Measure out spacing for each strip of your board and batten.
  6. Add liquid nails to the back of the strips, then nail to the wall using your finish nailer. Liquid nails are recommended as you likely won’t be adding each strip where the studs are located.
  7. After adding each board, fill holes with wood putty, caulk all seams at the added boards and wall (you want to do this to fill any gaps that may exist), wait to dry, sand puttied holes then vacuum up all debris.
  8. Now you’re ready for paint! If you painted the wall the accent color prior to adding the B&B strips, you’ll just have to paint the seams and newly added trim.

In full transparency, it’s been a lot of work updating this room soley because of my project to repaint ALL of our bedroom furniture. It’s an easy process, just time consuming due to the coats of paint and polycrylic finish.

In the end, all of the labor is worth it. You eventually forget about how much it hurts during the process, then you do it all over again for the next project.

I want to hear if you are planning to add an accent wall. Share in comments if you’re adding a pattern or keeping it classic with a floor to ceiling board and batten addition.