
Shopping for my husband & other men in my life (my dad, father-in-law, etc) has never been easy. They always seem to have it all because they typically buy when they need/want something leaving the gift-giving task more of a challenge.
I’ve put together some of my husband’s favorite items that I hope will serve as a starting point for you as you create your shopping lists.
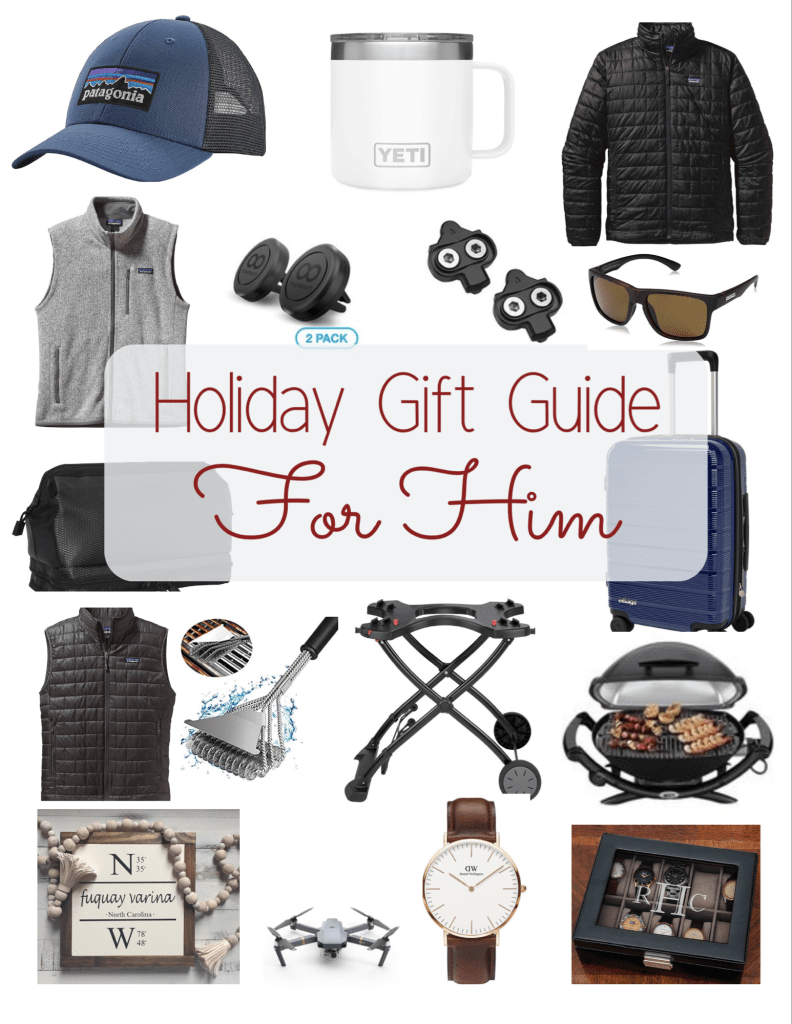
Patagonia Pro Low Trucker Hat – Great to wear casually.
Patagonia Fitz Roy Schoop Hat – Second option to wear casually.
Yeti Rambler Mug – Large handle grip, perfect for on the go coffee.
Patagonia Nano Puff Jacket – The only winter coat your man will need, it’s sure to keep him warm.
Patagonia Better Sweater Vest – Both Stylish and warm, this vest will keep your man warm when you don’t need the full coat. It also layers well under a jacket for extra body warmth.
Patagonia Nano Puff Vest – Because vests are best and keep you warm. They are favorites of ours as NC winters are somewhat mild. Worn solo or layered with a jacket.
Magnetic Car Mount for Phone – Great stocking stuffer. Provides safety and keeps the phone accessible while driving.
Pearl Izumi Men’s Cycling Shoes – For the avid (or beginner) cyclist, both indoor spin and road cycling.
- Bike Cleats – Needed with Cycling Shoes. Favorite cleat options of ours that make snapping in and out of pedals easy but a tight enough clip in that you won’t pop out without trying.
Suncloud Polorized Optic – (a Smith’s sunglass owned company and a fraction of the price) They are my husbands go-to with so many style options.
Carry-on Spinner Bag with USB – 4 wheels is the only way for a roller bag. A favorite for that traveling businessman in your life.
- Gatemouth Toiletry Bag – Necessity to keep toiletry items together and easily accessible when traveling.
Weber 1200 Gas Grill – Compact, easy to travel with for tailgating or camping, small enough for a porch, and a great grill for perfect cooking. I personally love it because of the ease to lite it.
- Grill Cover – Get one to go with the grill!
- Grill Rolling Cart – Folds down flat for easy storing with your grill still locked int.
- Bristle Free Grill Brush – No fear of bristles getting into your food with this brush. Cleans the grill better too.
Daniel Wellington Classic St. Mawes Watch – This watch looks great worn casually and with business attire. My husband loves this classic style and the thin face – no issues with the face getting caught on his shirt sleeves.
Personalized Monogram Watch Box – For the watch collector – personalized and a nice accent piece for your loved one to display his beloved watches.
DJI Drone – For the tech lover. My husband has had his for 3 years and loves that he can also navigate the drone via phone & ipad (for larger display screen). Takes wonderful pictures and videos.
Robotics EVO Drone – A second drone option with high reviews as well.
Customizable City Coordinate Sign – Great for the home or office decor.
Stay Humble/Hustle Hard Sign – Perfect office decor and a simple daily reminder.


