Powder Room Refresh

What was once an item listed on our project list, the powder room, it quickly became an active project when my husband walked into the garage and returned inside with a hammer and crowbar. He took to a corner in the bathroom and began an attempt at removing 1/4 round and baseboards. All I needed to get going on this particular project was him taking that first step and saying “let’s start checking off these projects.”

DIYs are fun but now with 3 kids, we have to be strategic in planning when we can tackle projects -between his work travel and kid schedules.

Goals for this project:

  1. Try to be budget friendly, afterall, it is just a powder room
  2. Source a local company to fabricate a new granite countertop for the existing vanity. This granite was going to the dump, and we scooped it up!
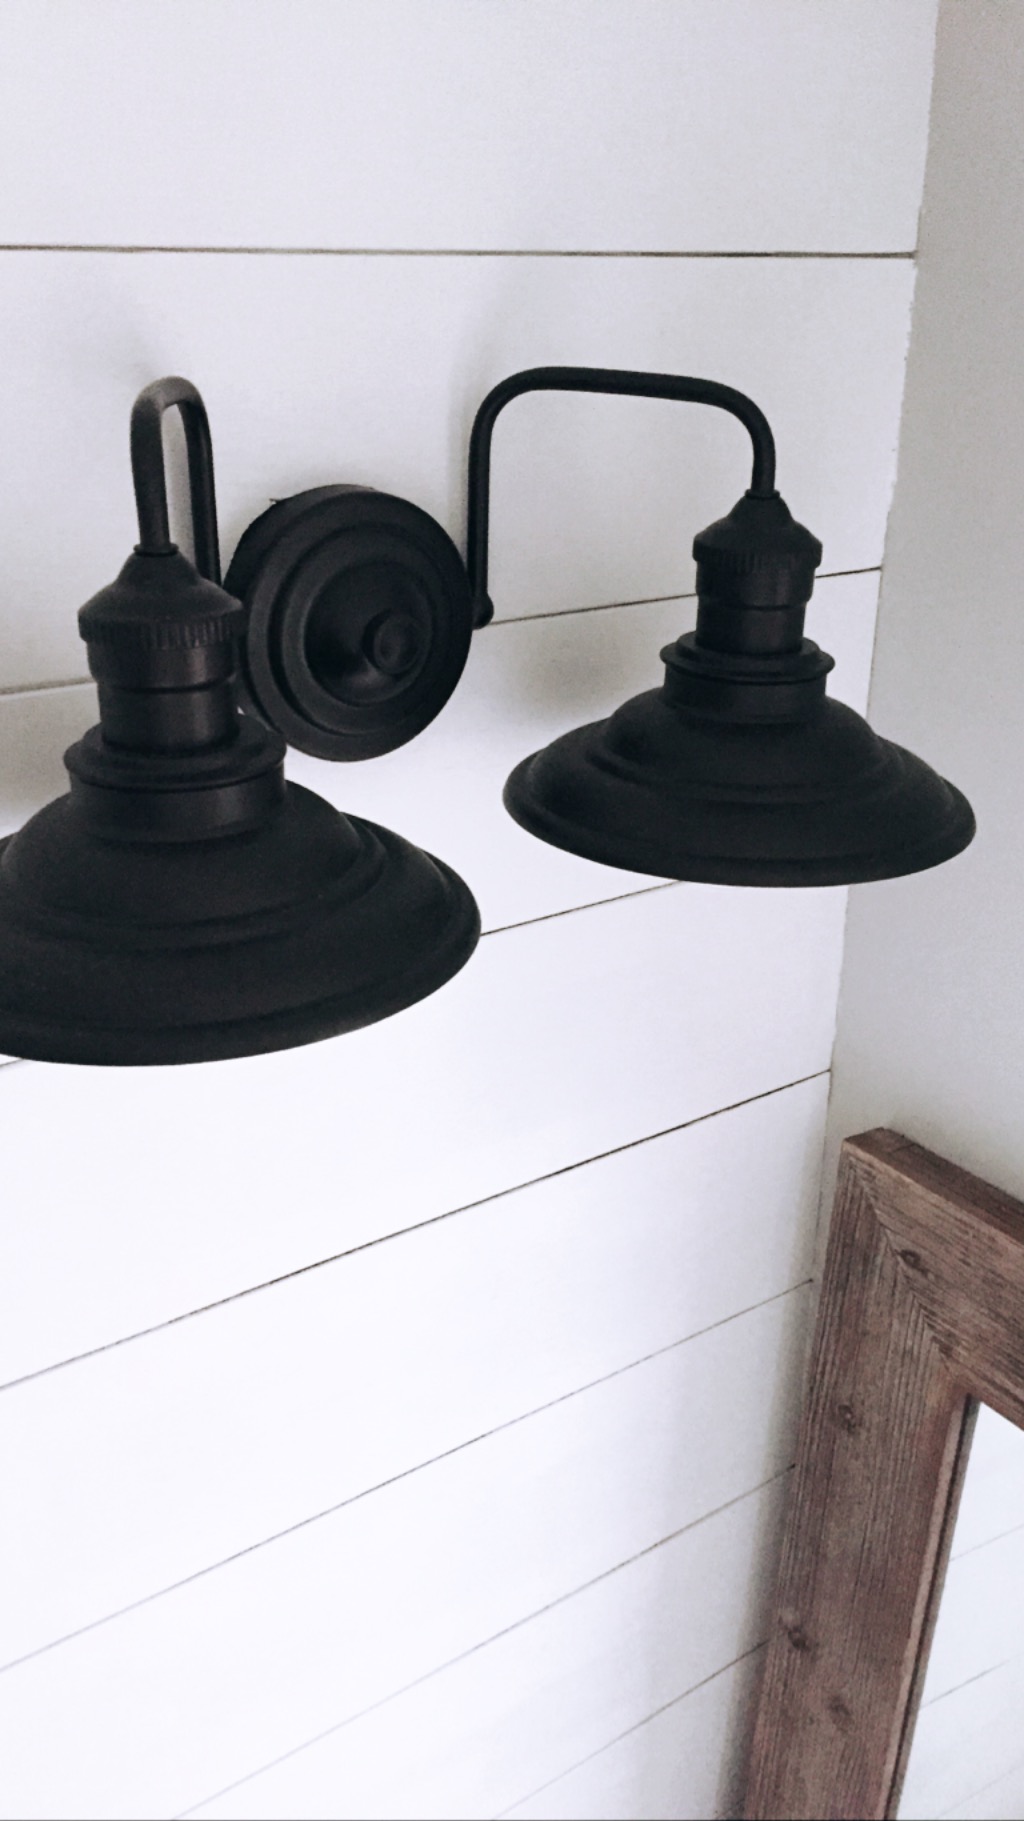
  3. Find new faucet, lighting and accessories
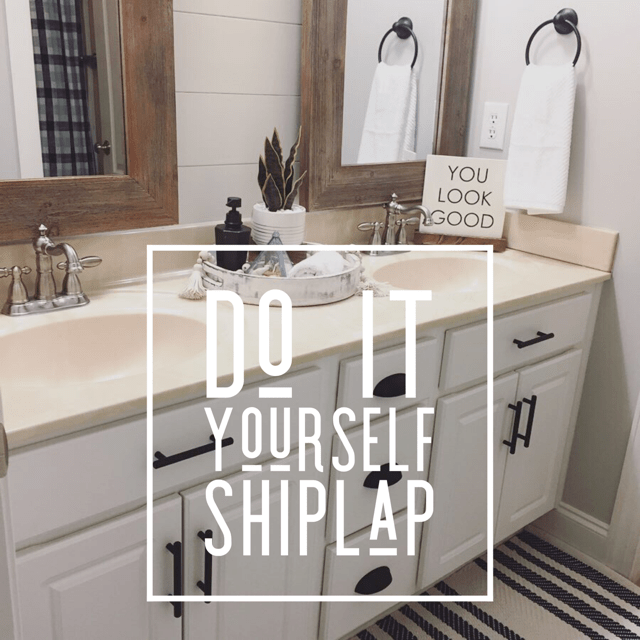
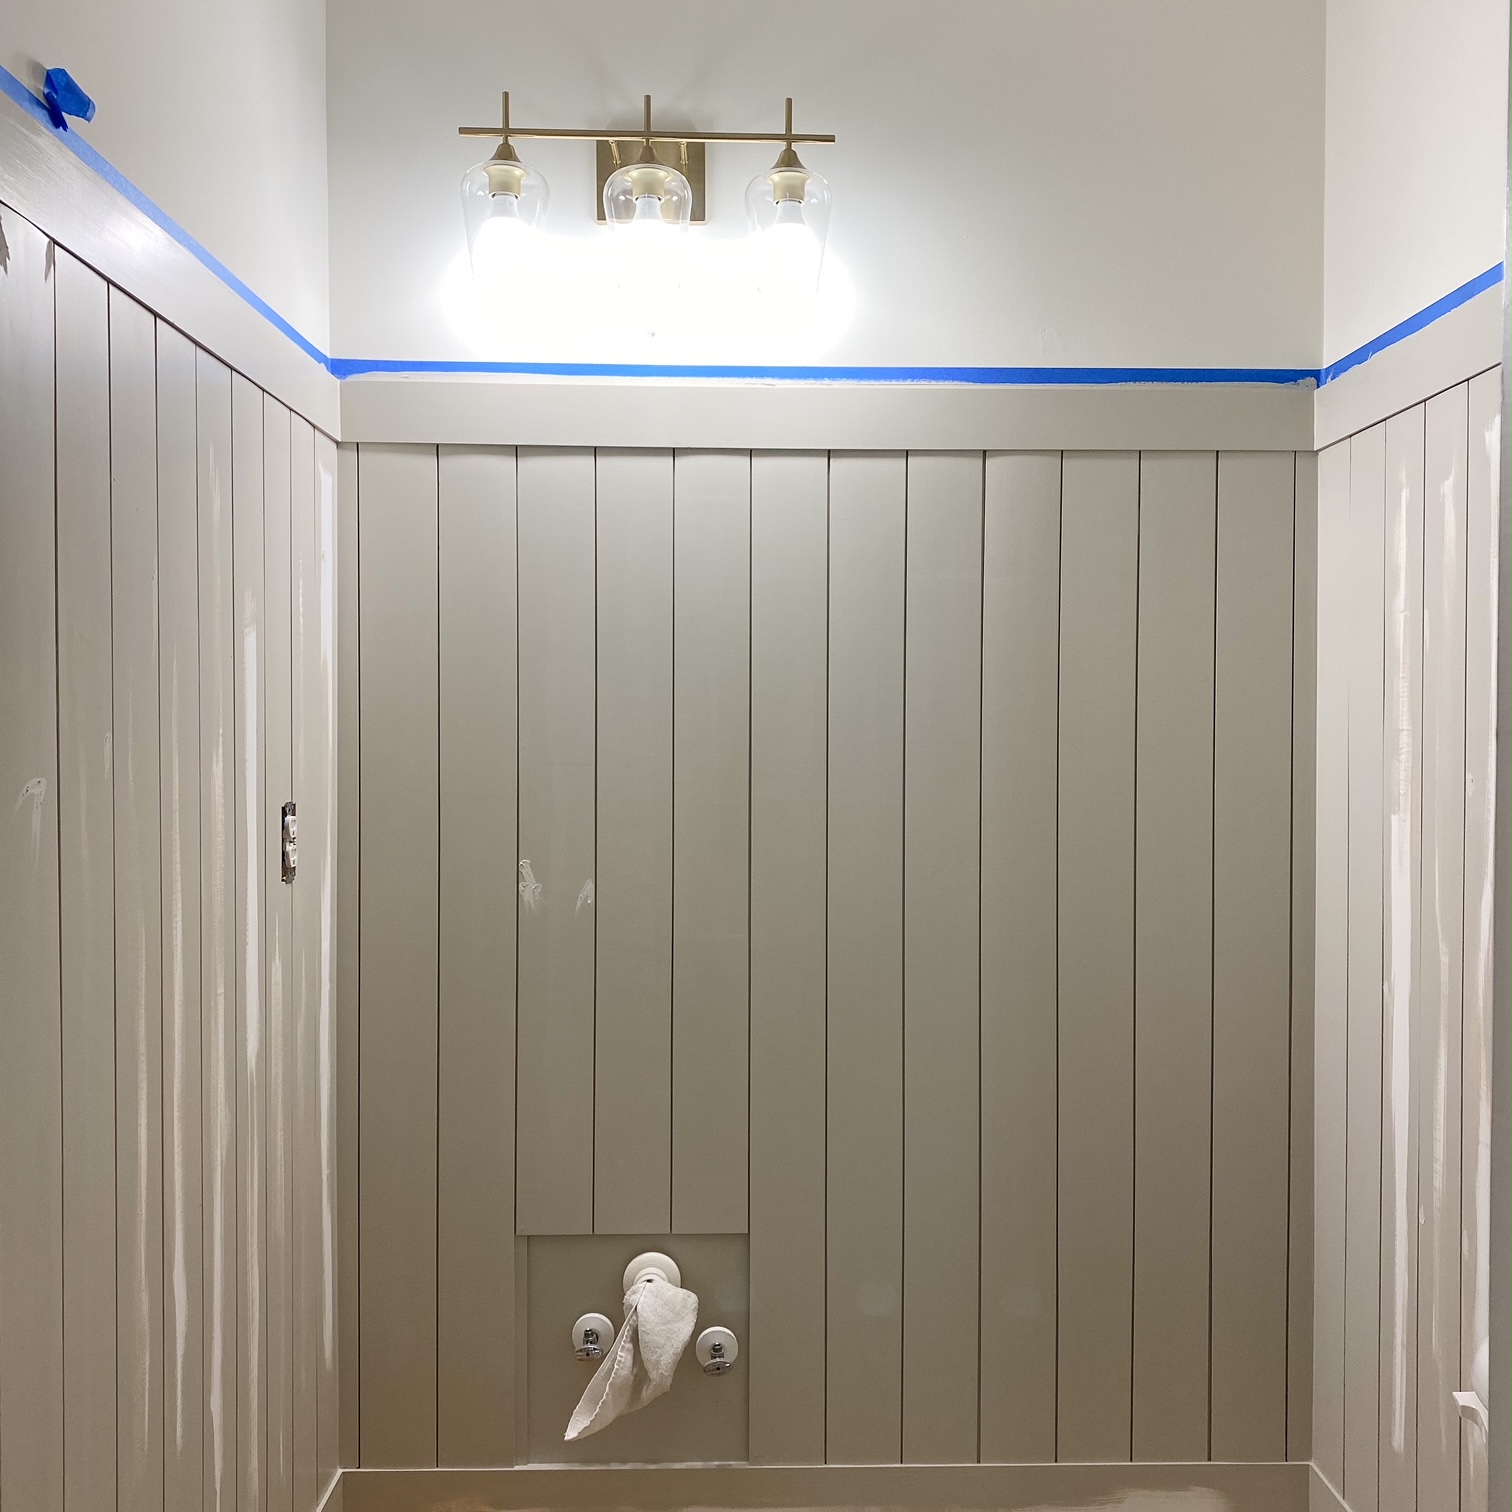
  4. Add vertical shiplap
  5. Fresh coat of paint

Project Mood Board

You can find links to the lights, hardware, and faucet here, Product Links. The final faucet we went with can be found here. We have been very pleased with it. In fact, I installed it apart from connecting the drain to the p trap. I’m thankful for my dad who came over to connect them and teach me how they work.

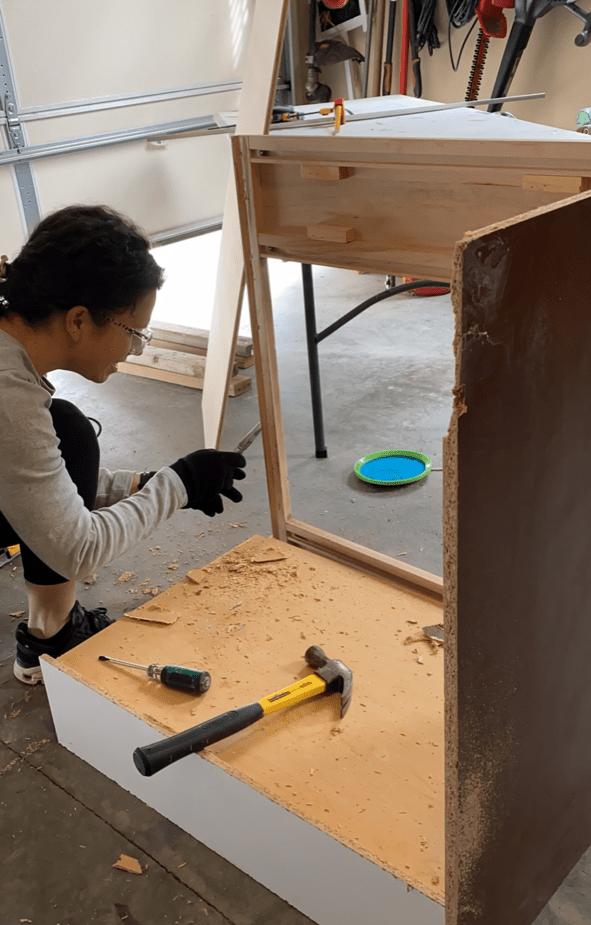
First we demoed by taking out all 1/4 round, baseboards, disconnecting the water supply and removing the vanity.

We ended up having to purchase this set to help in removing the 1/4 round and baseboards. Even still, it proved to be challenging because the installers used 3 inch nails which is excessive in my opinion.

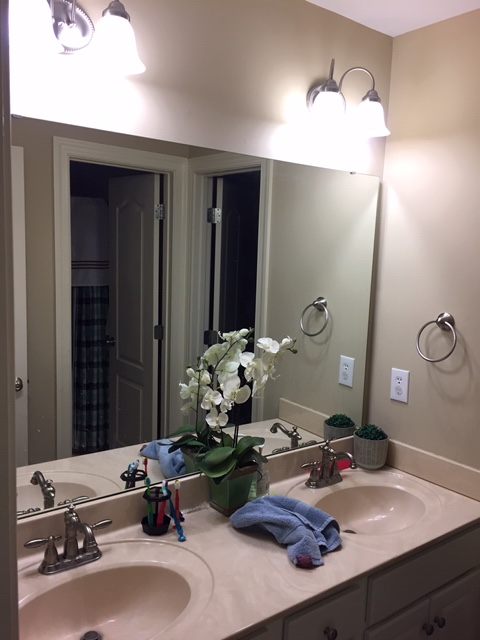
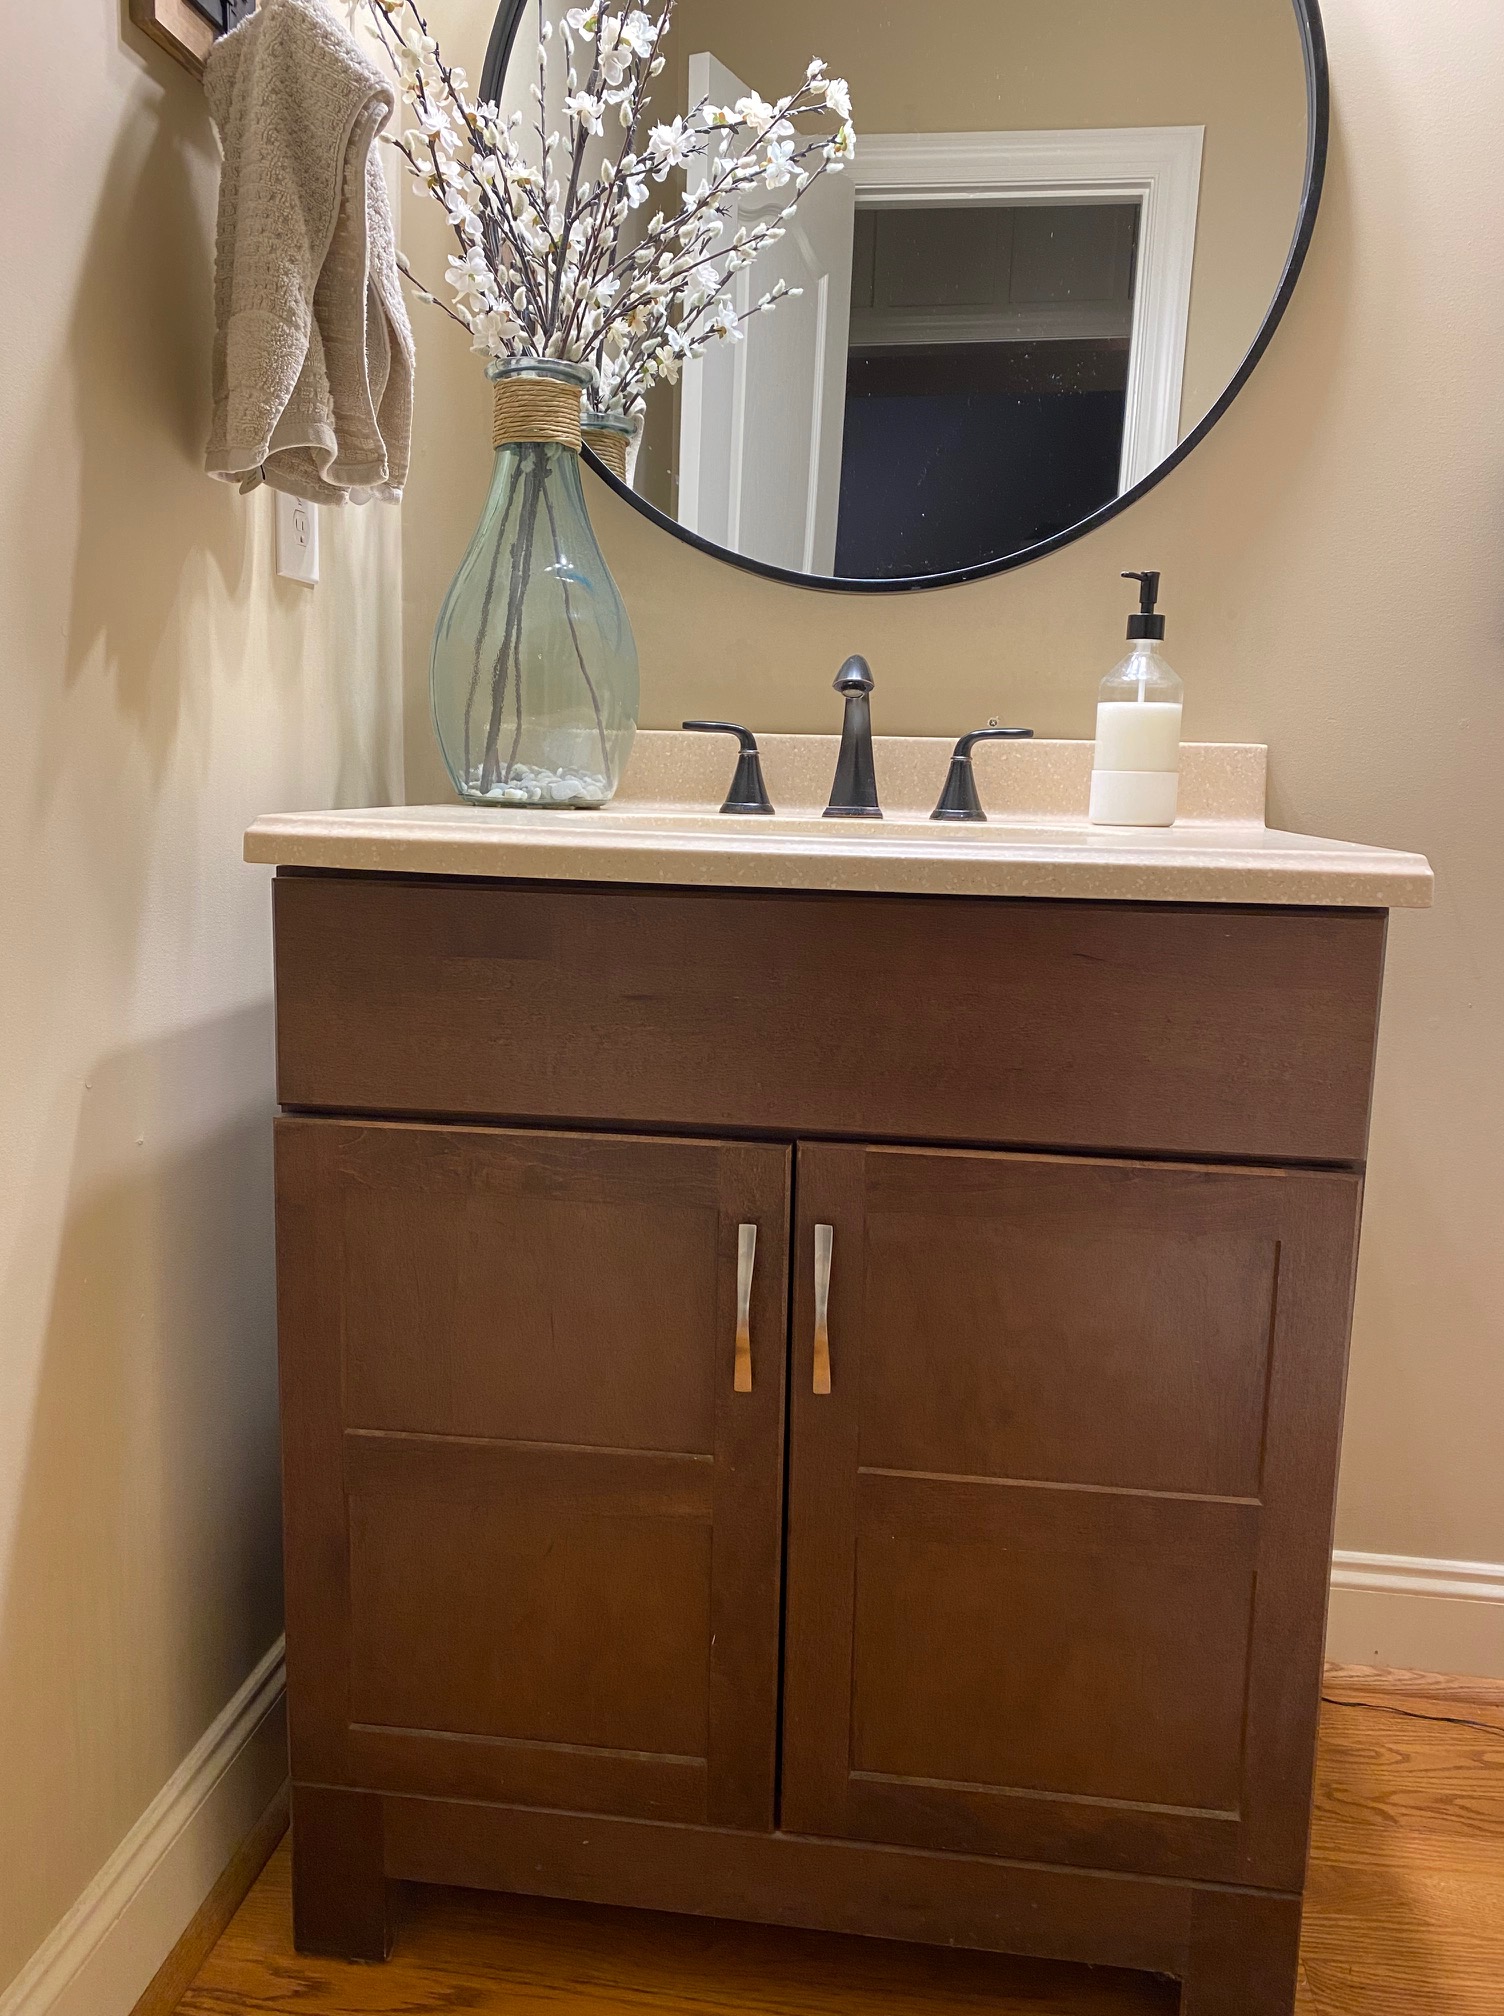
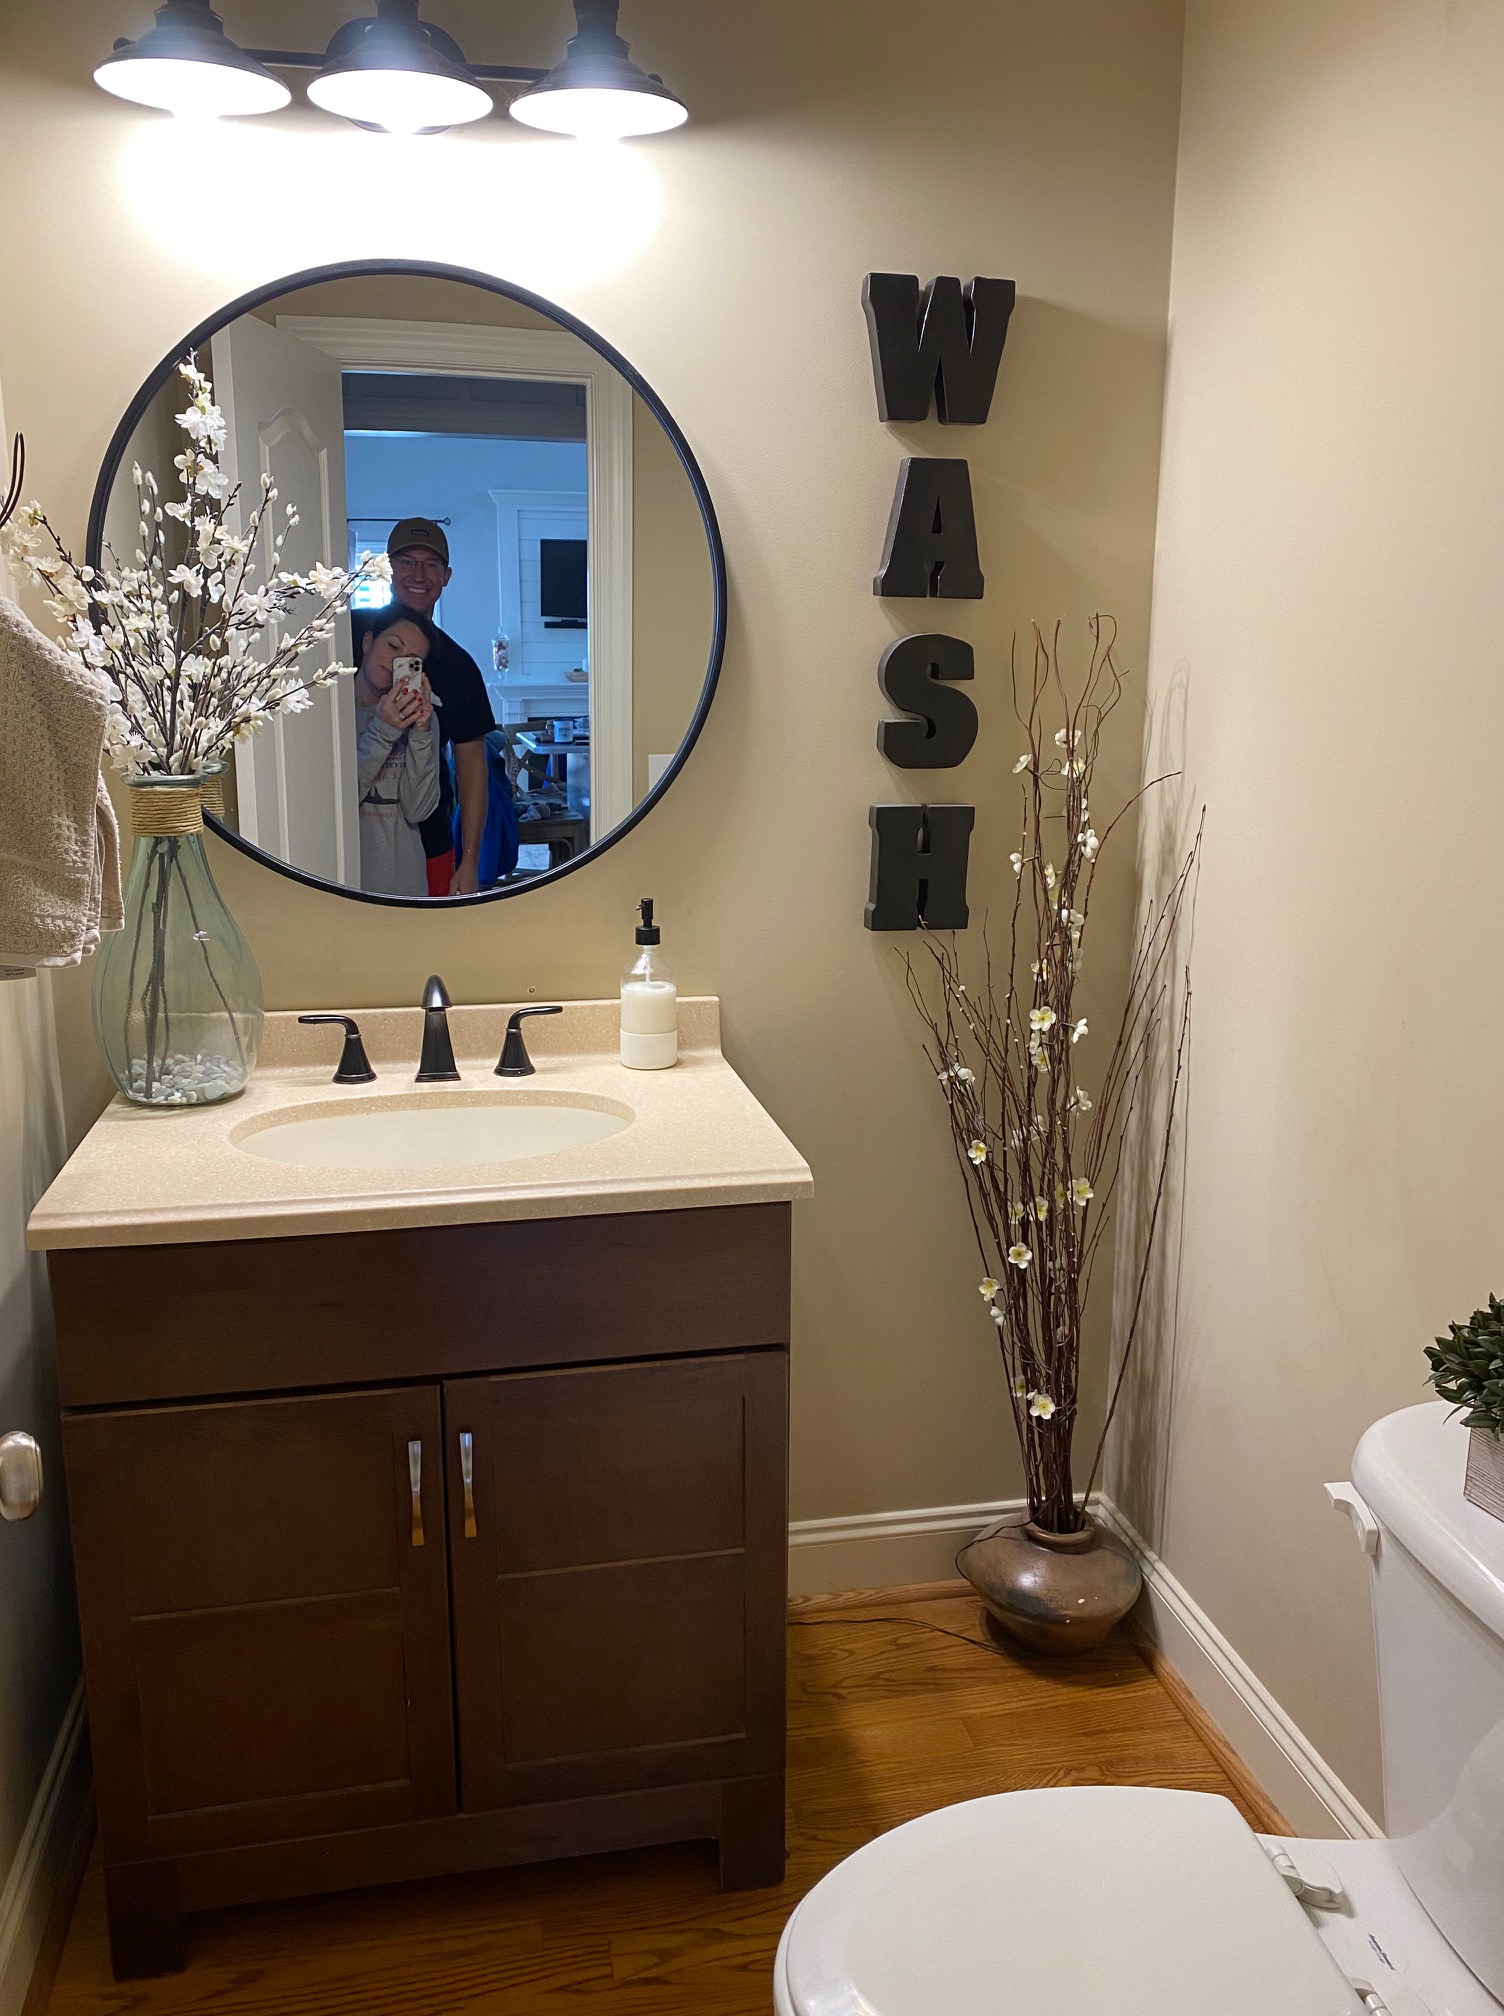
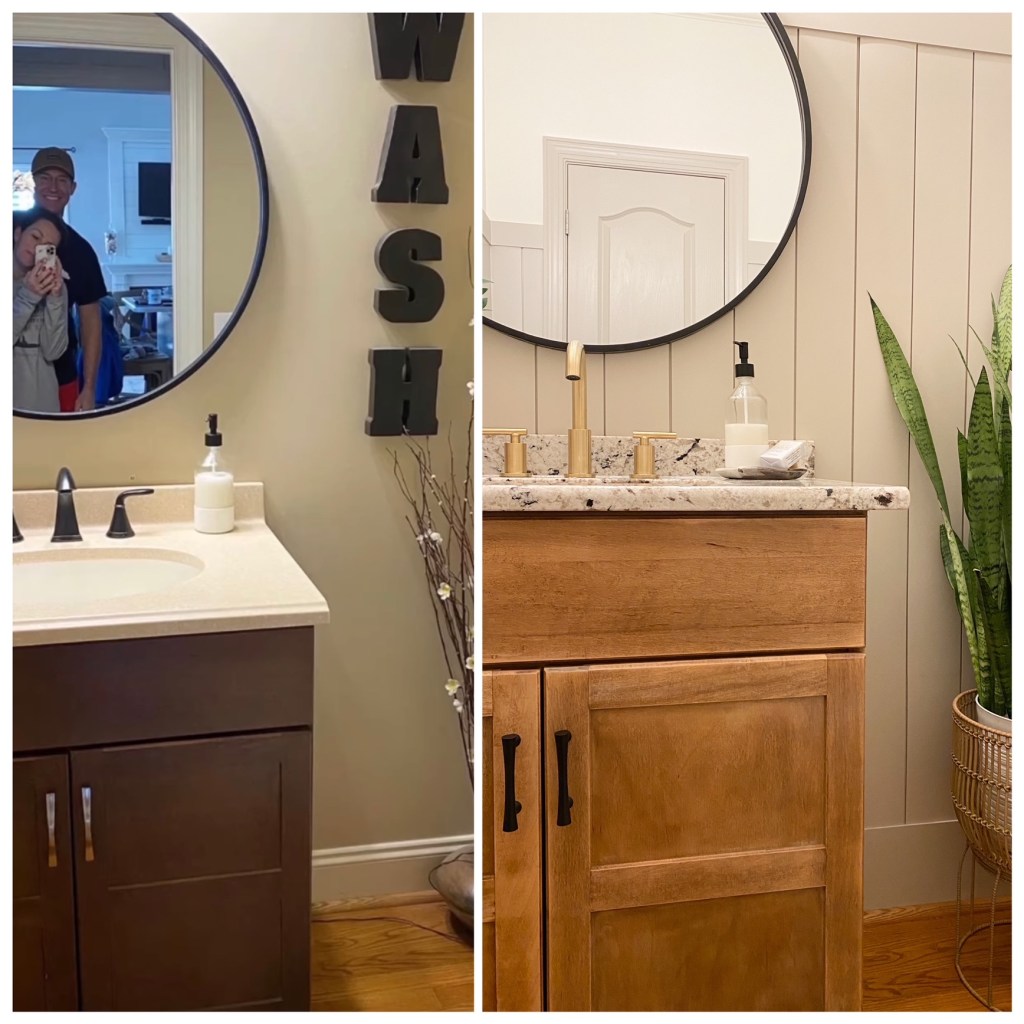
As you can see, the before was just “blah” and didn’t fit our style at all. As for the layout of the bathroom, we would have never designed it this way but we had to work with it.

After the space was cleared out, I painted the top 1/4 section of the walls White Dove and the crown molding, and ceiling. Then we added in new baseboards, 1×8 primed pine as the MDF was limited for us.

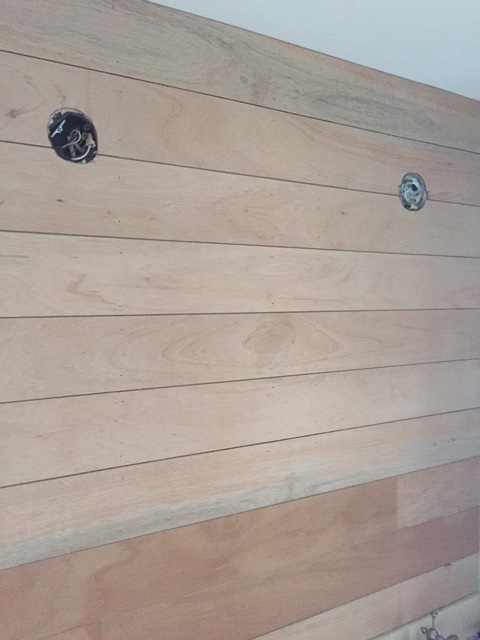
After baseboards and paint, we added a 1×4 piece of trim that was our finishing cap and would act as the point where we measured for each vertical shiplap board.

At this point in the project, I had also switched out the light fixture but had not yet purchased new light bulbs that were a softer lume.

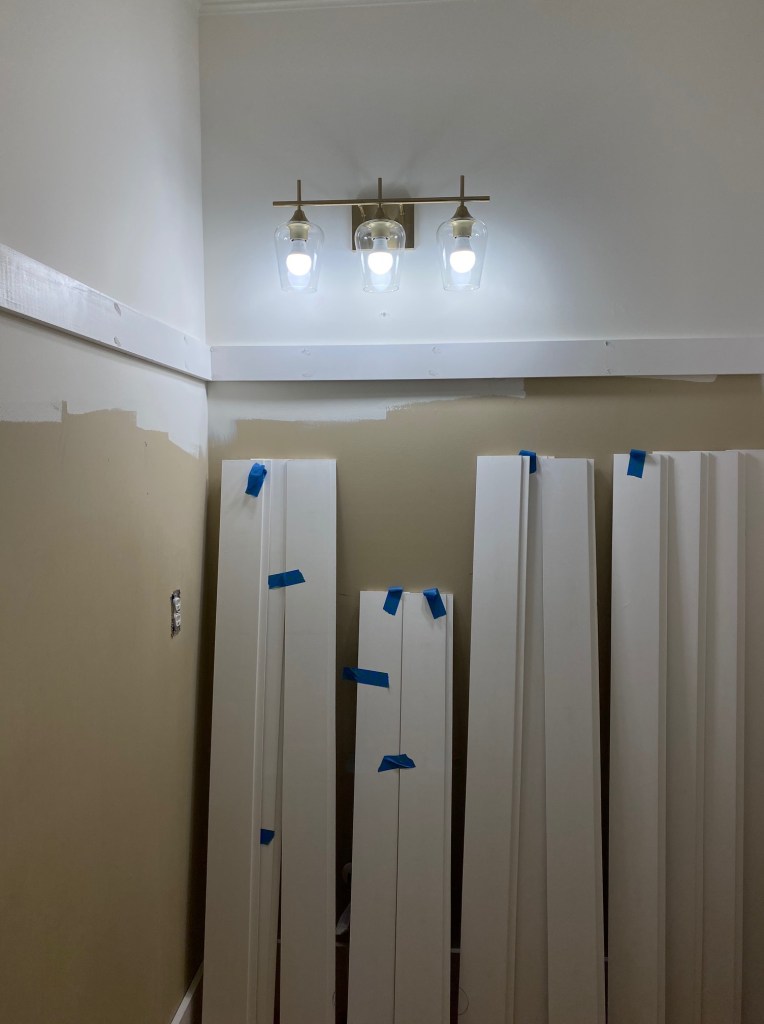
Once we both cut down our shiplap to size for our first wall, I painted the edges of each piece prior to nailing them to the wall. As I did this, my husband marked the studs on the walls.

As paint was drying on the walls, I decided to update the existing vanity and strip the brown stain. I saw this inspirational photo which solidified my decision. Our granite was very similar in coloring.

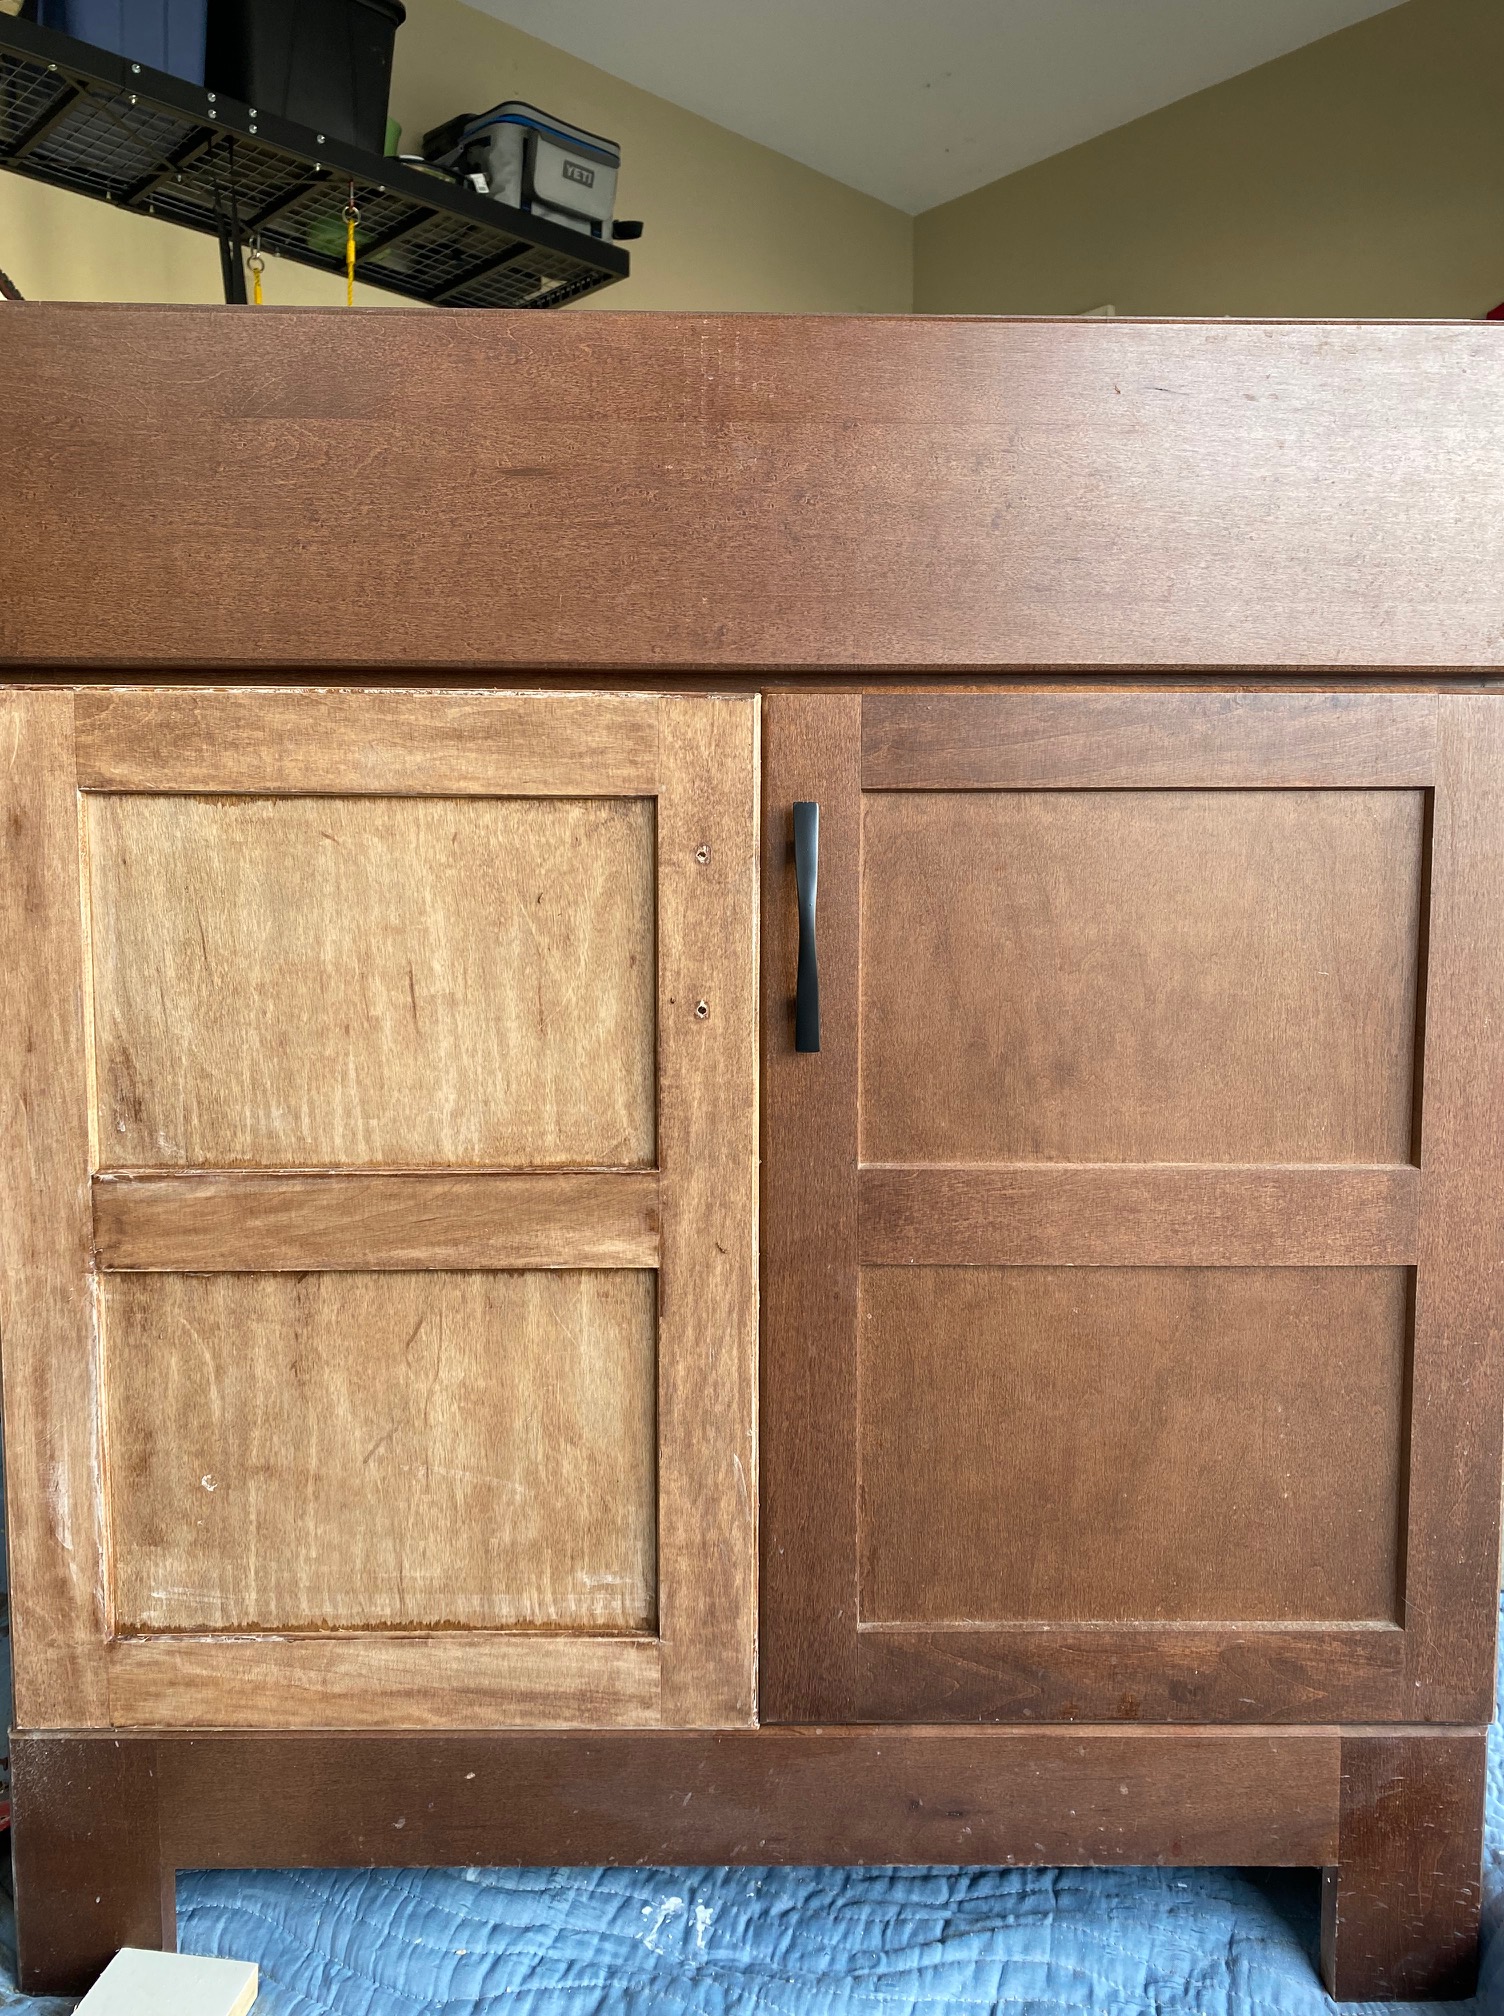
I first tried a couple rounds of oven cleaner as stripper but I didn’t love the results. You can see the beginning process in the left photo. Next, I went the route of Citri Strip and it did much better. I also coated the doors with Citri Strip and wrapped them in plastic wrap to let them sit overnight before scraping off the product and stain. The result revealed a beautiful color that was very similar to what I was hoping for.

With a little grit, I cleaned up the corners to get it to match using steel wool and 220 grit sandpaper.

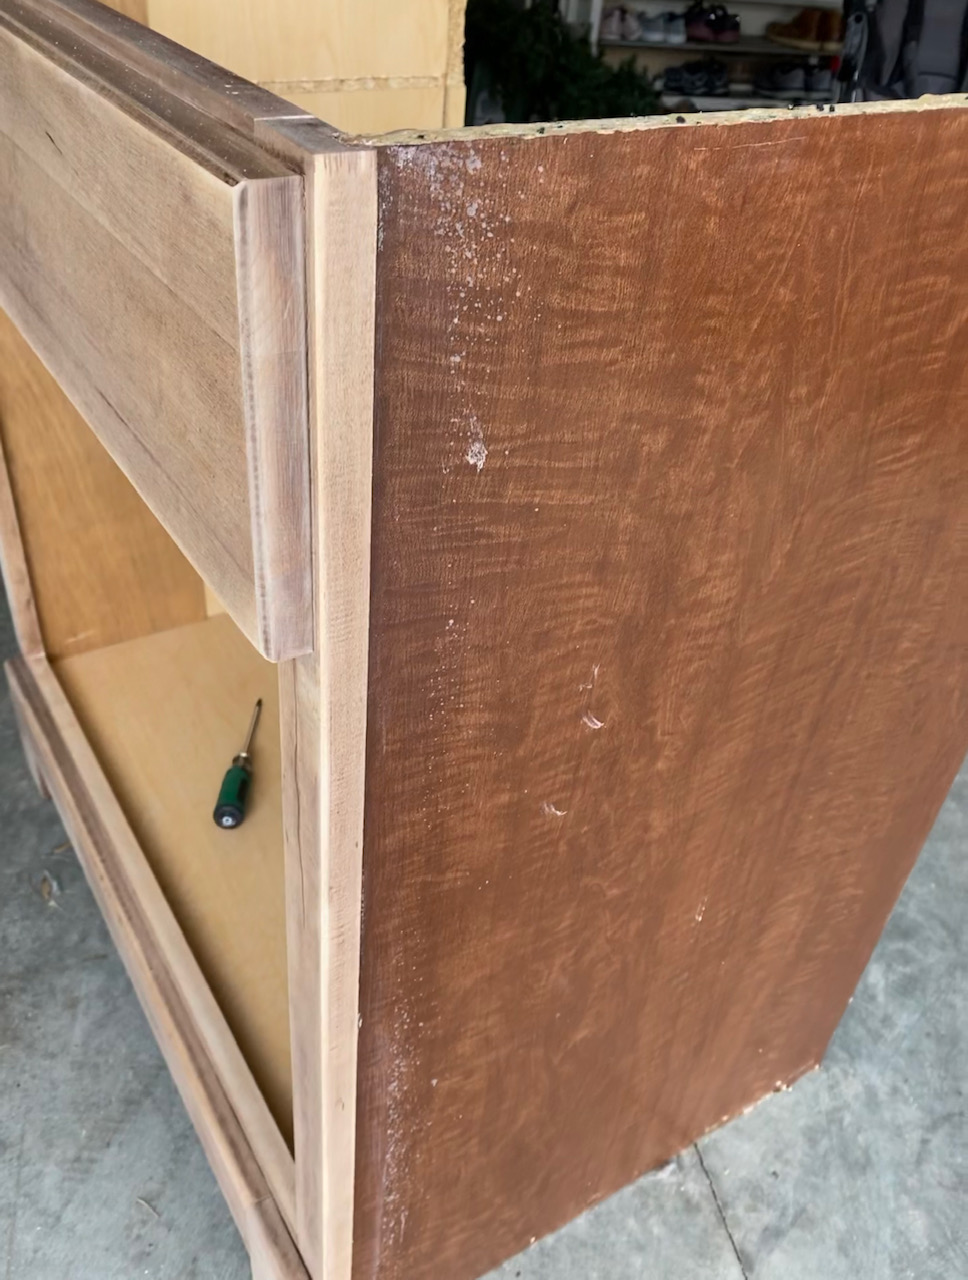
Where this vanity got tricky was the fact that I had to update the side panels. They were not made of real wood but had a veneer finish; therefore, stipping them of stain wasn’t an option. I had to replace the side panels with new 1/2 inch sheets of plywood. We were out of scrap wood that met the size requirements so I purchased 2×4 sheets from Home Depot and cut those down to size. Without using a table saw, I used a guide, clamps and my skill saw to trim it to size. I feel much more comfortable with this tool vs. a table saw.

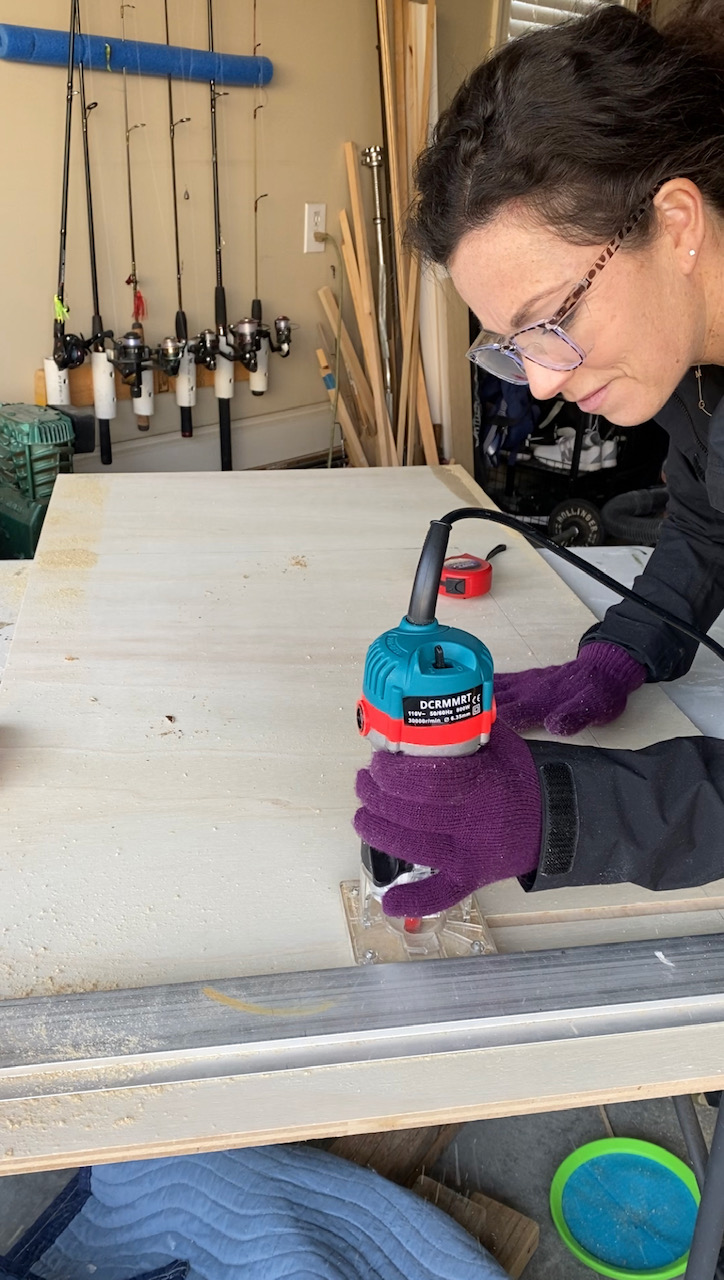
This also allowed me to try out my new router tool to create a ledge for the cabinet shelf to rest in, just as it did on the original side panels. This was such a fun tool to use. I look forward to future projects when we can try out different bits that it came with.

After the new side panels were cut to size and the ledge routed, I had the task of matching the stain to the stripped down vanity color. I did this with a combination of Special Walnut, watered down white paint as a white wash, and Dark Walnut. I ended up doing 2 more additional coats of dark walnut to darken it up more and found the perfect match.

After stain, the side panel was attached with wood glue and 1 inch brad nails. I then finished it off with 1 coats of clear Matte Polycrylic. This is my favorite poly and is easy to work with. Tip: Between coats, you have to use 220 grit sandpaper to get the smoothest finish.

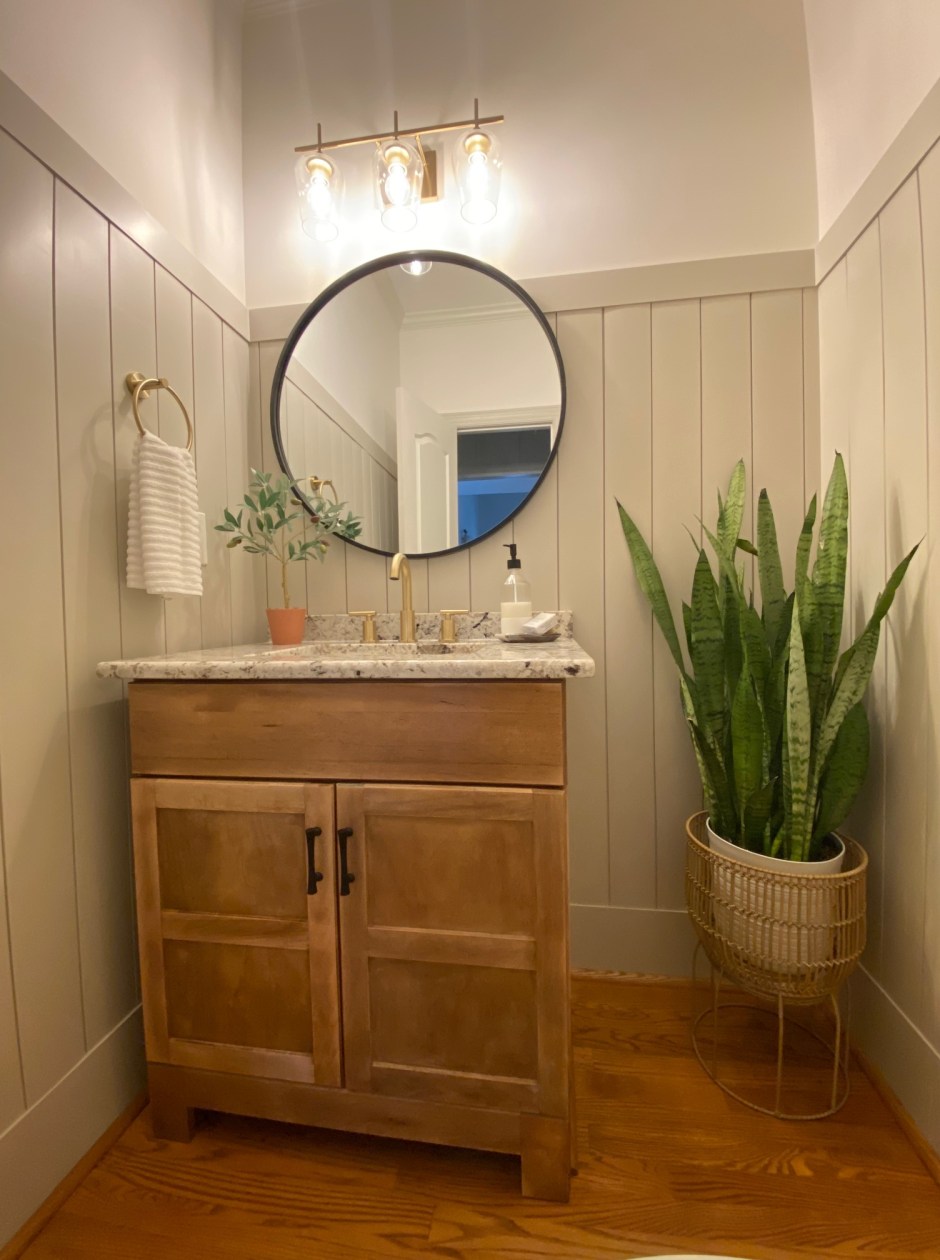
Check out the progression of adding the vanity back into the space, the counters, doors, faucet and new handle pulls.

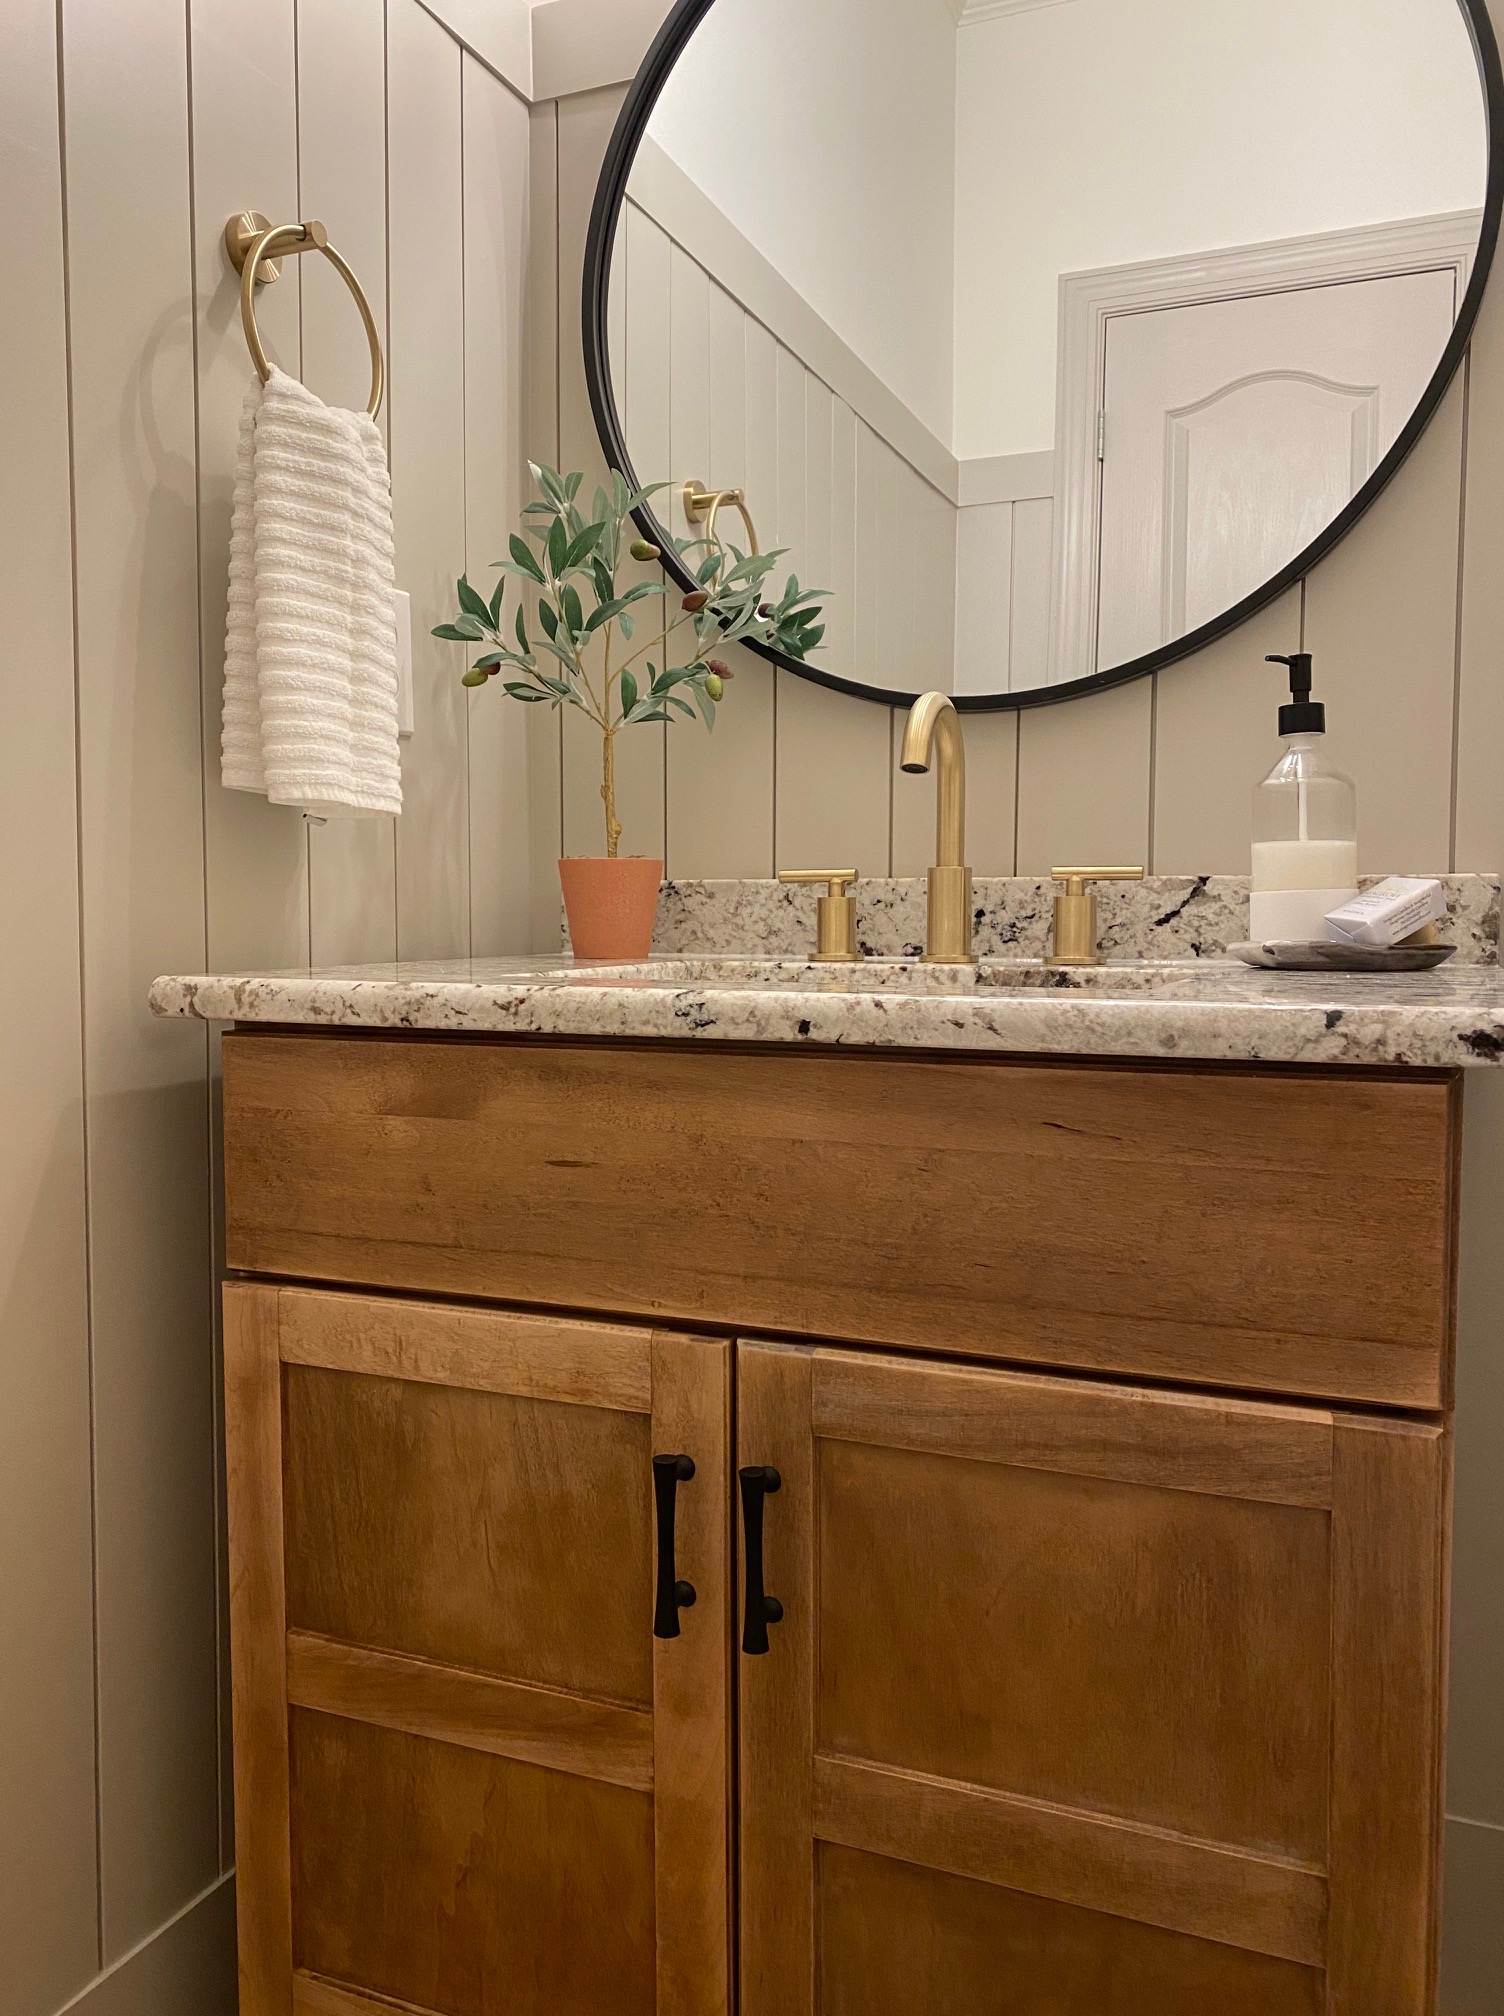
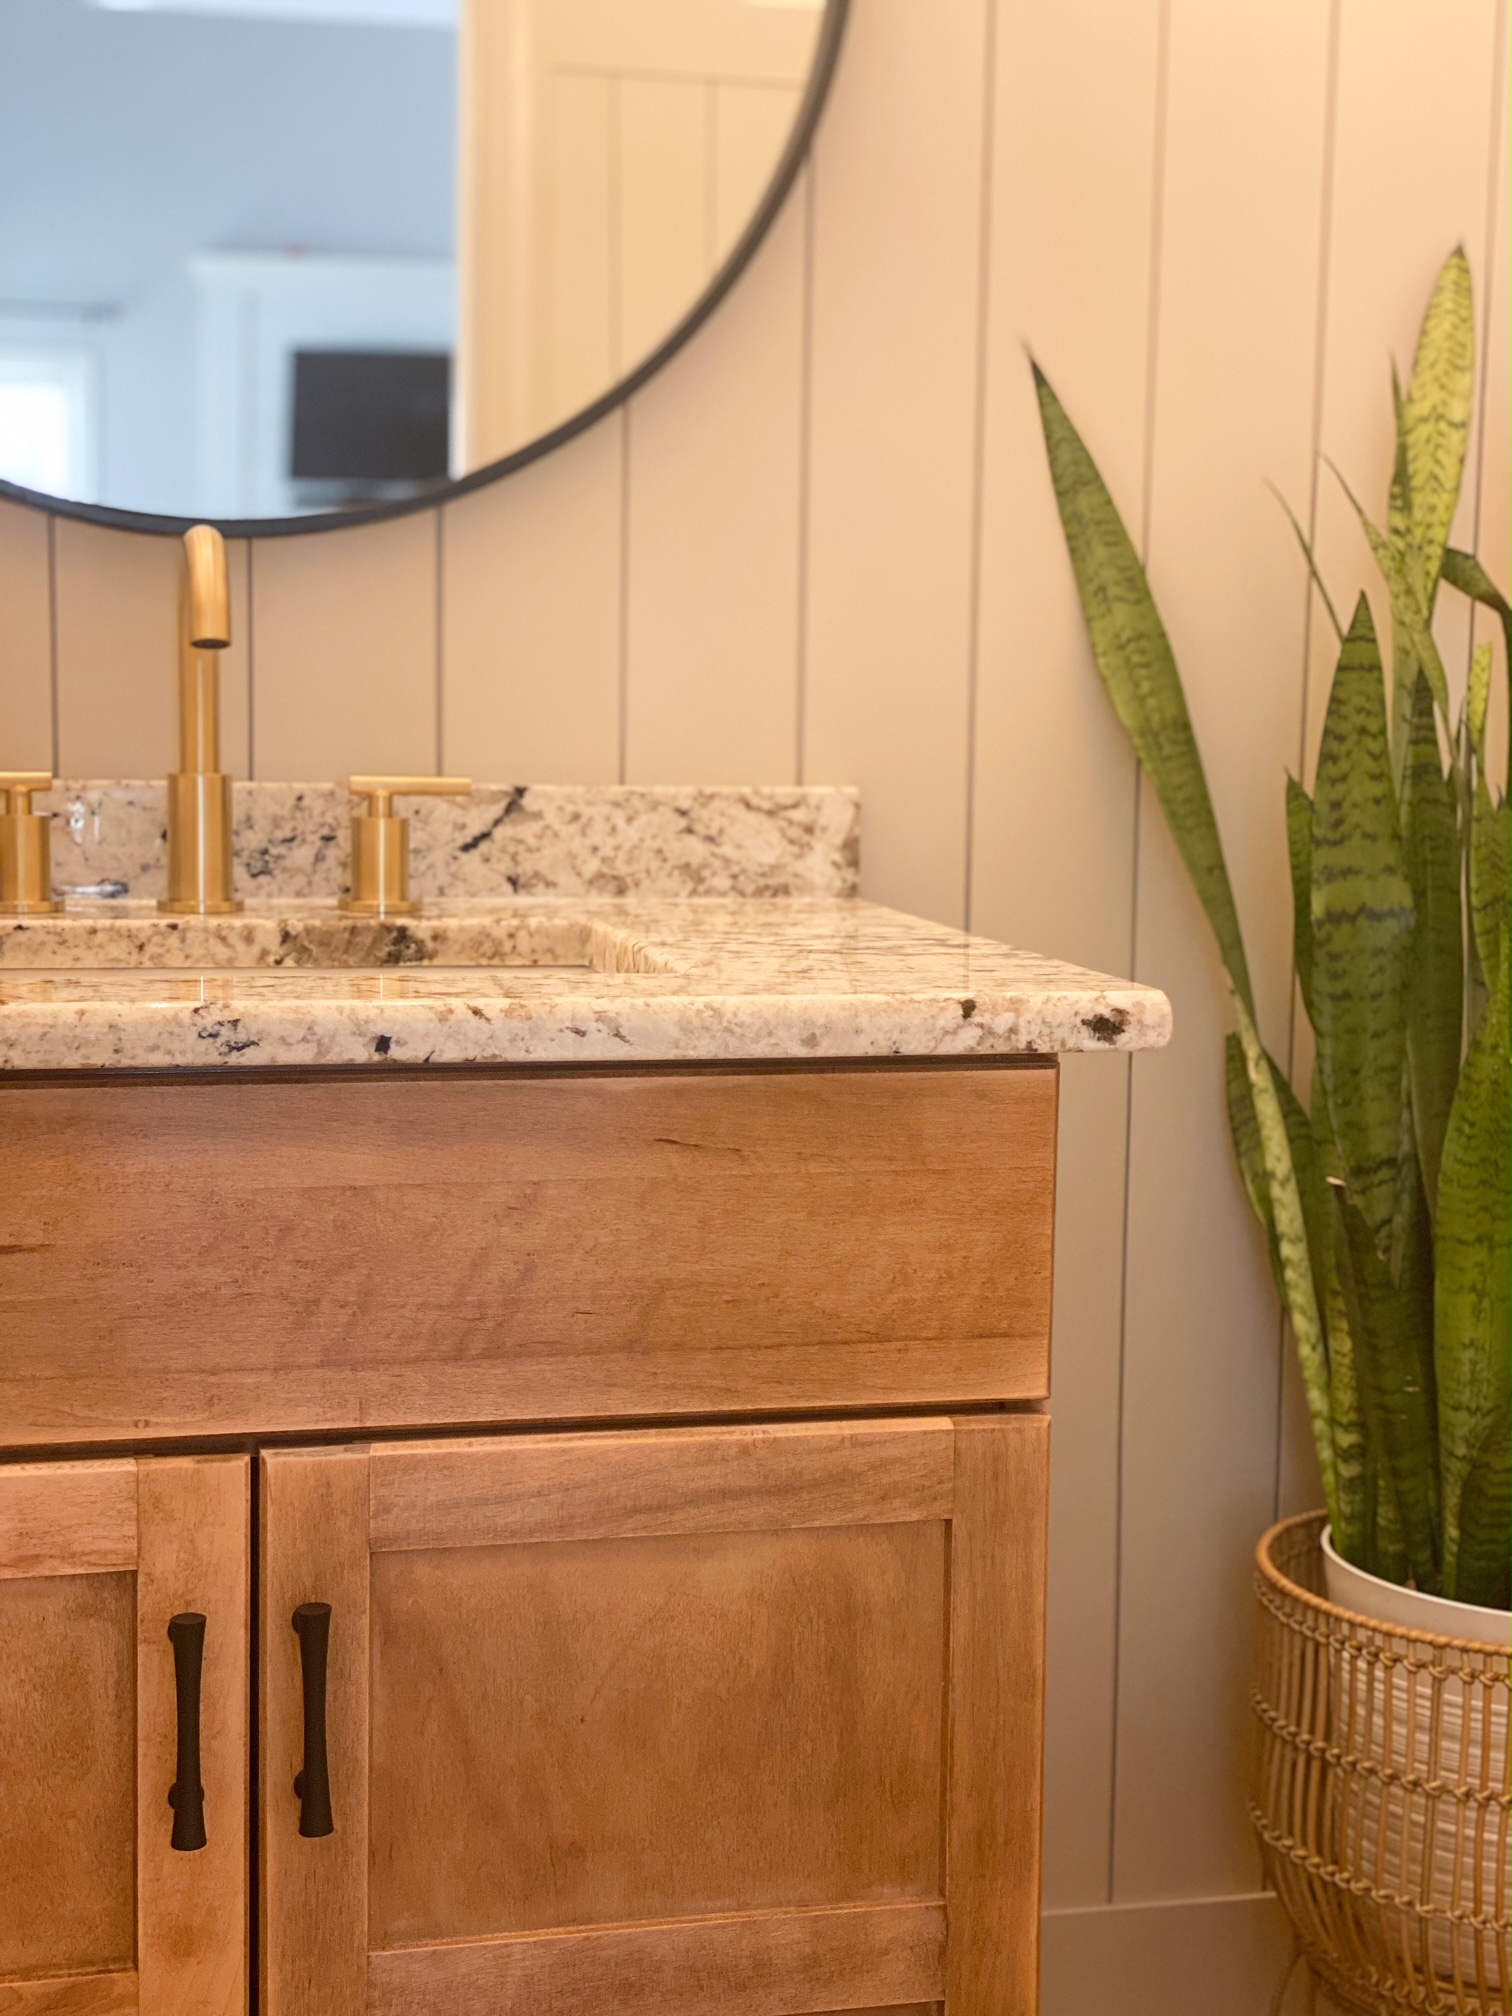
Similar Mirror, here.

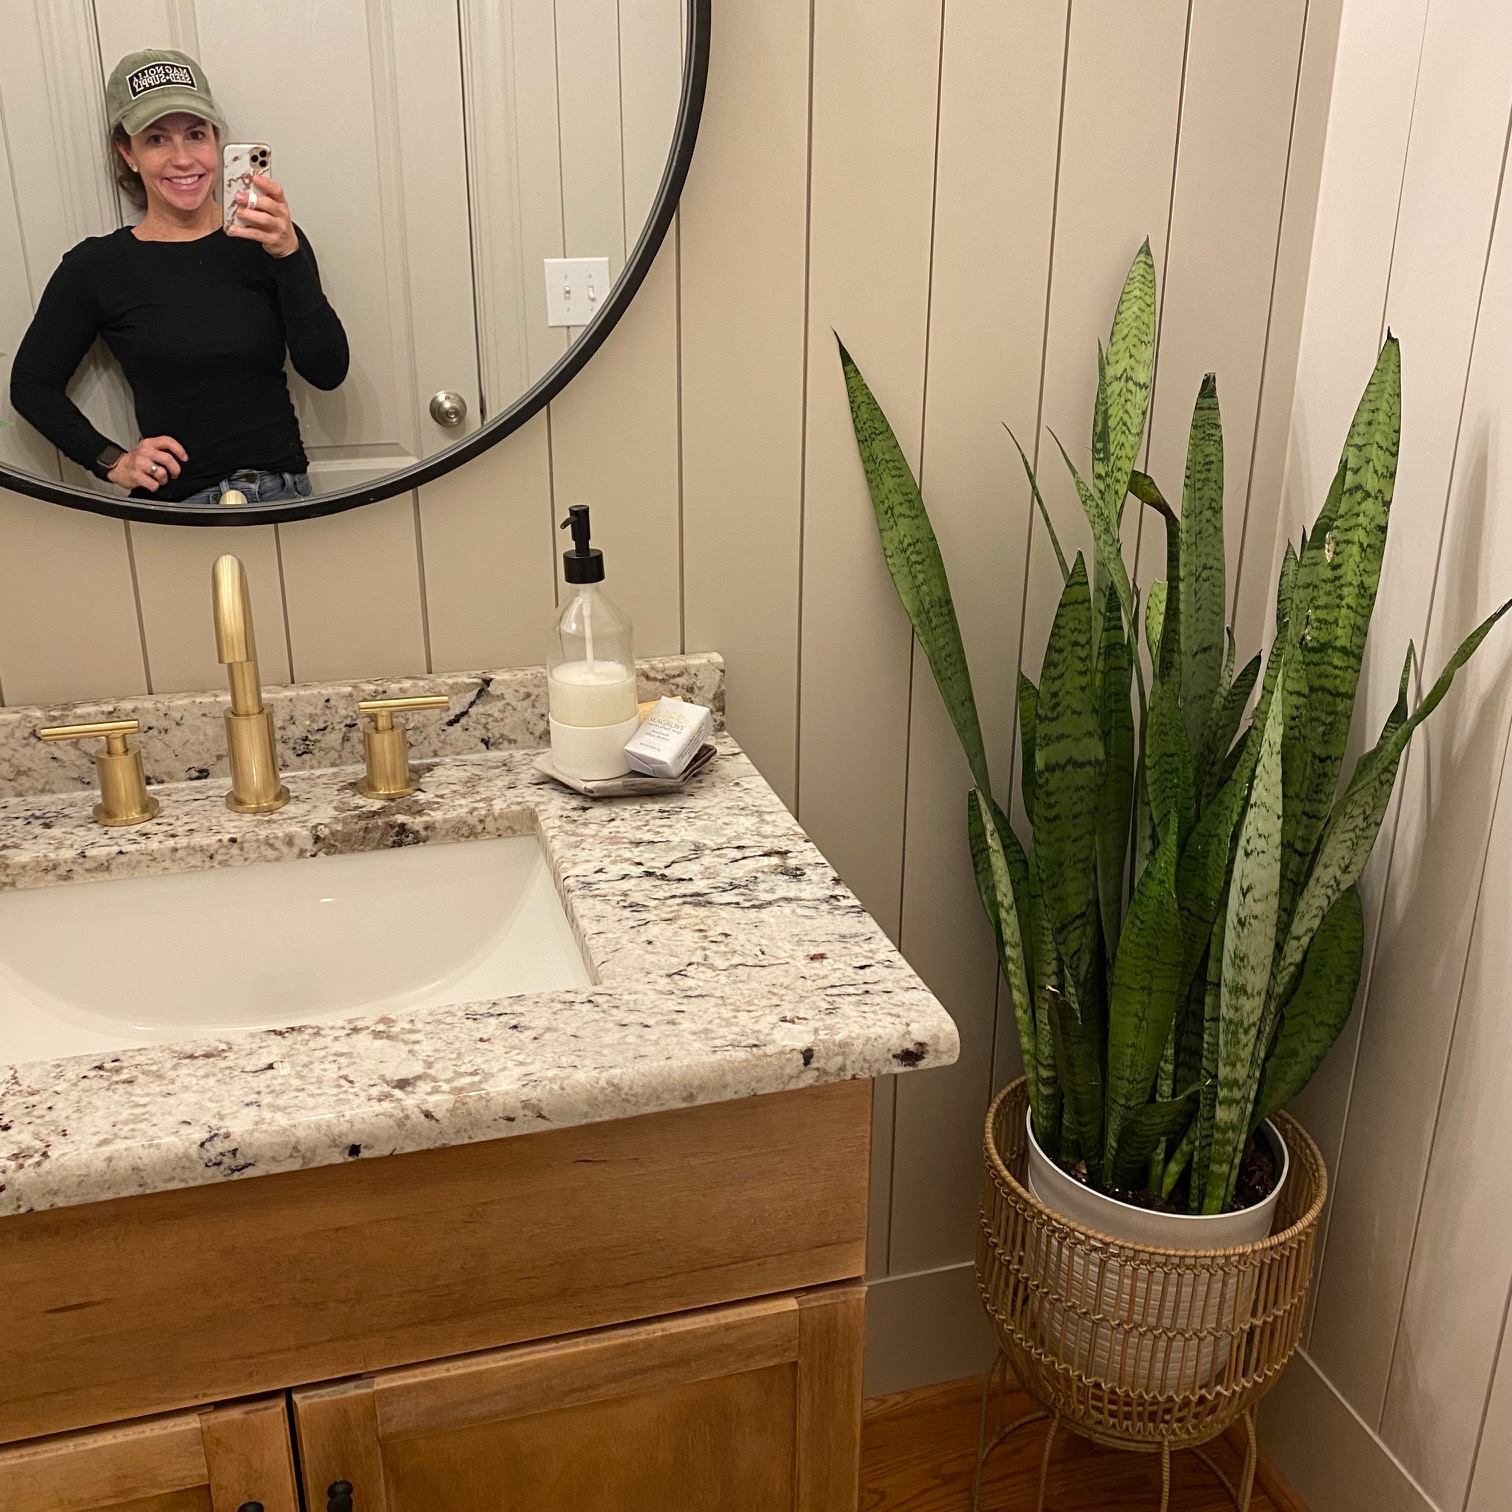
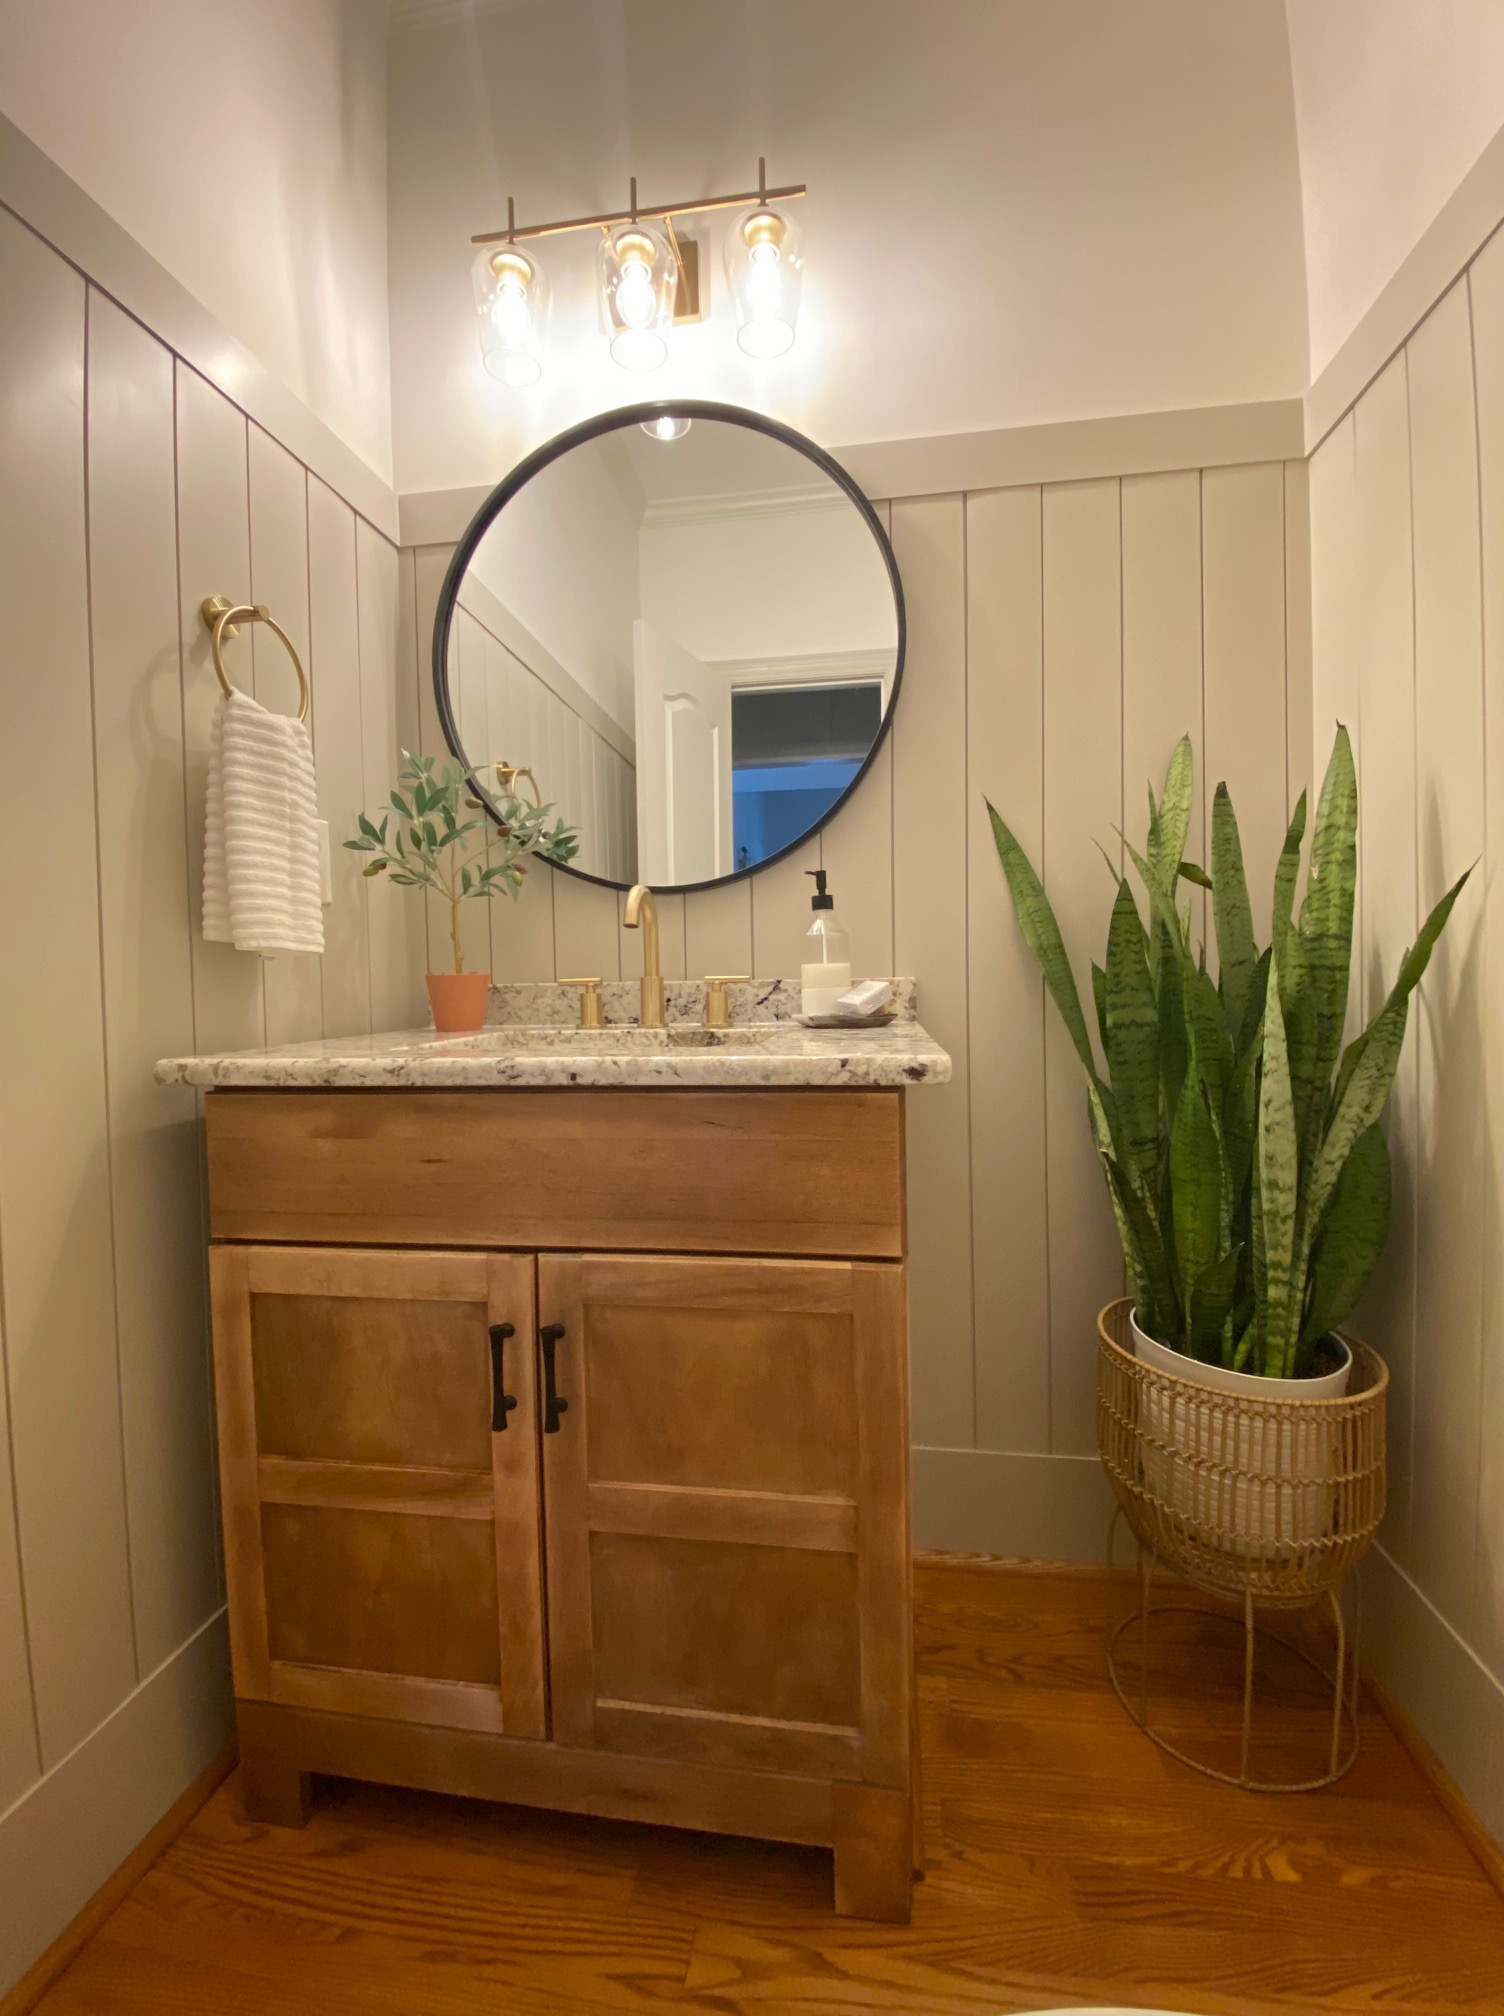
Adding in the finishing touches was one of my favorite parts. To fill the dead corner space, I found this giant snake plant at Home Depot for $22! The plant stand was an awesome find at Marshalls.

My favorite piece is the room is this watercolor lily. It was a gift to my grandparents by one of their church members. They had is framed by a local business who made a special pocket on the backside to hold the card that was handwritten and included with the art. The special note is a reminder of the impact they had on so many lives and that motivates me to live life to the fullest.

Before we look at the completed space in its entirety, let’s remember where we started again:

Before + After – @4havenssake

LINKS:

Handle Pulls

Turkish Hand Towels

Faucet

Towel Ring and Toilet Paper Holder

Vanity Light

Cutest Safety Glasses

What do you think about the Powder Room transformation? Would you believe it was completed for less than $600? Most of that cost went to lumbar because we went with primed pine vs primed MDF.

I hope this inspires you to make the most of your space and transform it with a little paint and a little elbow grease. The before and after can be exactly like your mood board.

Shiplap + Bathroom Redesign

If you’re looking to add shiplap to a wall or room in your home on a budget, this post is for you.  I’m sharing how you can update a standard builder grade bathroom into a modern farmhouse design.

We transformed this space:

IMG_6402

Into this newly designed space for a total of $315.  The shiplap wall only cost a little over $15.

Start by measuring your walls.  In this case, we were only doing the mirrored wall which made for simple math when deciding how much 1/4 inch plywood we needed.

For ease, we had Home Depot rip down 2 sheets of 1/4 inch plywood into 6 inch planks.  (we did have some scrap that we measured out to smaller planks that we knew we could use where some boards needed to be ripped down to less than 6 inches.) We also knew we wanted to continue the shiplap in the shower/toilet room and would use the extra planks in there.

Simple steps to hang the planks:

  1. Sand down all edges of the planks with an electric sander as there will be rough areas. This goes quickly.  *Wear a ventilation mask, it’s not healthy to breath in the dust from the wood.
  2. Remove old light fixtures
  3. Measure the length of your wall and trim the board accordingly.  Our wall was mostly to scale so we went ahead and trimmed all needed boards to the length of wall.  Where there were slight discrepancies, I was able to use an electric sander to take off a small amount for a perfect fit.
  4. Using a stud finder, mark out the studs in the wall drawing a line all the way down.  This is where you will nail your planks.
    1. In this case, we started adding our planks at the ceiling because we wanted a full 6 inch board at the top.  When planking a full wall, it’s sometimes easier to start from the bottom and work you way up.
  5. Ensure the board is level & using a nail gun (with 1 1/4 nails), nail one end of the board.  It’s easier when you have an extra set of hands to hold the board in place but if you are doing the job solo, double check that your board stayed level and nail the opposite end to the wall.  Then nail along the board where you marked the stud locations.
  6. Use nickels for your spacers and put up the next board in place.
  7. Continue step 5 until you have to make cuts for outlets or light boxes.
  8. In this case, we had to trim the bottom of one board and the top of the next to accomodate for the lighting.  We put the boards in place and traced out where we needed to cut.
  9. Use a jigsaw to make these cuts.  You can always trim off more if your first cut isn’t perfect. (Continue nailing boards after these cuts are made).IMG_6515
  10. I recommend painting the edges of each board and the wall as you put up each one.  This makes the painting process much easier as you don’t have to squeeze a brush into the cracks.  We had to get this job done quickly with two toddlers running around so we opted to just get the boards up and I’d paint later.
  11. Paint the sides and cracks of the boards first.
  12. Roll the boards second.  I needed 3 coats total when rolling because it went on much thinner compared to the brush.
  13. Caulk the seam where the boards meet the wall and the top of the vanity.
  14.  Hang new light fixtures and mirrors and you can call it a completed project!

Our new lights against the freshly painted white shiplap.

IMG_6535

I wanted to further update the space and bought these handles for our existing cabinet doors and drawers.

I also really like these handles but admittedly, I didn’t price around for hardware for the best deal like I normally do and just made a decision at Home Depot.

I also spray painted our existing towel rings to match. (This cost nothing as I already had flat black spray paint for metal.)

When deciding on mirrors, you do need to measure out what range in size you can shop for.  I knew what my maximum height and width could be above each sink and searched online first.

Hobby Lobby frequently has a 50% off sale on their mirrors.  Luckily for me, the sale was going on when I was shopping so I made a quick run to the store and snagged the last two. These mirrors had the perfect amount of coastal farmhouse vibe we were going for.

Here is a little video highlight featuring a trick for hanging hardware on cabinet doors and drawers. Click Here

A quick trip to Marshalls for accessories – rug, vanity decor, and fresh linens, I snagged YOU LOOK GOOD sign from the inventory of The Homestead Haven (my side gig with my bestie), and then shopped our home for the rest to complete this room design.

You can shop this sign and others in our Etsy shop, here.  By the way, this sign is interchangeable.  The wooden insert comes out of the base and can be changed seasonally or with other design offerings in our shop.  I’m forever changing decor in our home and love this creation of ours making it easy to do so inexpensively.

The best part about the room design, our two boys (ages 5 and almost 3) complimenting each individual new detail in the room.  They seemed to really appreciate the hard work and love that went into freshening up this space.  Mission accomplished.

Please comment with any questions you may have and follow along via Instagram for our next project.

Trash Can Hideaway

Are those pesky trash can and recycle bins an eye sore outside of your house?  Do they turn over from winds?

We had both of these issues and only one solution, make a DIY trash can hideaway with an easy paver ground cover. IMG_4381

DIY trash can hideaway:

Basic Materials:

1×6 pressure treated boards

4×4 pressure treated posts

post hole diggers

galvanized screws

wood spacer (sized accordingly to the spacing you want between the horizontal boards)

Decorative post caps, we used these – DeckoRail Post Cap

Pavers (color and size of your choice) – we used left over pavers from our patio

This project is pretty quick and simple.  The first step is to make the holes for your 3 posts.  We used 4x4x6 posts and felt that 1.5 feet in the ground was sufficient without mortaring around the posts.

Second, attach the post caps on top of your 4×4 posts so you can appropriately start your first board spaced the same distance that each board will be apart from each other.  Ours are approximately 1 inch apart.

Next, measure your 1×6 board from the far edge of one post to the edge of the second post.  Attached the first board 1 inch from the base of the post cap with galvanized wood screws.  I recommend starting on the side of the hideaway so that the front view won’t show the seam where the boards meet at the center post.

Use a spacer (we used scrap wood, 1 inch in height), to place under your first board, place the second board flush to this spacer and attach one side.  Move the spacer to the second side and attach.  Continue this process on this side of the hideaway.

For the second side, you’ll measure from the edge of the post to the edge of the first board you attached to the side.  We recommend you take measurements of each board and make cuts accordingly as there are slight differences per wood inconsistencies.

If you want a natural look, allow the treated wood to dry out (approximately 1 month) and clear coat or stain.  If you wish to paint, also allow for the wood to dry out and first prime with an oil based kilz prior to painting it to match your trim.

Lastly, level out the ground area within the trash can hideaway and lay out your pavers for a smooth surface for your trash and recycle to rest.

Please see this DIY deck skirt tutorial if you want to carry over this look of shiplap to create a storage space under your deck.

DIY “Shiplap” Deck Skirt


Seeing potential in our home has always been a fun challenge for my husband and I.  We prefer to start with a clean slate and add finishing touches that fit our style.  One main thing our home lacked on the exterior when we moved was curb appeal.  We made plans early on to add a patio and landscaping to the back so that we could enjoy the views, pond, and entertain friends and family.

If you are looking for a way to add a deck skirt but don’t necessarily want the look of lattice, this tutorial might be for you.  We loved that there was great storage under our screened in porch but really disliked that everything was visible.

We sketched out the look we had in mind to send in to our HOA for approval and began measuring how much wood we would need.

Deck Skirt Process

Basic Materials List:

1x6x8 pressure treated boards

2×2 pressure treated boards

Galvanized screws

Lag Bolts

The first step for us was to add new support boards to the interior of the posts that would allow the horizontal boards to be flush with the posts.  You can see from the pictures above what this process looked like.  New boards were added first, then the old exterior boards were removed from the sides.

Step two, we ran 2×2 posts along the deck posts leaving space for the horizontal boards to be attached to them and remain flush with the deck posts.

Each horizontal board had to be measured individually because the deck posts had natural inconsistencies that happened over time.

Use a piece of scrap wood from you cuts to make a spacer the width you want your boards to be spaced apart.  Ours are space just under an inch apart.

It’s easiest to work from the top down when adding each horizontal board as your deck is already level.

The most challenging thing for our project was making a door for us to easily access everything we were storing.  We originally planned to make two swinging doors that carried over the deck skirt design but we determined that the weight of the wood would eventually cause the doors to sag.  We didn’t want that.

With some insight from my brother, he suggested making a removable panel that would match the deck skirt.  The trick was determining a way to hang it so that it would be removed easily.  We decided to add lag bolts, two on each side of the opening, from Home Depot.

We notched out the sides of the door panel, at an angel, to allow for the homemade door to easily drop on and lift off when we needed to access things.

We opted to wait for the treated boards to dry out in the summer sun and then prime & paint them to match our trim.  After having the natural look of the wood for so long, we began to also love that look but ultimately went with a cleaner look with the white.  It has brightened the space so much and now lets our landscaping colors pop.

It’s hard to believe we started with a small concrete slab at the base of the deck stairs and now have an outdoor living area that allows us to enjoy the outdoors so much more.

Please see this post for an easy DIY trash can hideaway.

IMG_4324

As I’m typing, 4 yards of mulch is being dumped on the driveway so I guess I need to wrap it up and start filling the wheelbarrow to freshen up our natural areas.  Don’t worry, the hubby is almost finished with work so we’re going to work together while the kids play outside on this beautiful Spring day.

Let us know if you have any questions.  Tag us if you tackle this DIY deck skirt, @4havenssake on Instagram & Facebook, we’d love to see.