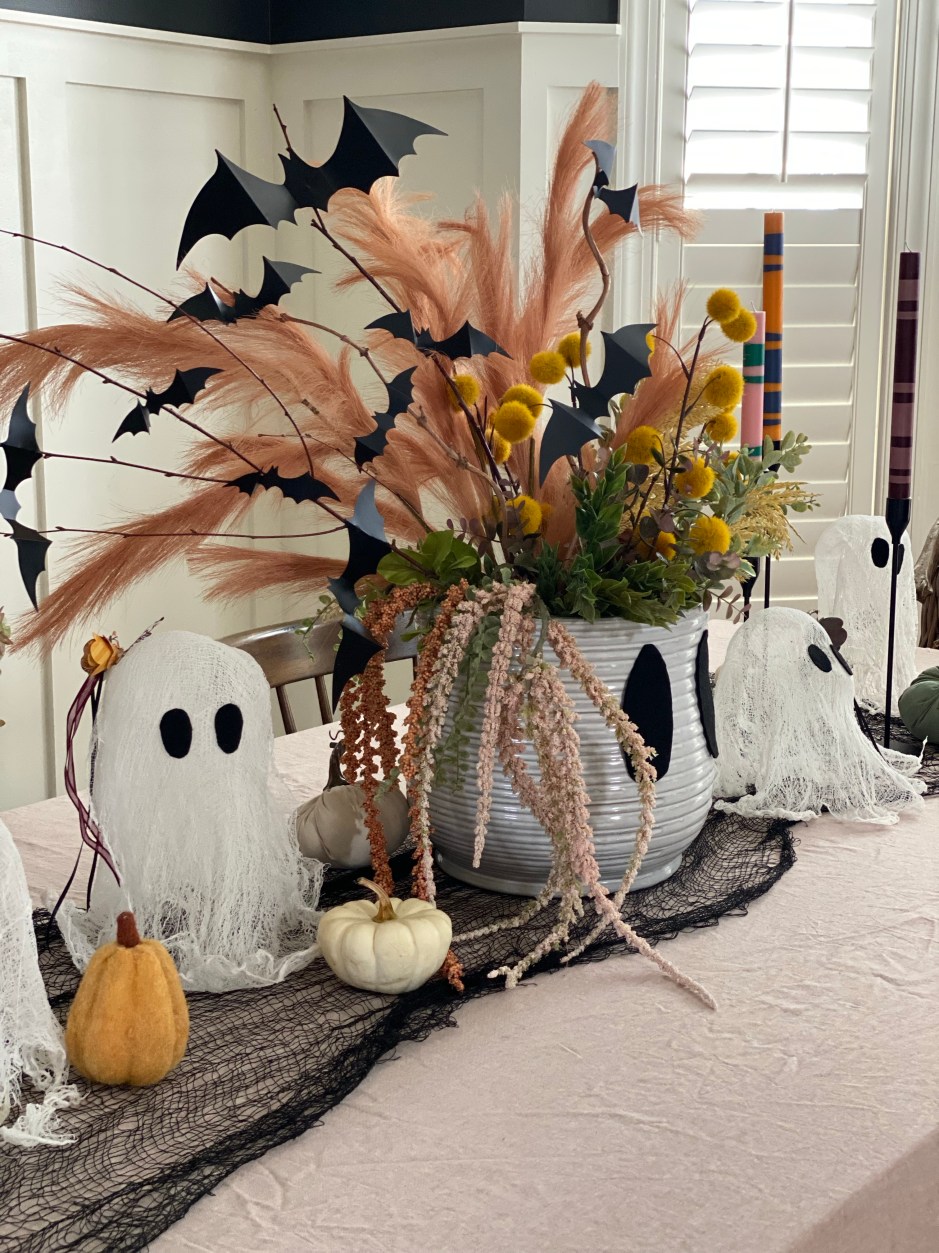
These printables also work for the kids if you are to fill little treat bags with Halloween themed goodies.
You will find everything you need, including printables for the homeowner to tape on their door so others know they have already been booed.
Download from the above link for the best quality.
I hope these printables make it easy and fun to spread a little Halloween cheer in your own neighborhood! It’s such a simple way to bring smiles, make connections, and remind others that community can be full of surprises—in the best way.
We’re three weeks into January, and chances are, you’ve set a few personal or professional goals for yourself. I’ve noticed a lot of people diving into post-holiday organization, clearing out the clutter, and sharing their progress online. While I totally get the motivation, I also feel the overwhelming pressure to “do all the things.”
In full transparency, I’ve had to tune out the noise that constantly floods our social media feeds. Messages like: Do more. Buy this. Try that. Here’s the latest and greatest thing you absolutely need can quickly become too much.
It’s a lot.
Here’s where I’m at: I want practical solutions that work for our family. I approach organizing by first assessing what we already have at home. Then, I figure out how to make it work without overspending on trendy organizational products.
Two Pain Points in Our Home:
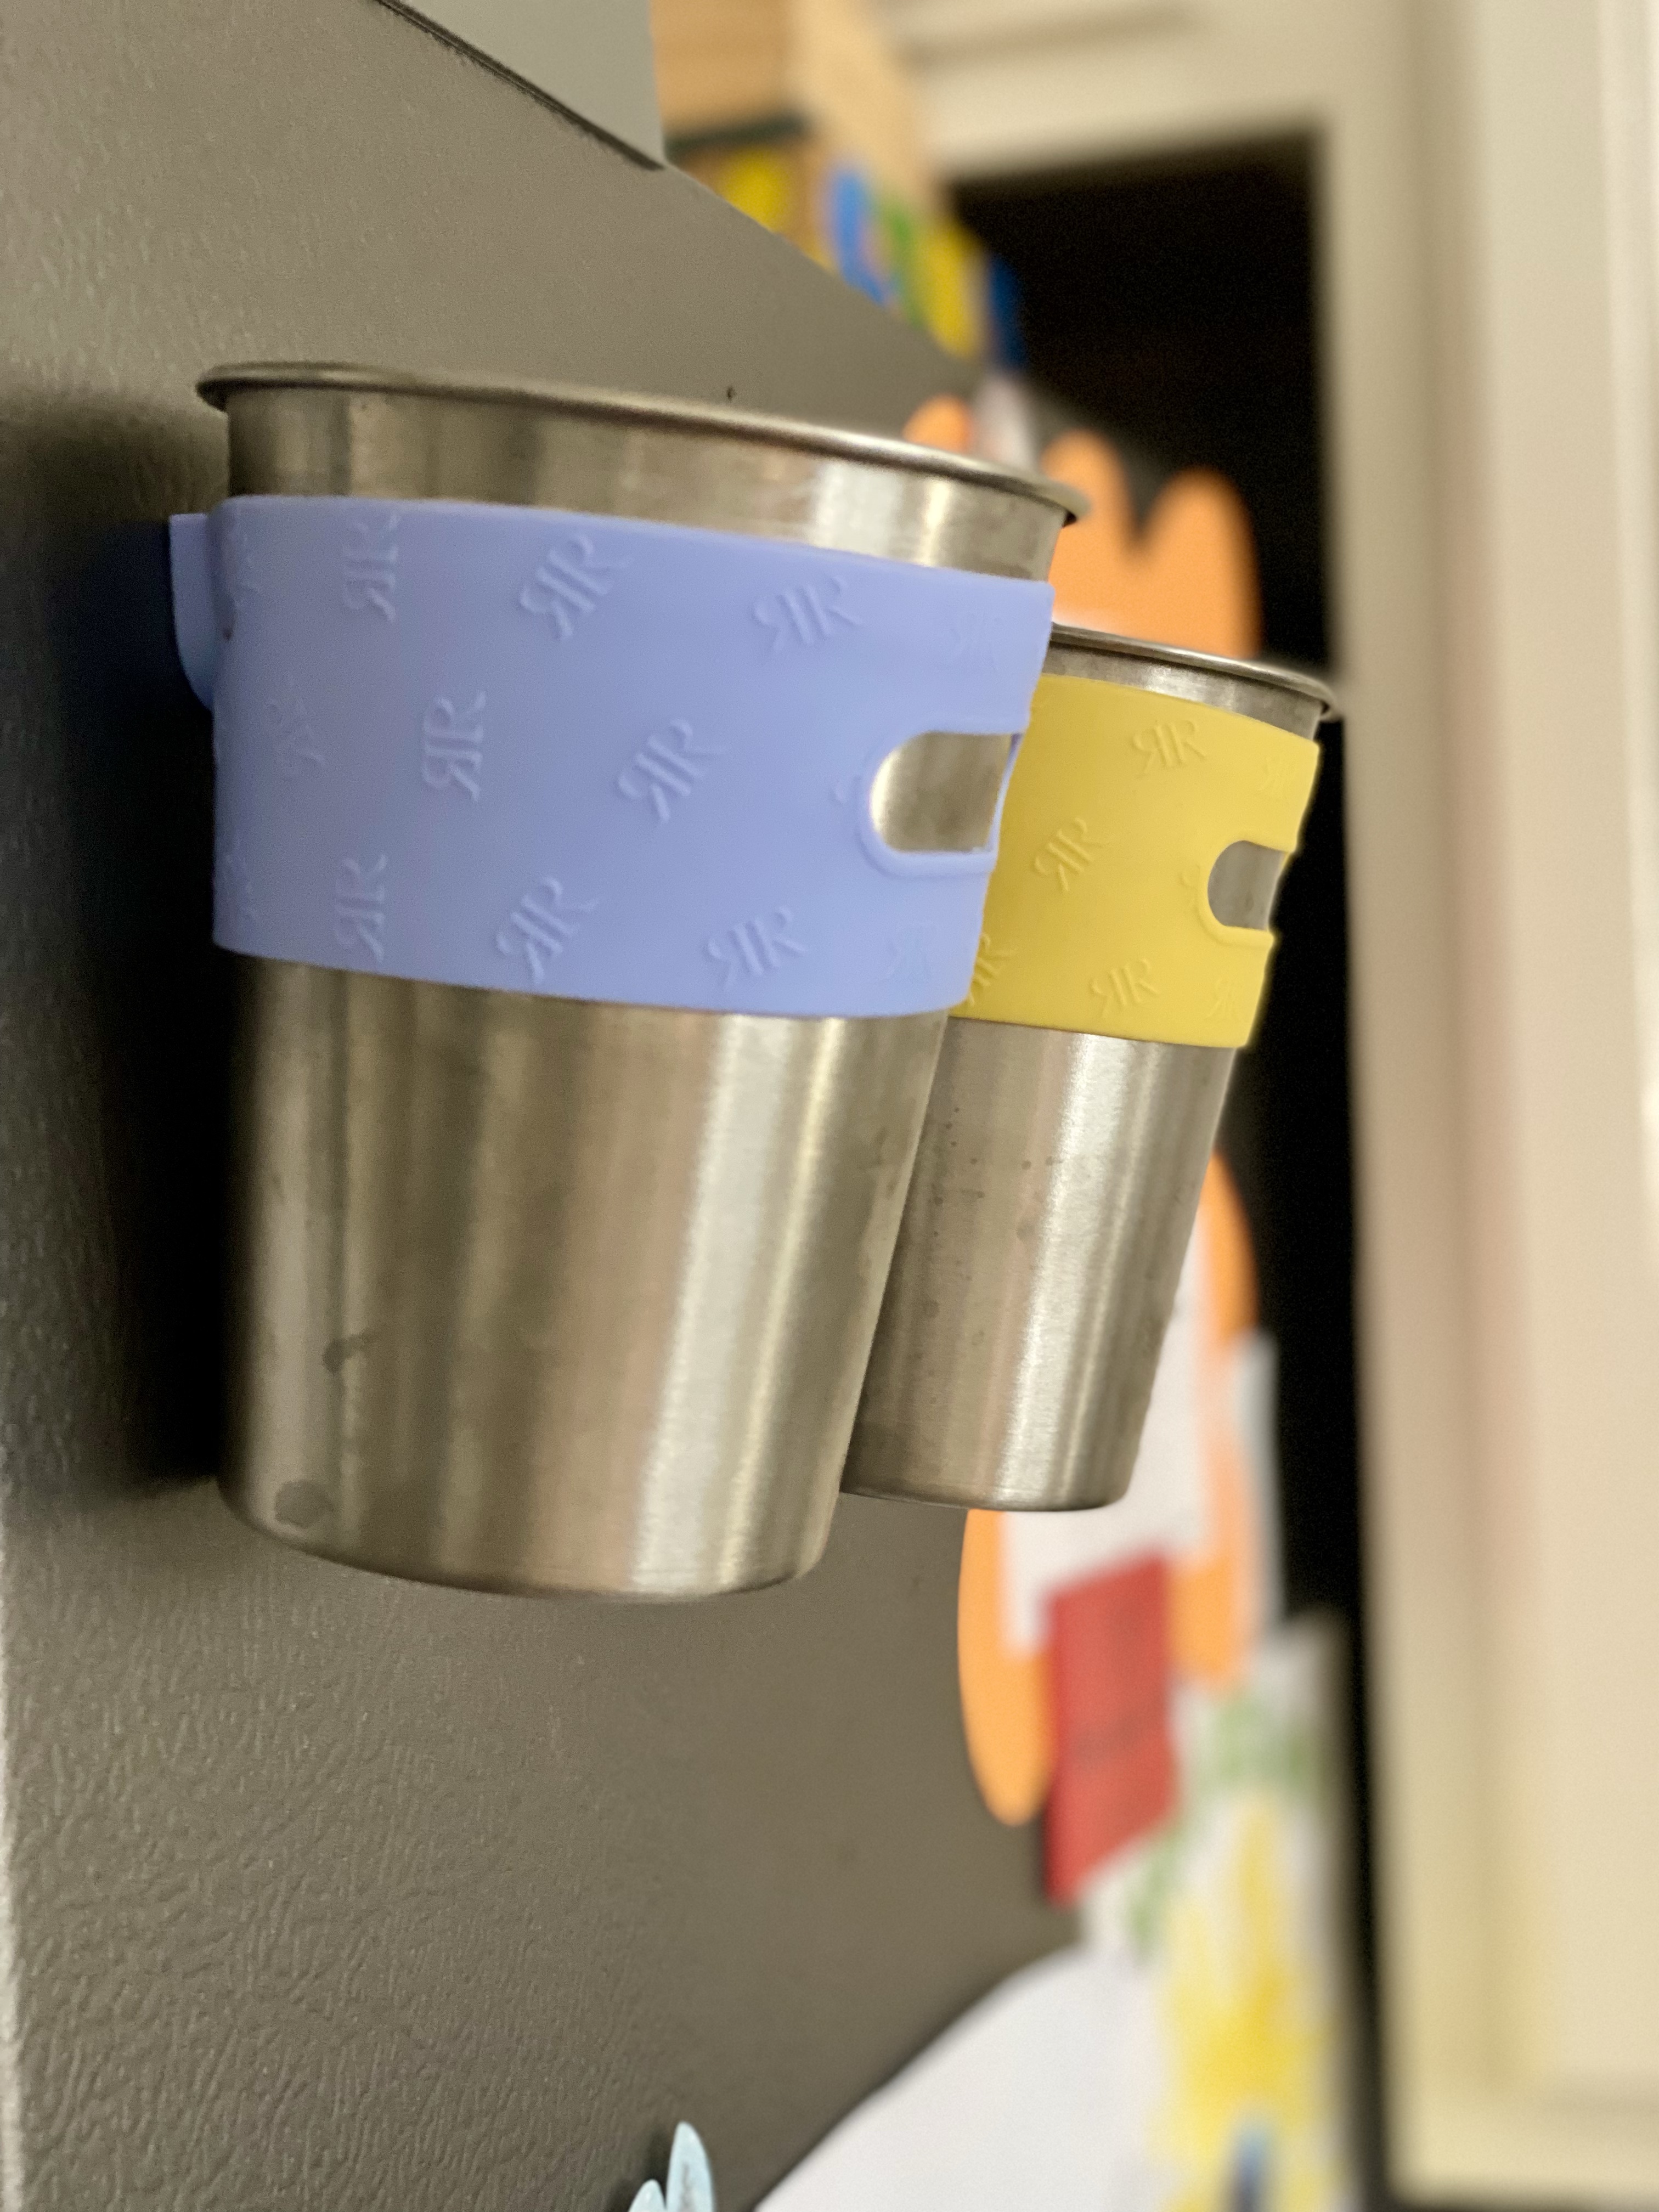
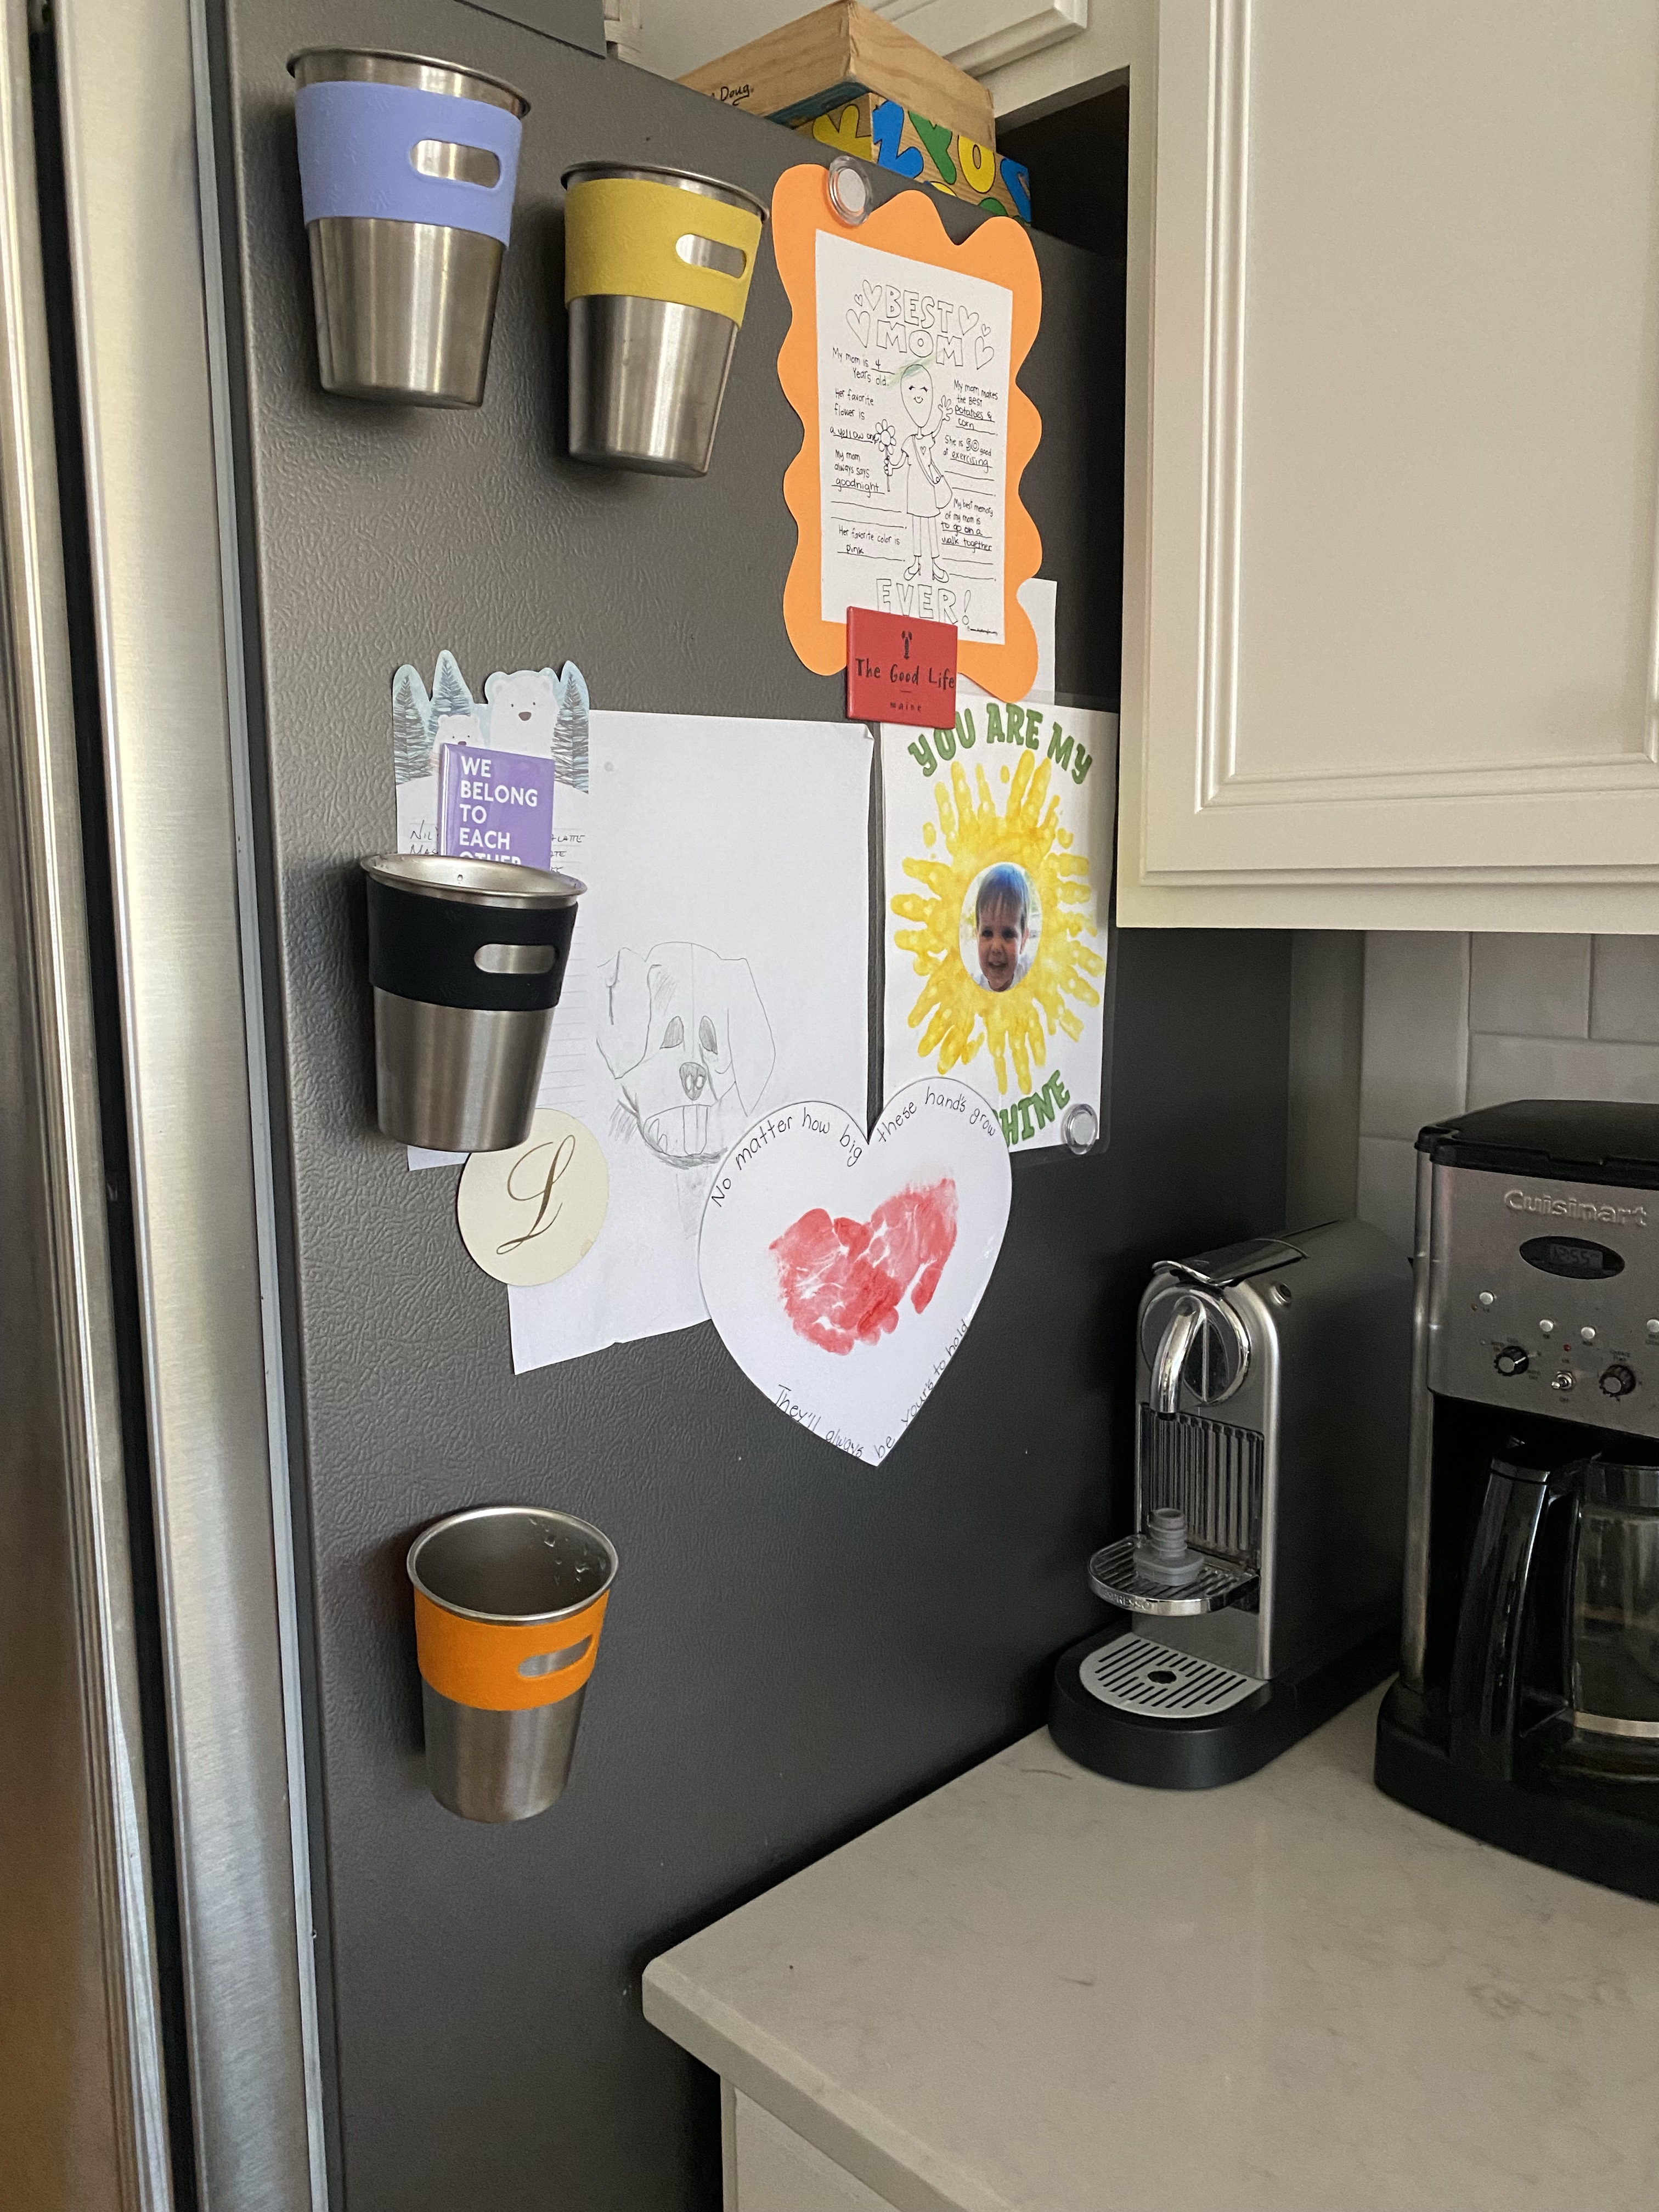
Too many water cups sitting out around the house.
Constantly digging through the pantry or fridge to find things—only to realize I have to move five items to get to the one I need.
If you’re tired of washing cups nonstop or filling the dishwasher’s top rack every day, let me introduce you to the simplest solution that’s been a game-changer in our home, magnetic cups! The best part? It’s affordable!
Want to know what happened when these small changes were made in our home? It gave our three boys responsibility they could control with their water cups. There was no longer a question about, “who’s cup is this?” Our 4-year-old listened to directions about how to use the cup one time and took ownership in getting his own water, dumping out what he didn’t drink, and putting the cup back on the fridge where he can reach it.
Kids want responsibility.
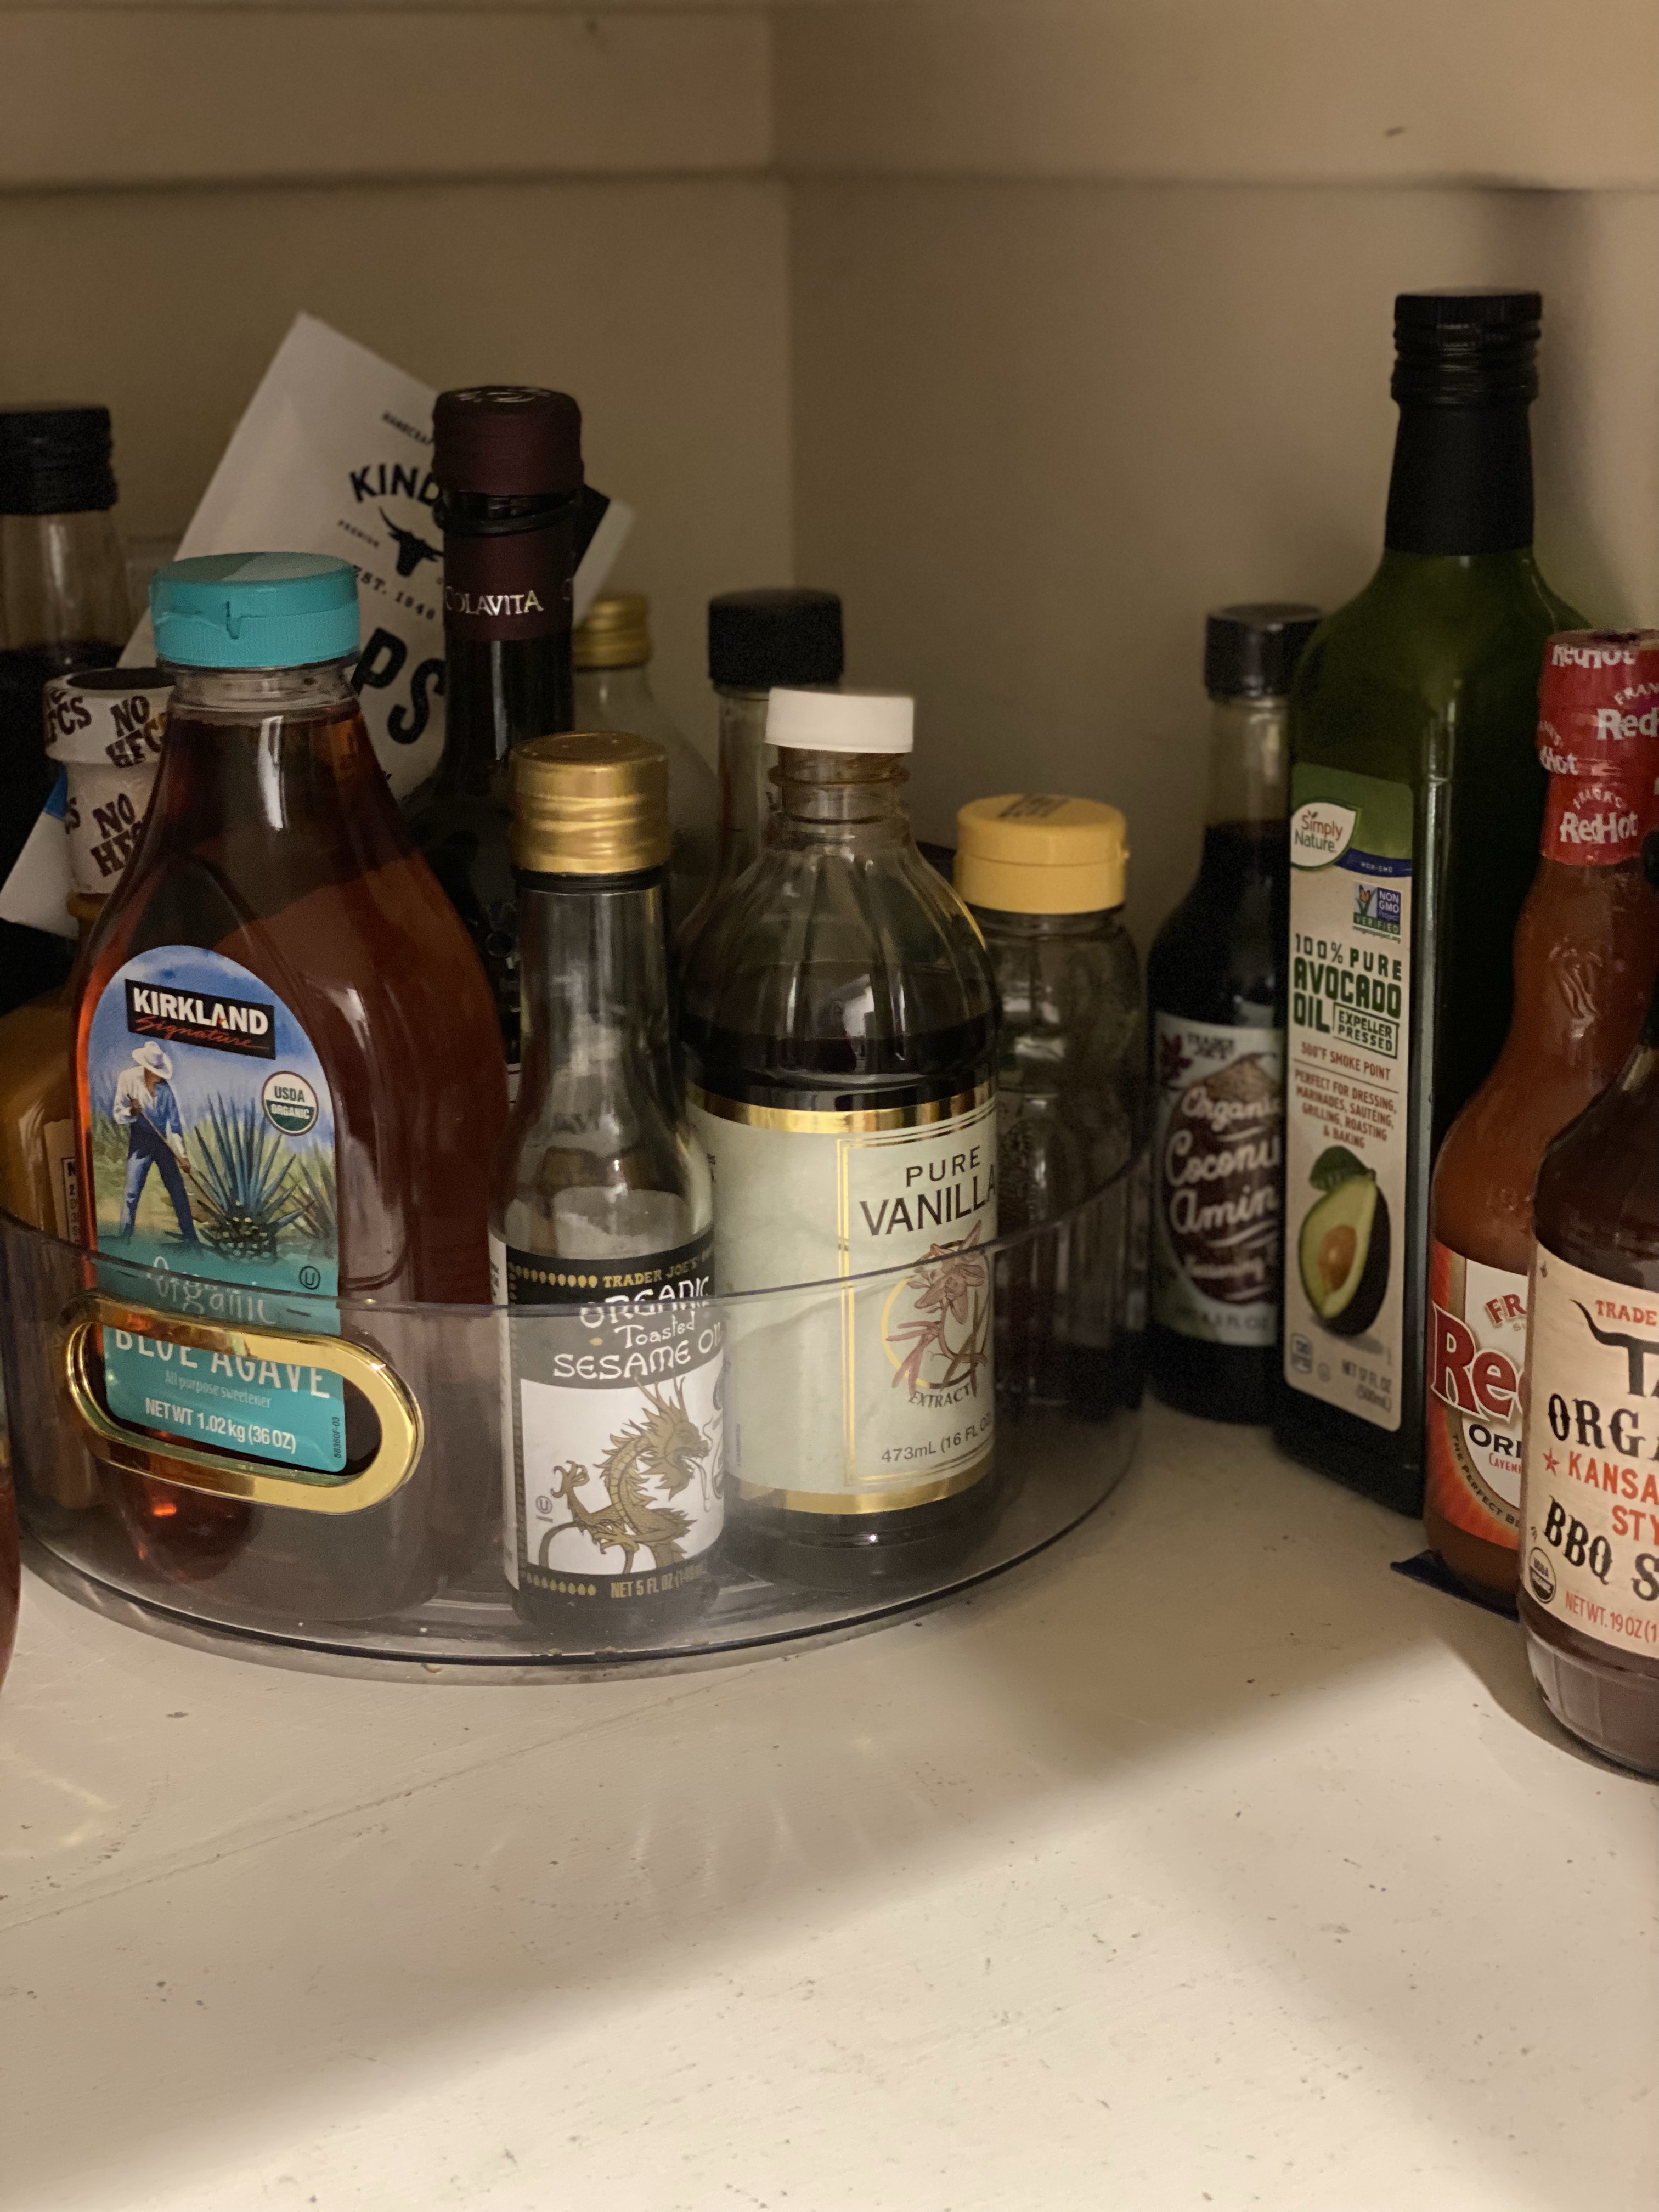
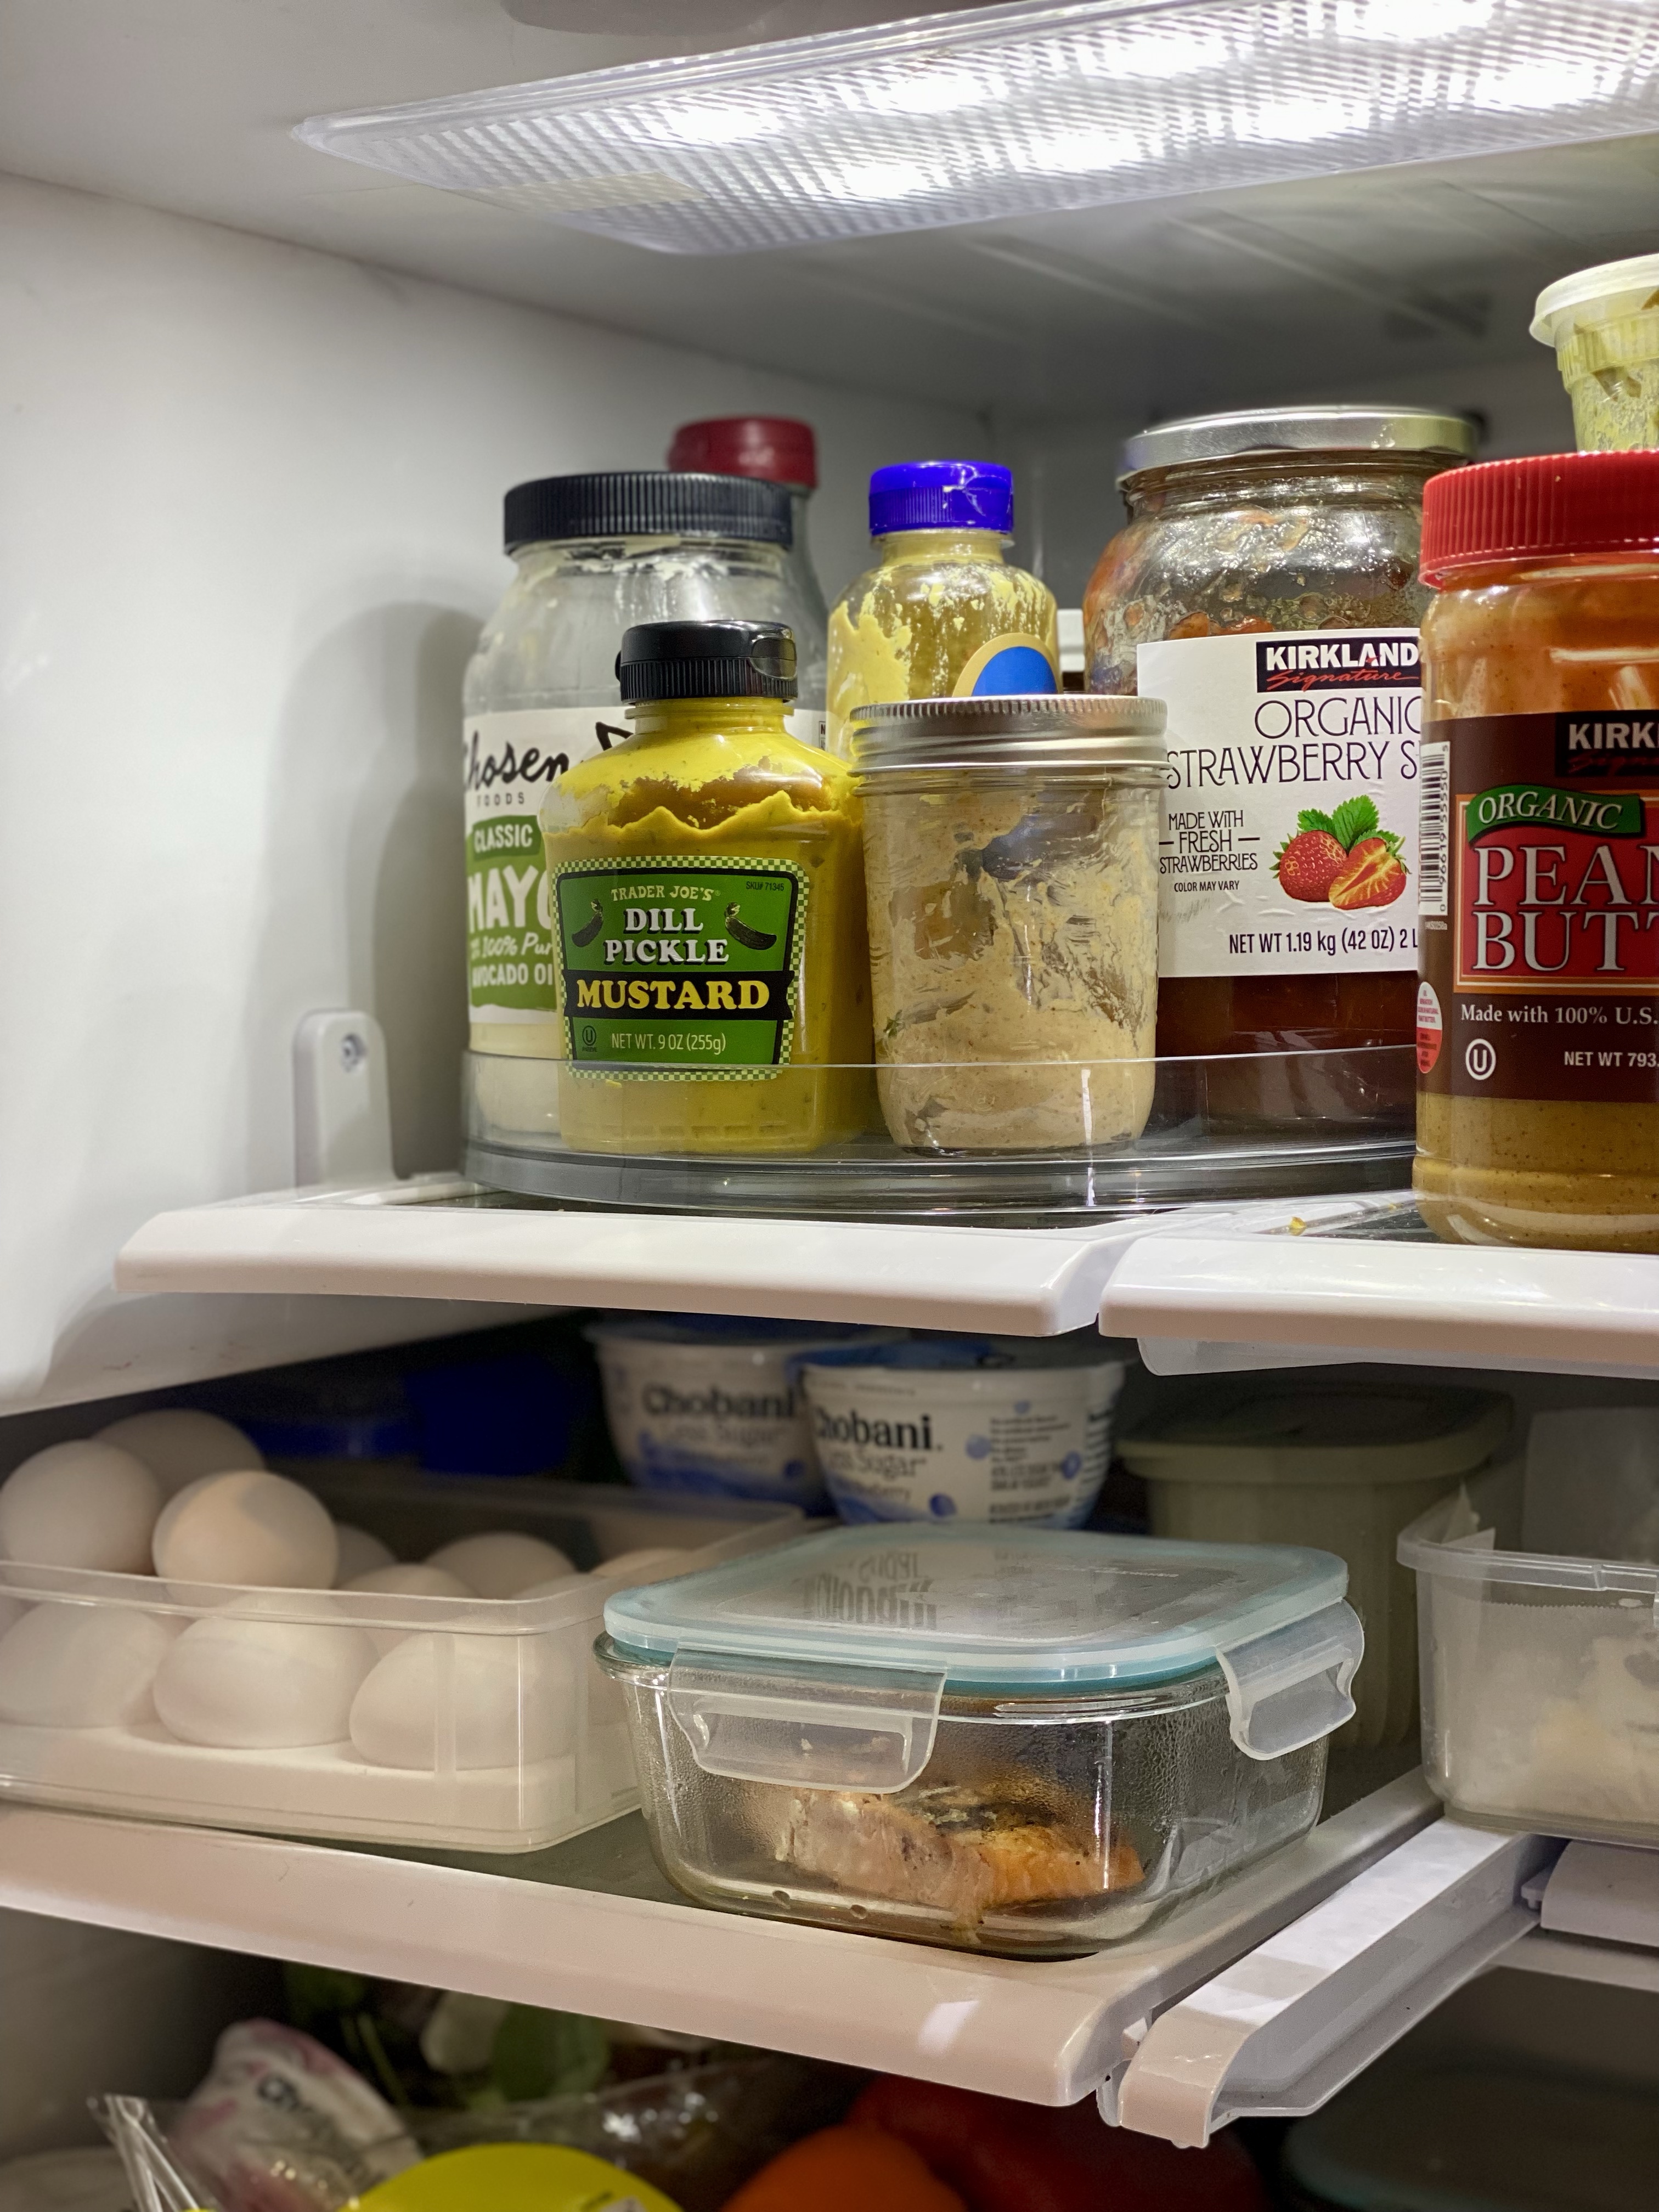
Now, let’s talk about the fridge and pantry. Do you have family members who open the fridge, take one look, and immediately ask you where something is? Let’s be honest—most of the time, they haven’t even tried to find it.
I came across these acrylic lazy Susans at our local TJ Maxx, and I instantly knew they could help. They’re perfect for organizing condiments, cooking essentials, and all those pantry staples we reach for regularly.
These two small, affordable purchases have made a huge difference. The counters are clearer, and it’s so much easier to find what we need in both the fridge and pantry. This two pack would be perfect, Lazy Susans
Cheap. Practical. Problem solved.
I’m reminded of a verse from Ecclesiastes 4:6: “Better one handful with tranquility than two handfuls with toil and chasing after the wind.” It’s such a grounding reminder that more isn’t always better. Sometimes, less is exactly what we need—less stuff, less striving, and less pressure to keep up.
Let’s lean into finding solutions that work for your family—starting with what you already have at home. You might be surprised by how simple changes can make a big impact.
What was once an item listed on our project list, the powder room, it quickly became an active project when my husband walked into the garage and returned inside with a hammer and crowbar. He took to a corner in the bathroom and began an attempt at removing 1/4 round and baseboards. All I needed to get going on this particular project was him taking that first step and saying “let’s start checking off these projects.”
DIYs are fun but now with 3 kids, we have to be strategic in planning when we can tackle projects -between his work travel and kid schedules.
Goals for this project:
Try to be budget friendly, afterall, it is just a powder room
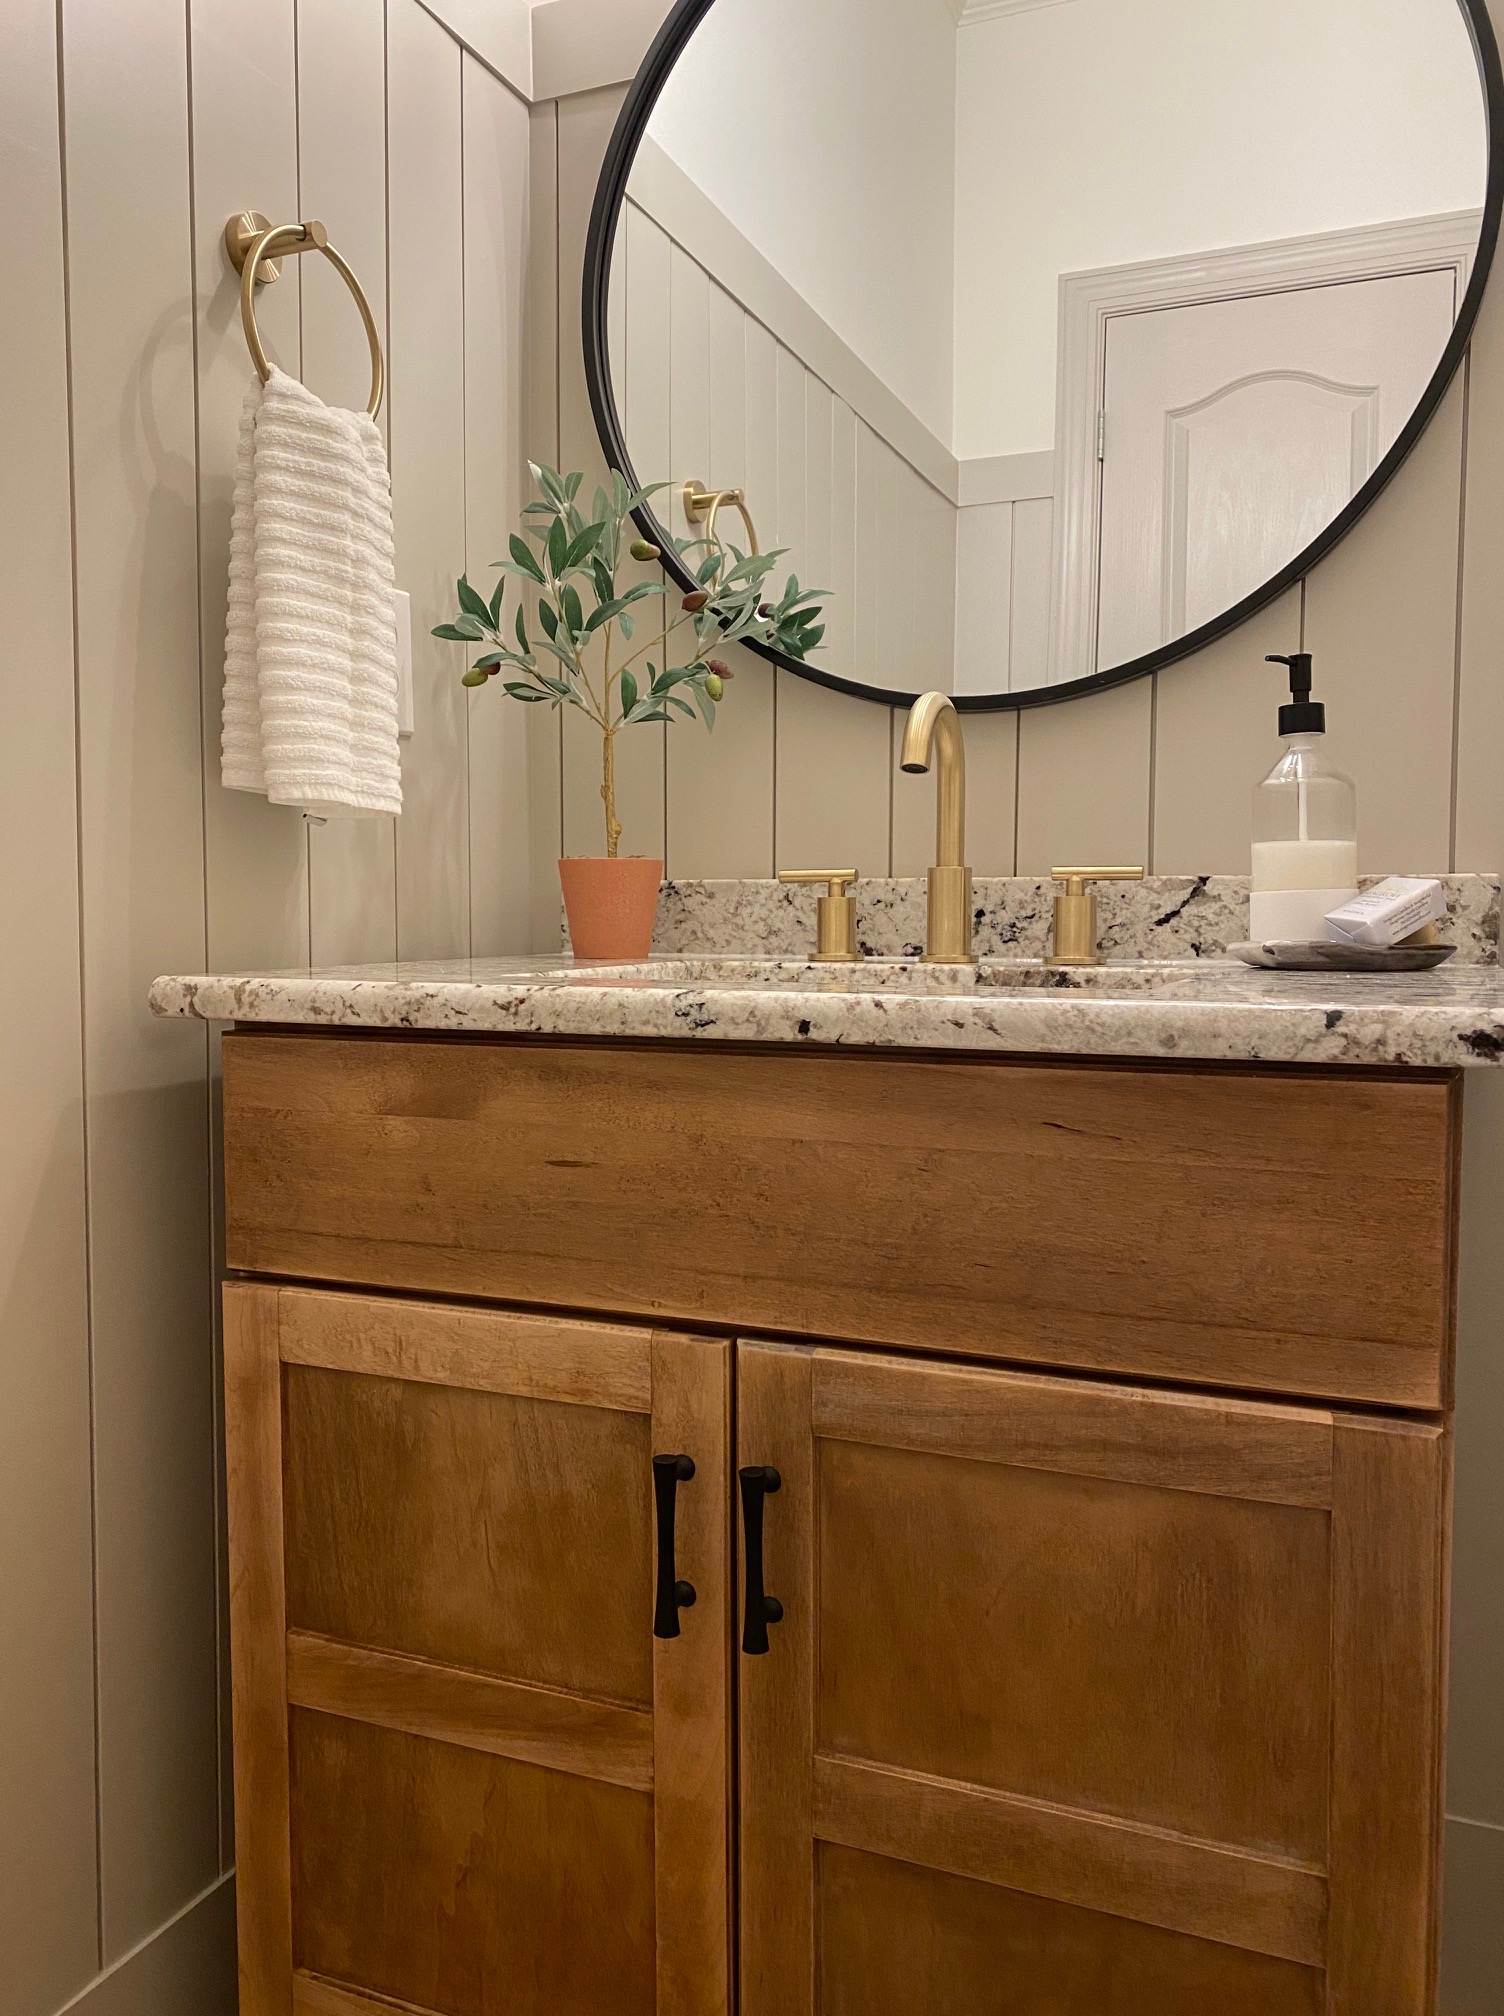
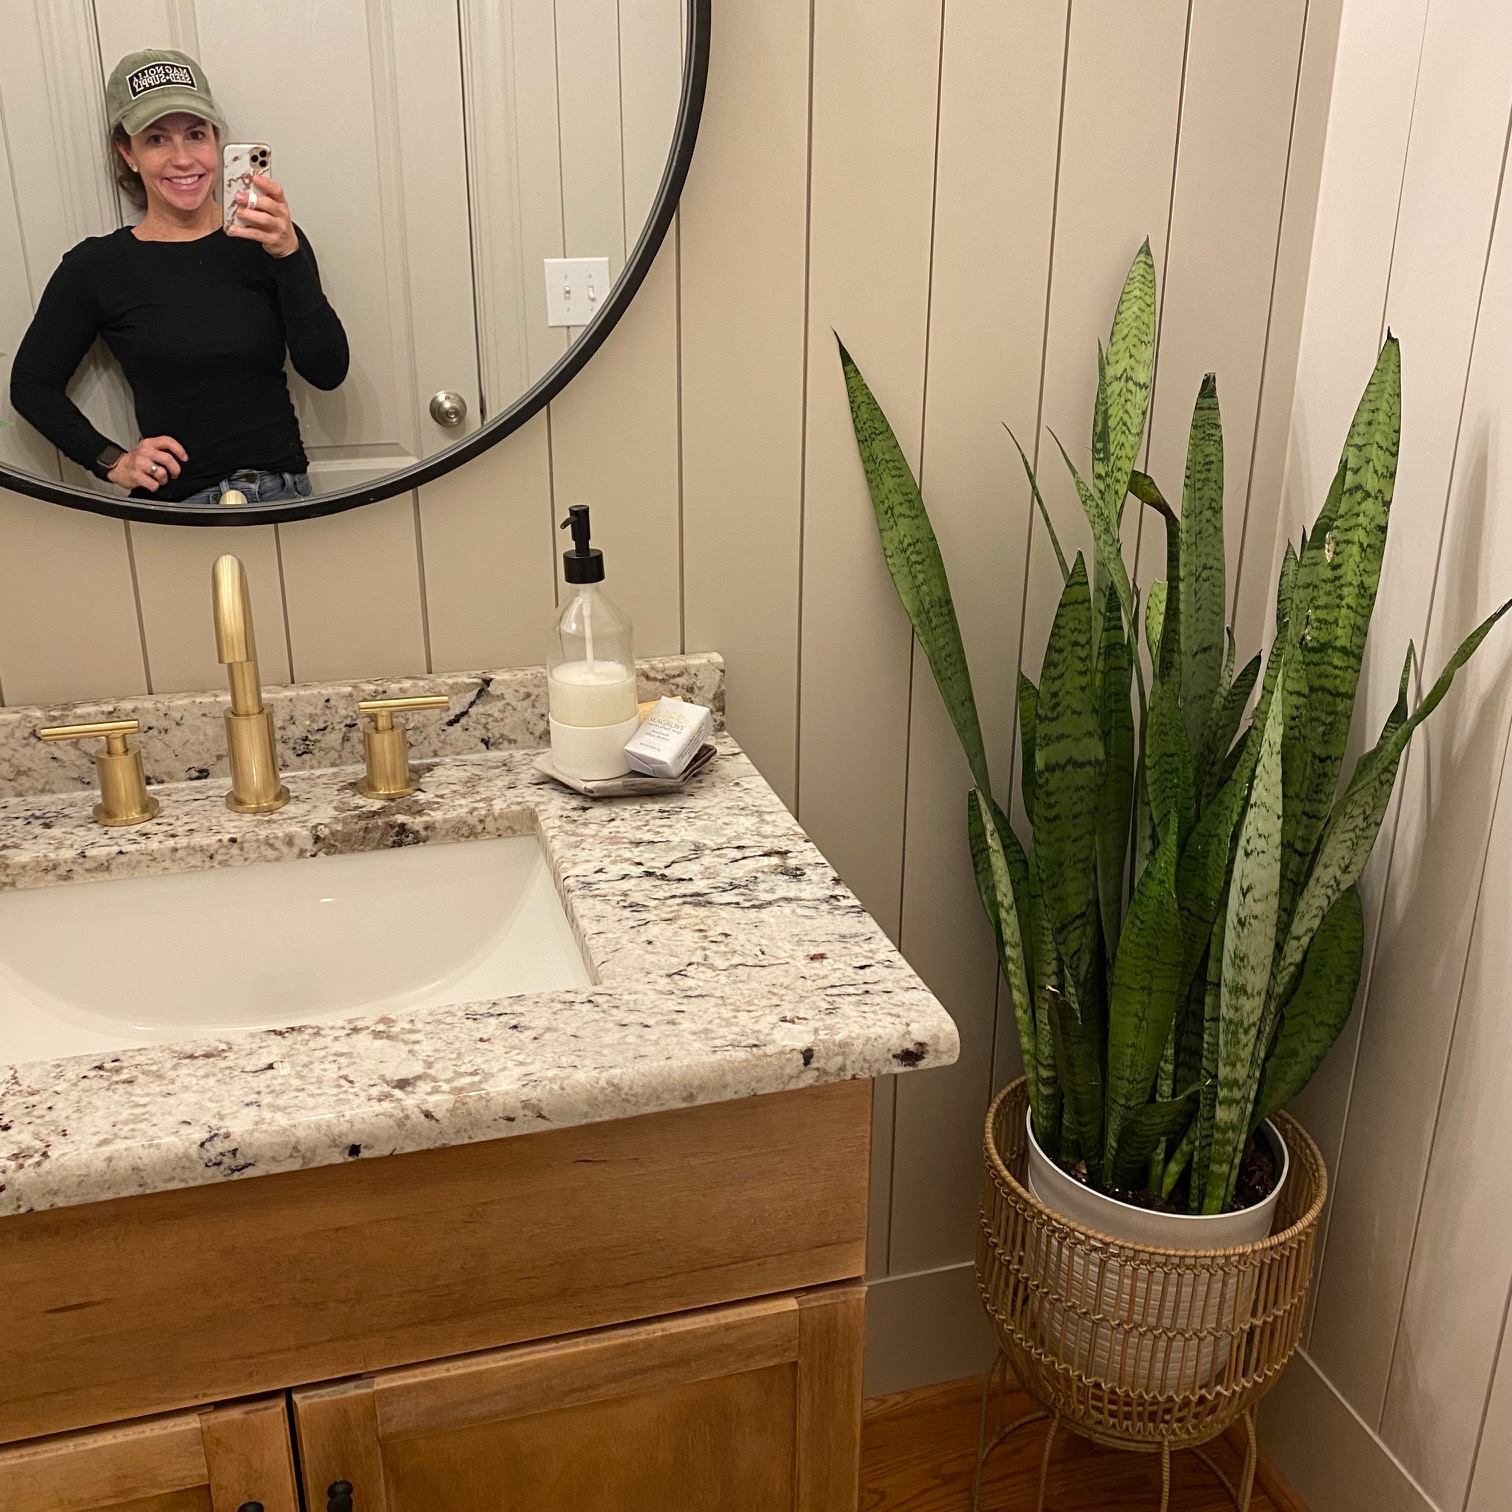
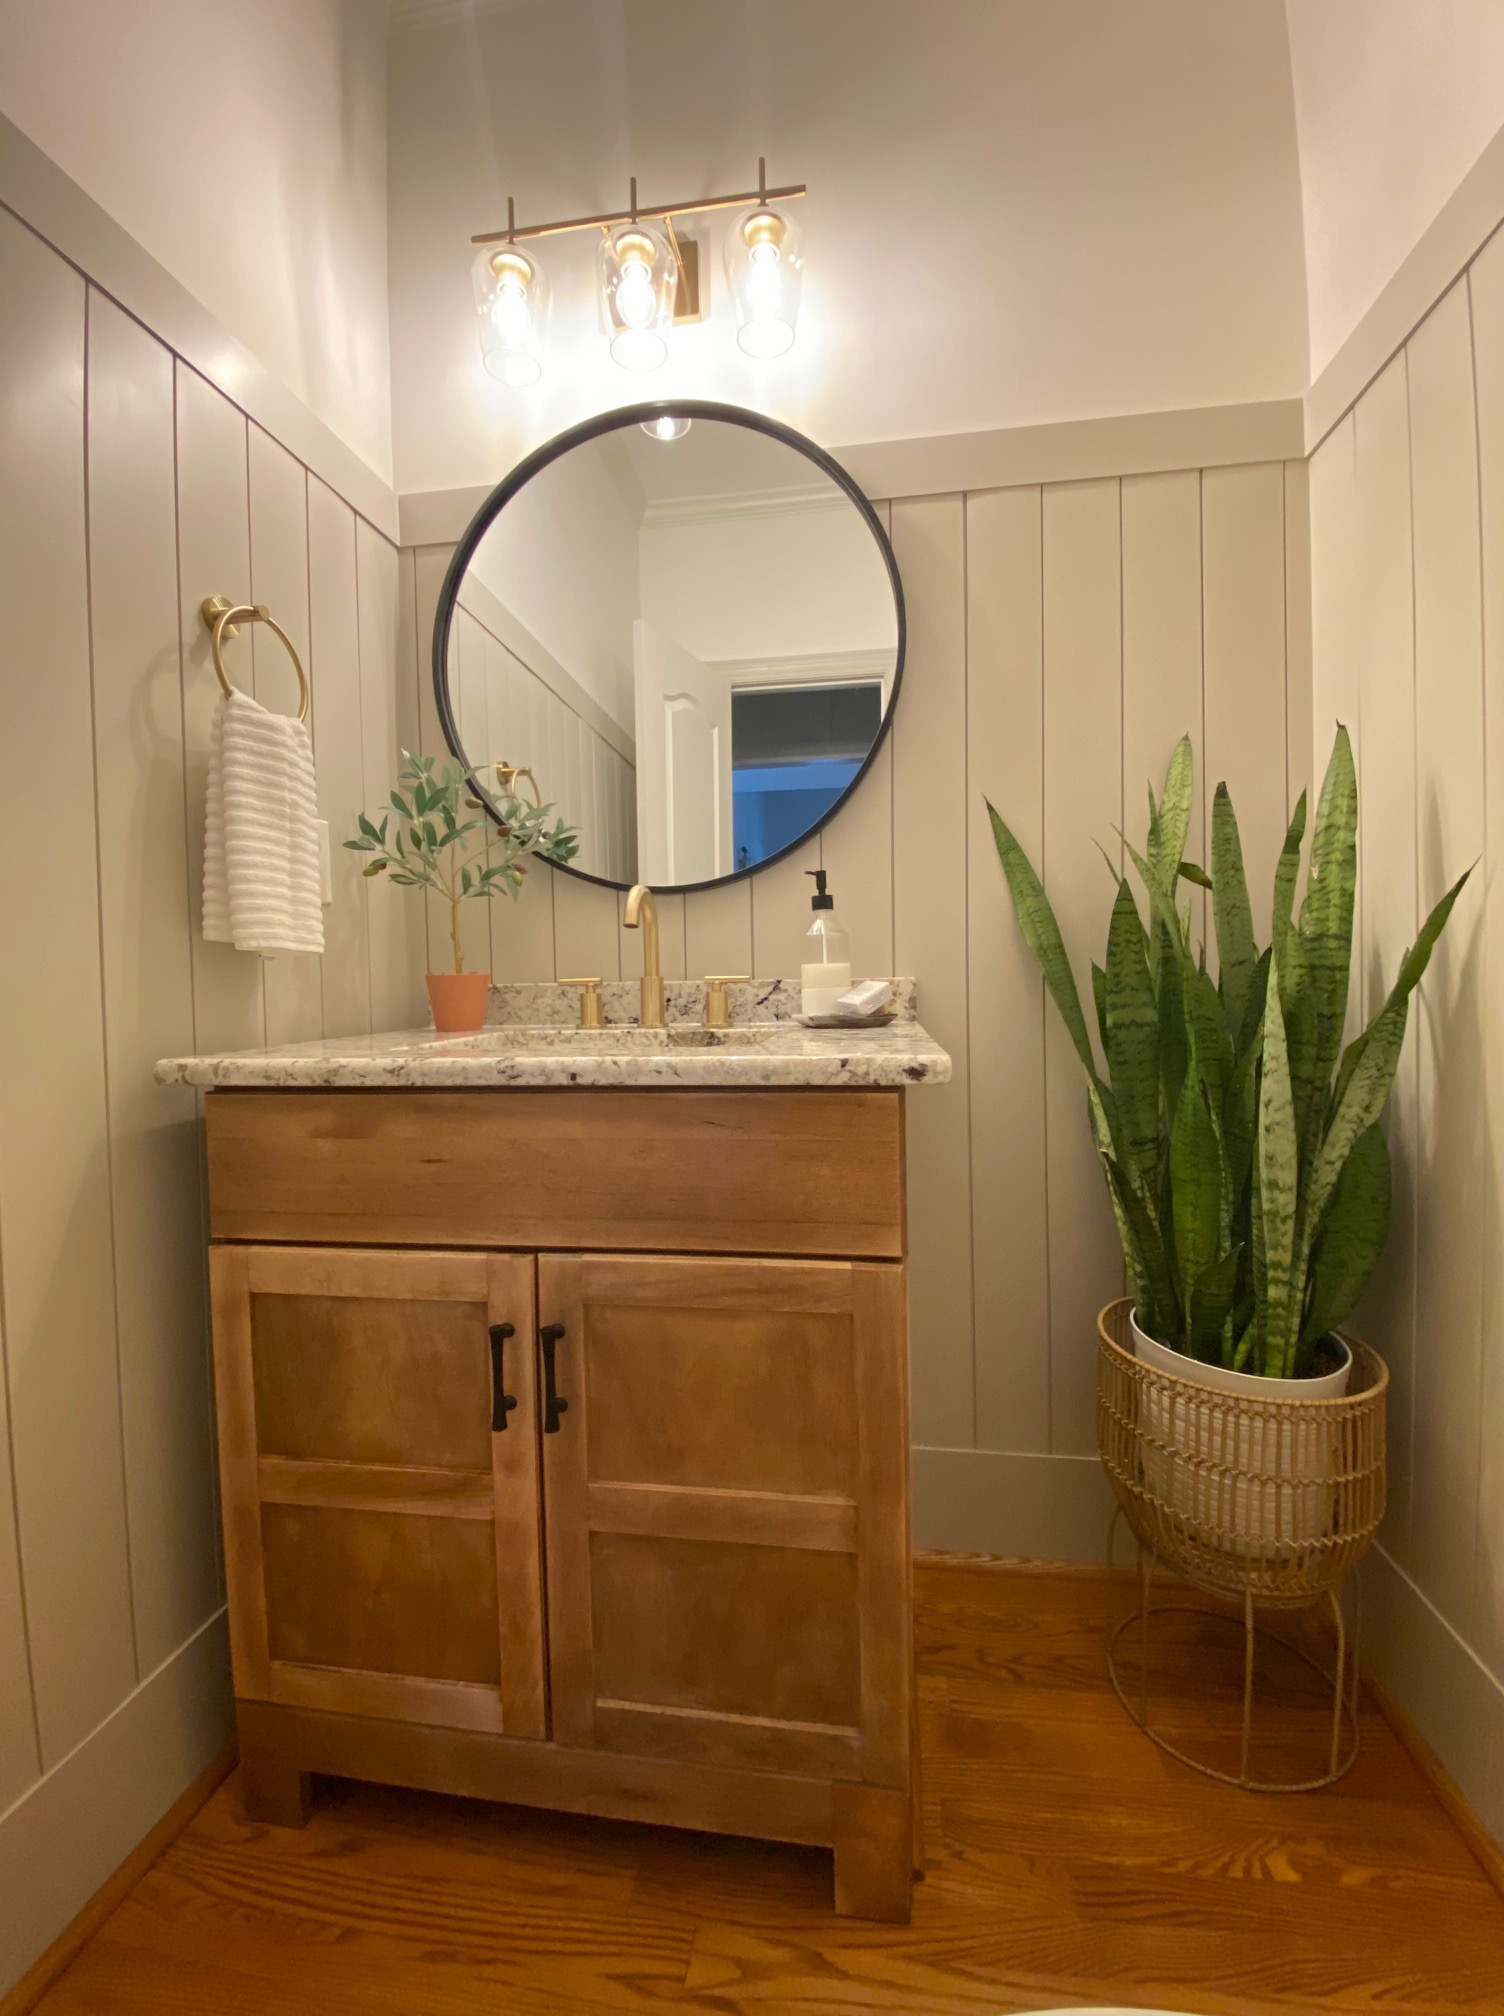
Source a local company to fabricate a new granite countertop for the existing vanity. This granite was going to the dump, and we scooped it up!
Find new faucet, lighting and accessories
Add vertical shiplap
Fresh coat of paint
Project Mood Board
You can find links to the lights, hardware, and faucet here, Product Links. The final faucet we went with can be found here. We have been very pleased with it. In fact, I installed it apart from connecting the drain to the p trap. I’m thankful for my dad who came over to connect them and teach me how they work.
First we demoed by taking out all 1/4 round, baseboards, disconnecting the water supply and removing the vanity.
We ended up having to purchase this set to help in removing the 1/4 round and baseboards. Even still, it proved to be challenging because the installers used 3 inch nails which is excessive in my opinion.
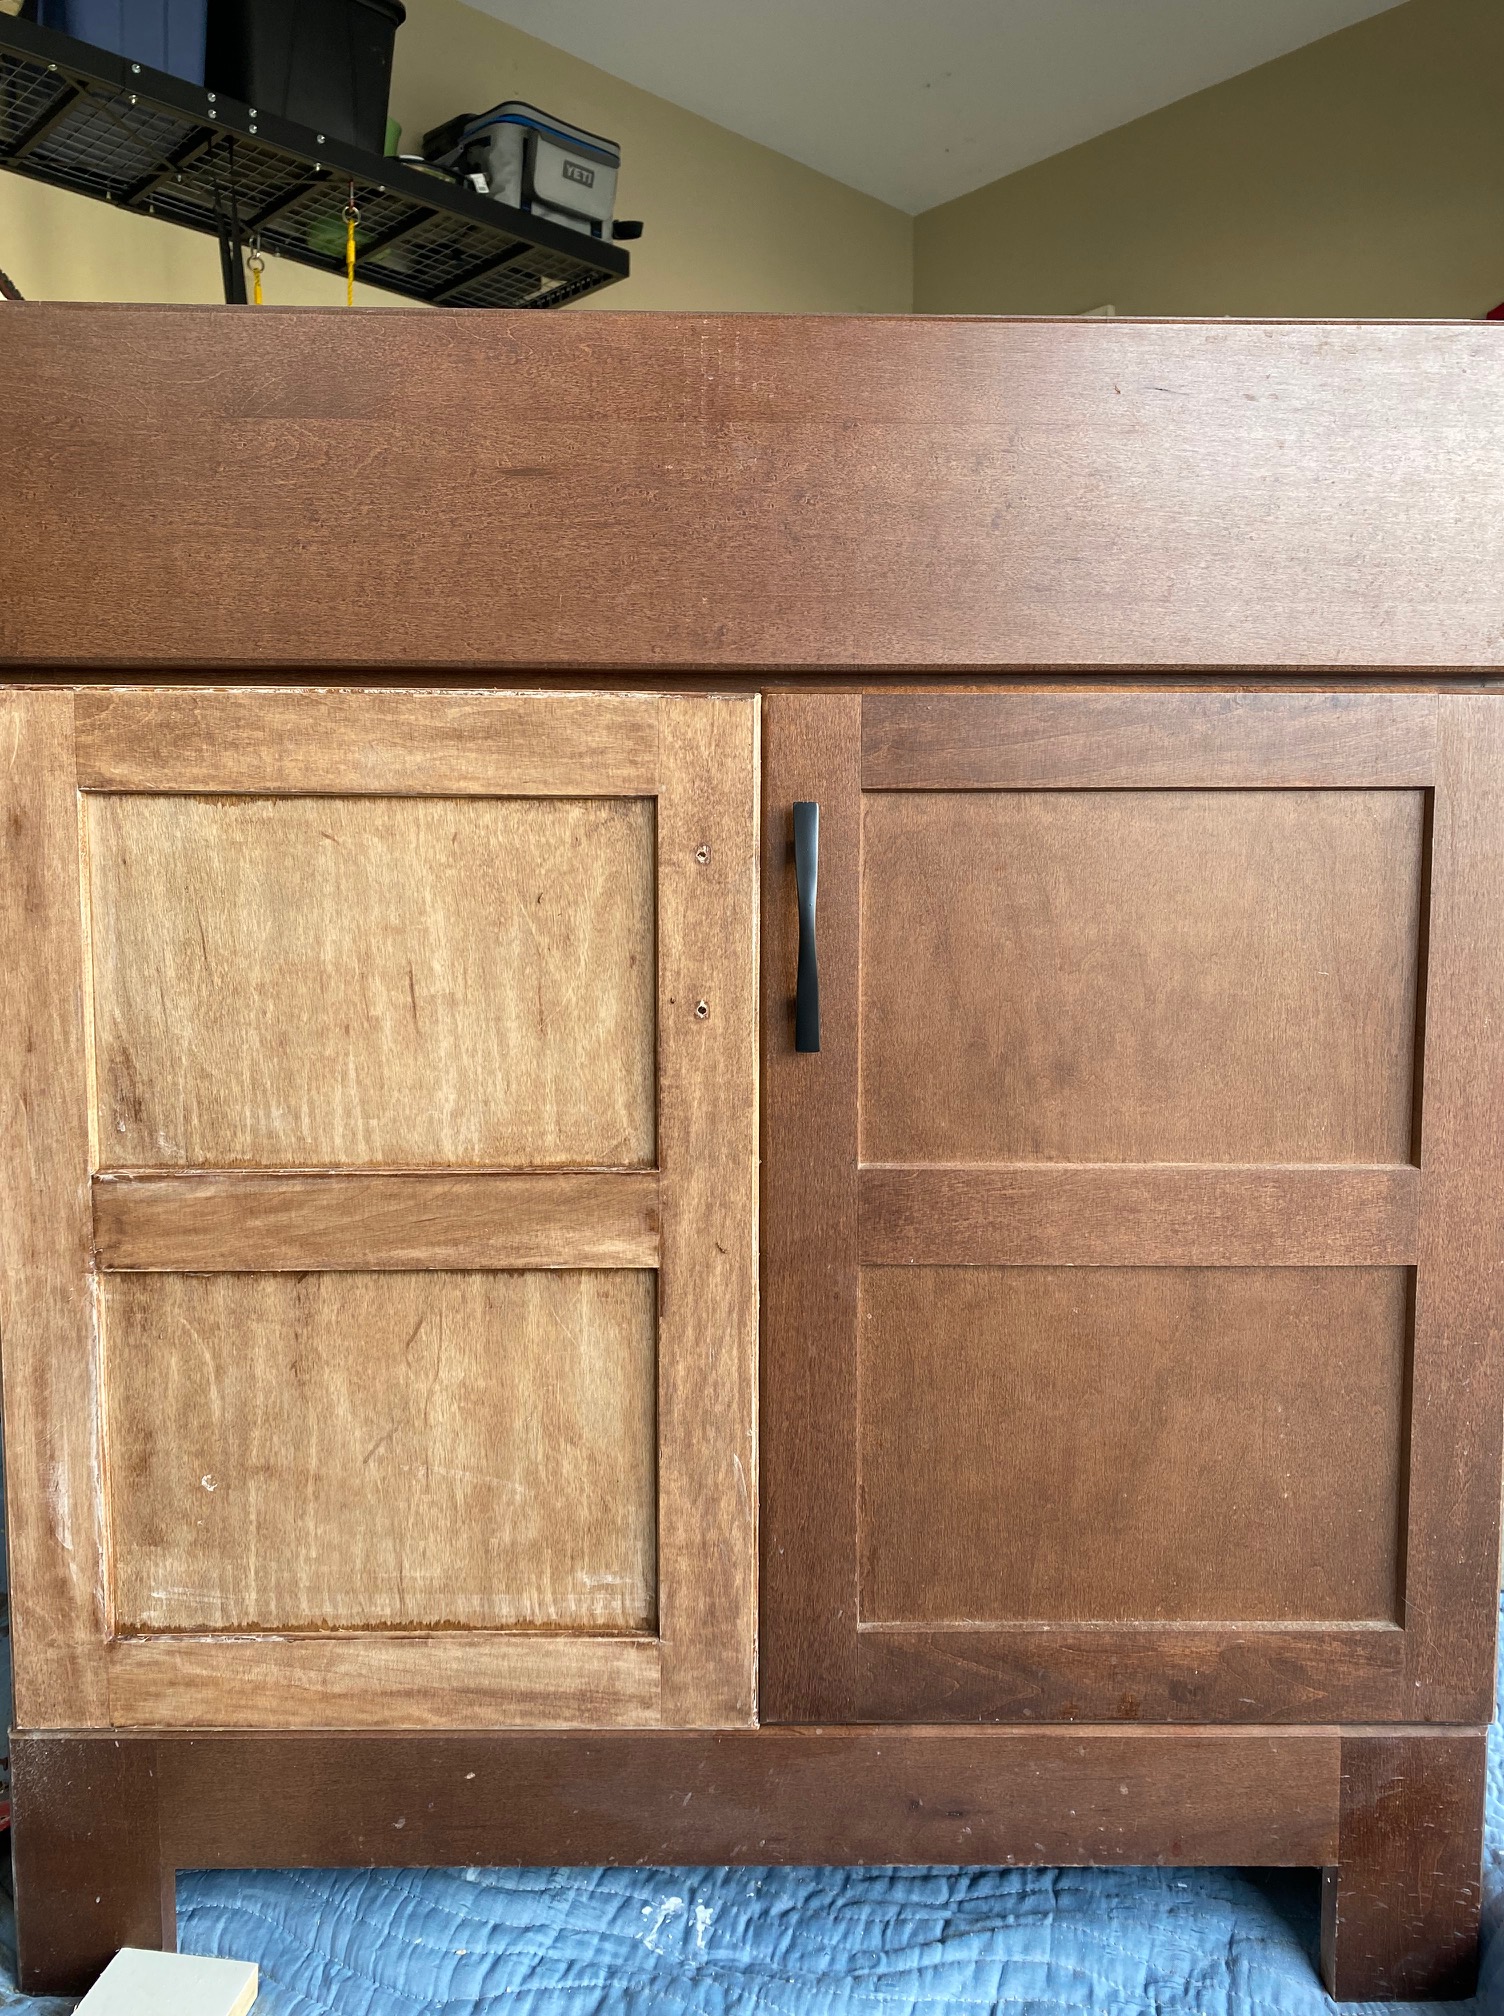
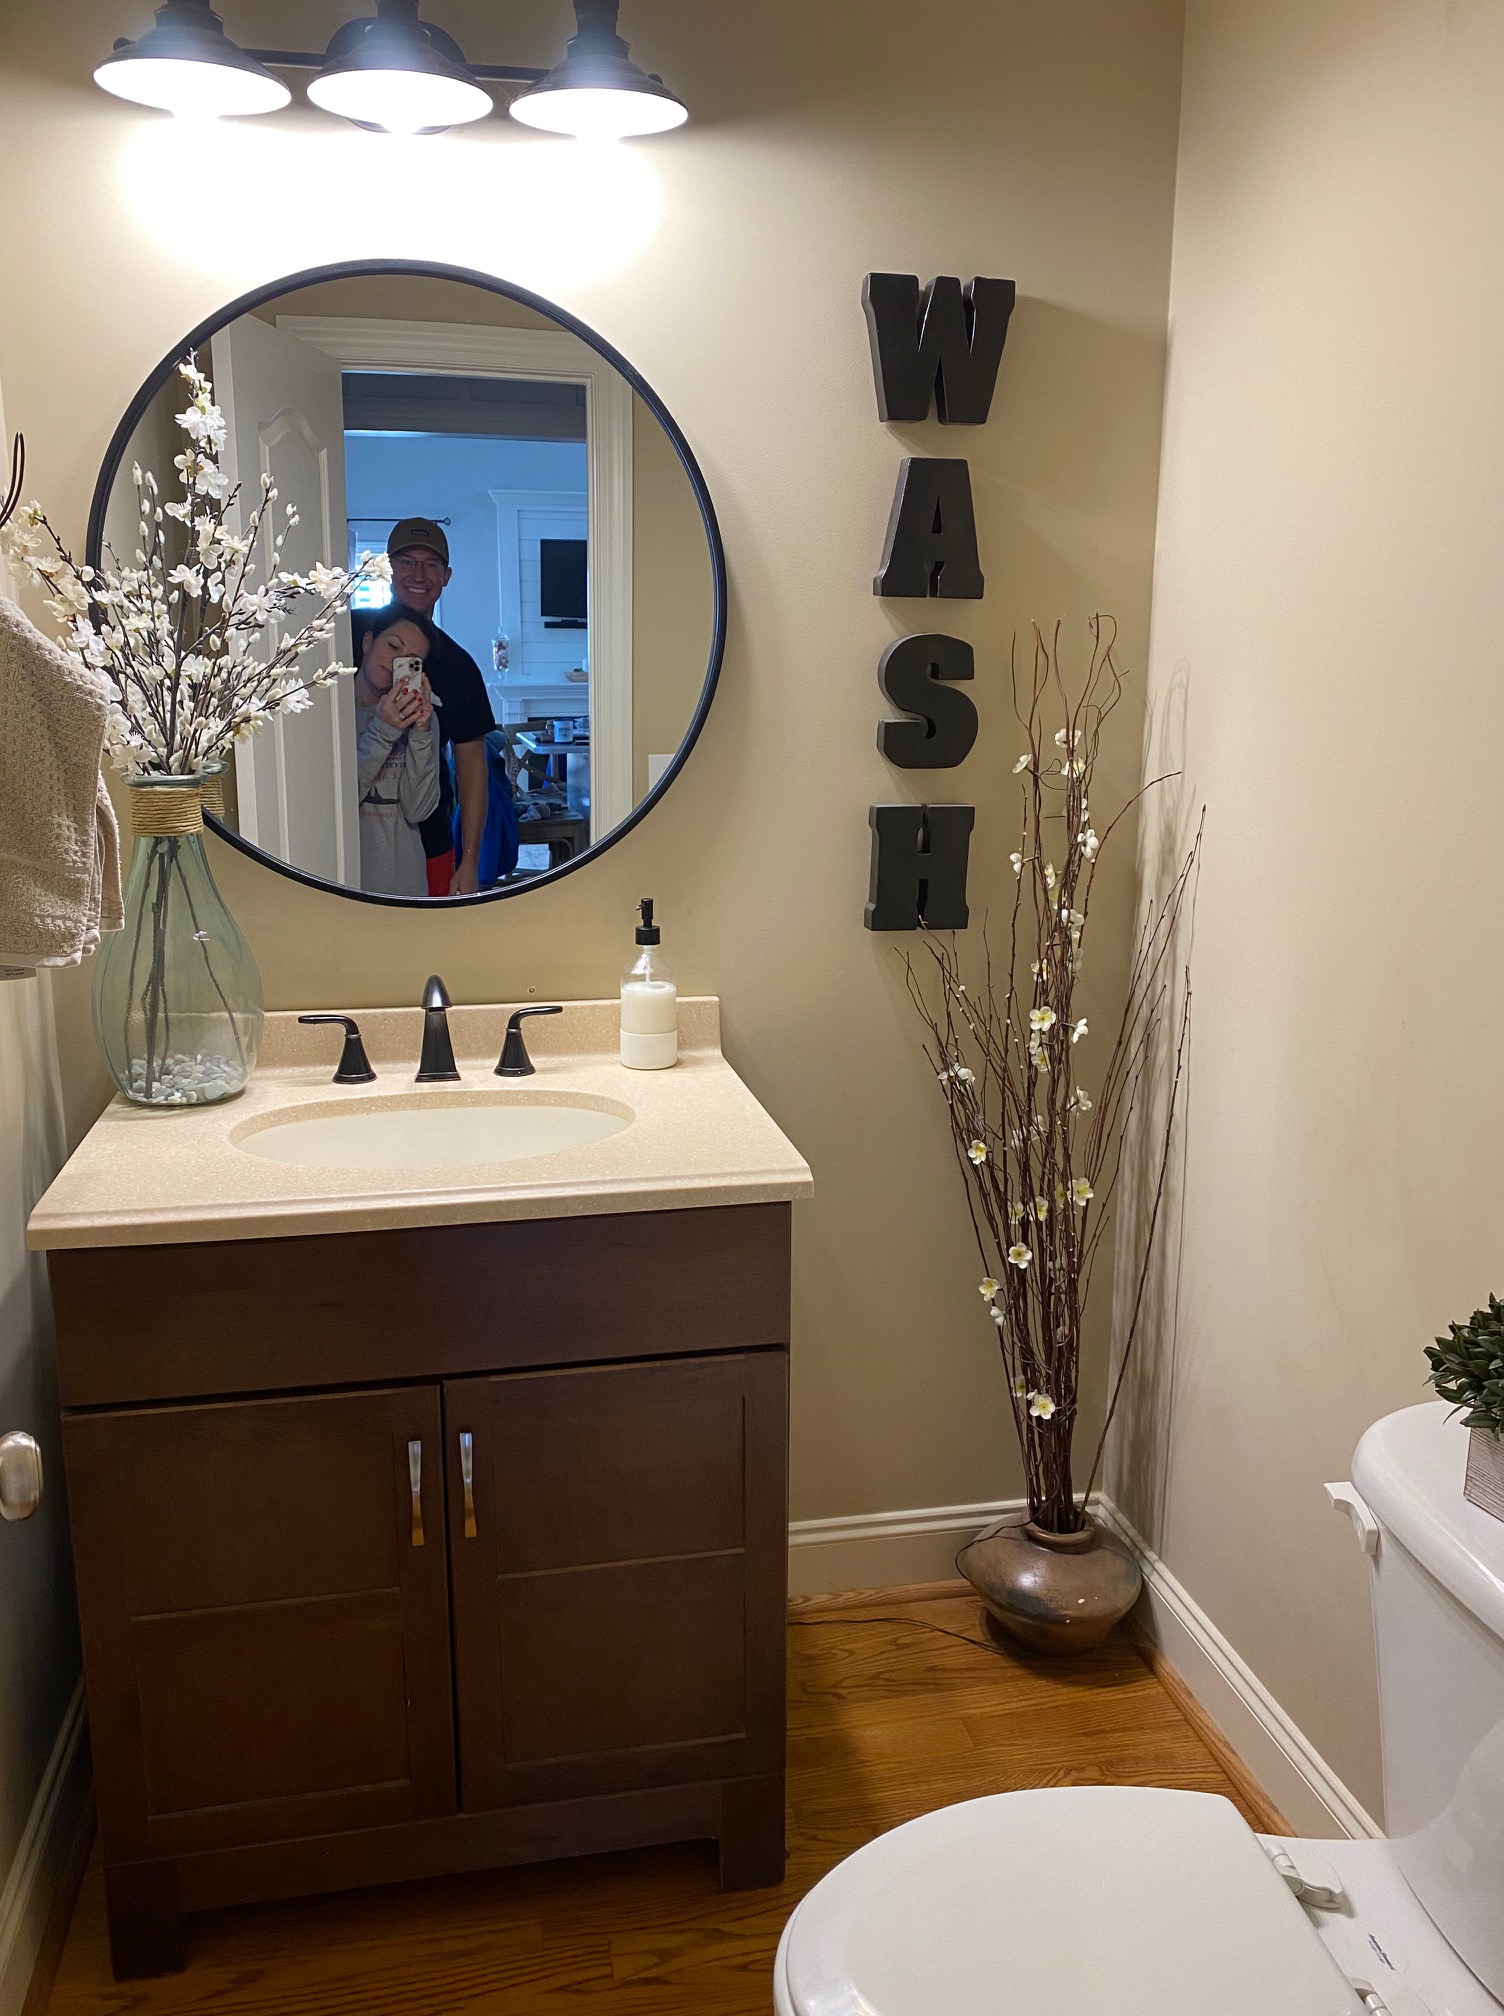
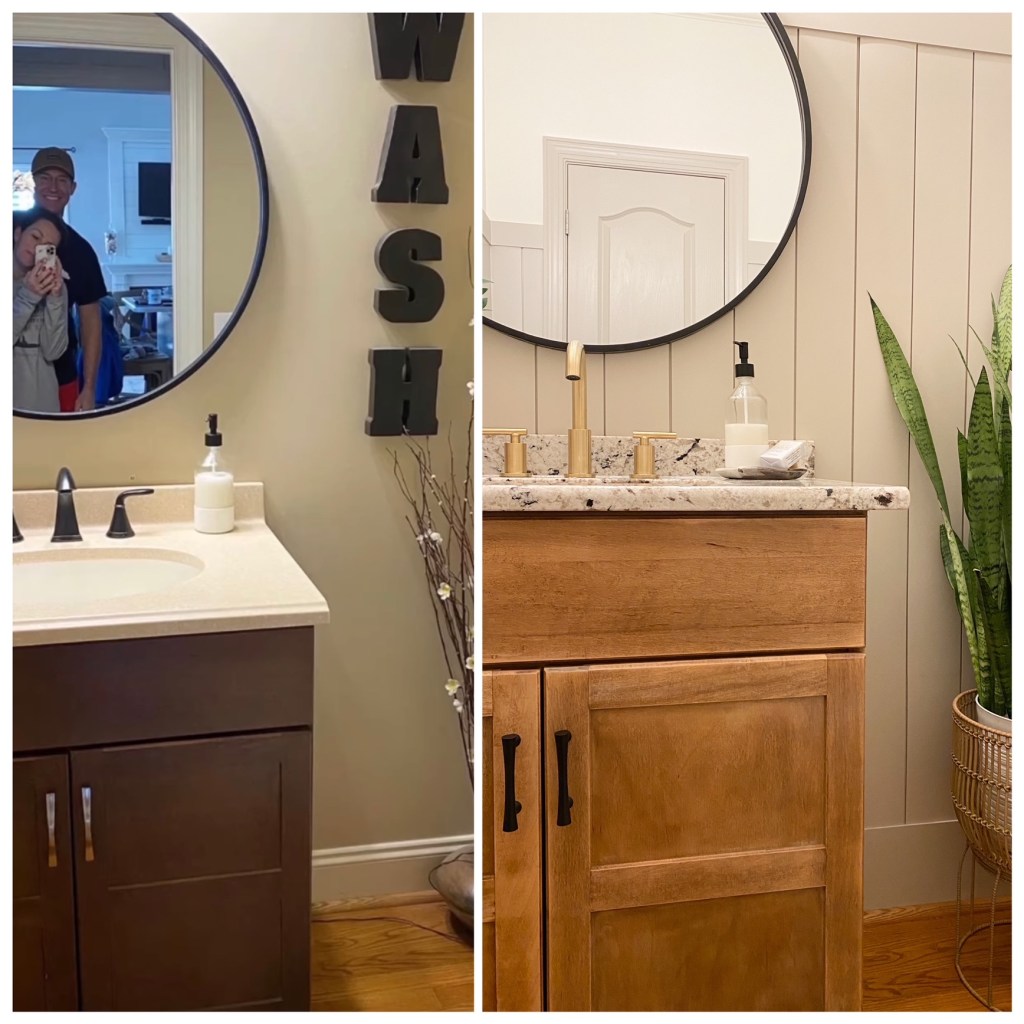
As you can see, the before was just “blah” and didn’t fit our style at all. As for the layout of the bathroom, we would have never designed it this way but we had to work with it.
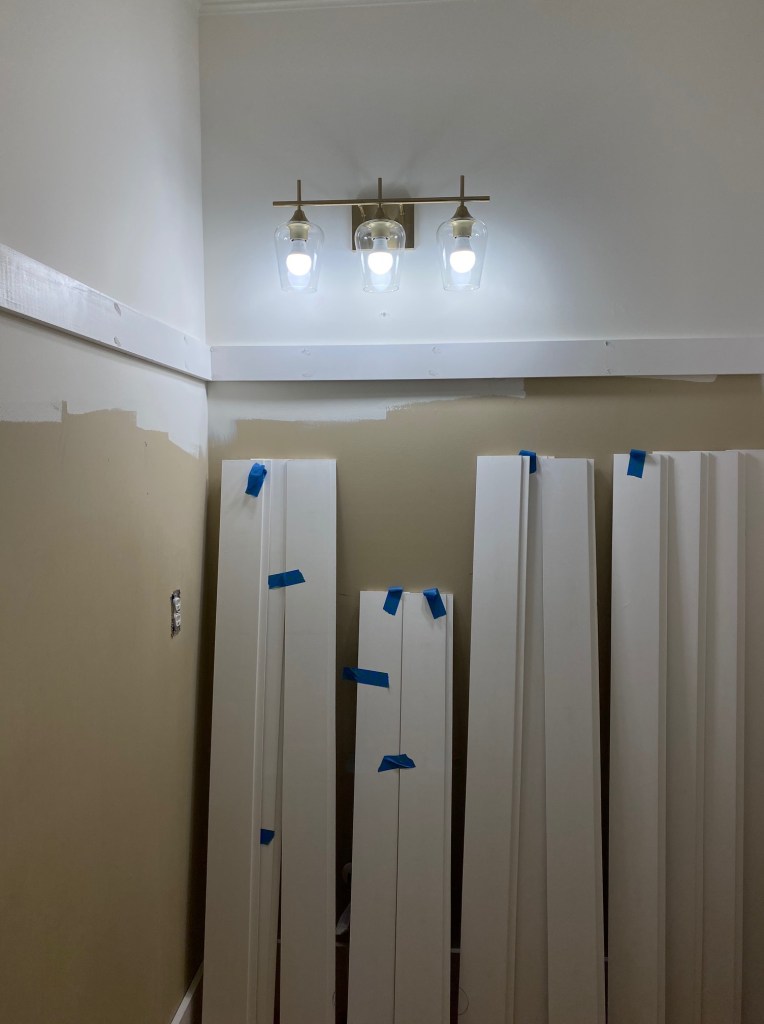
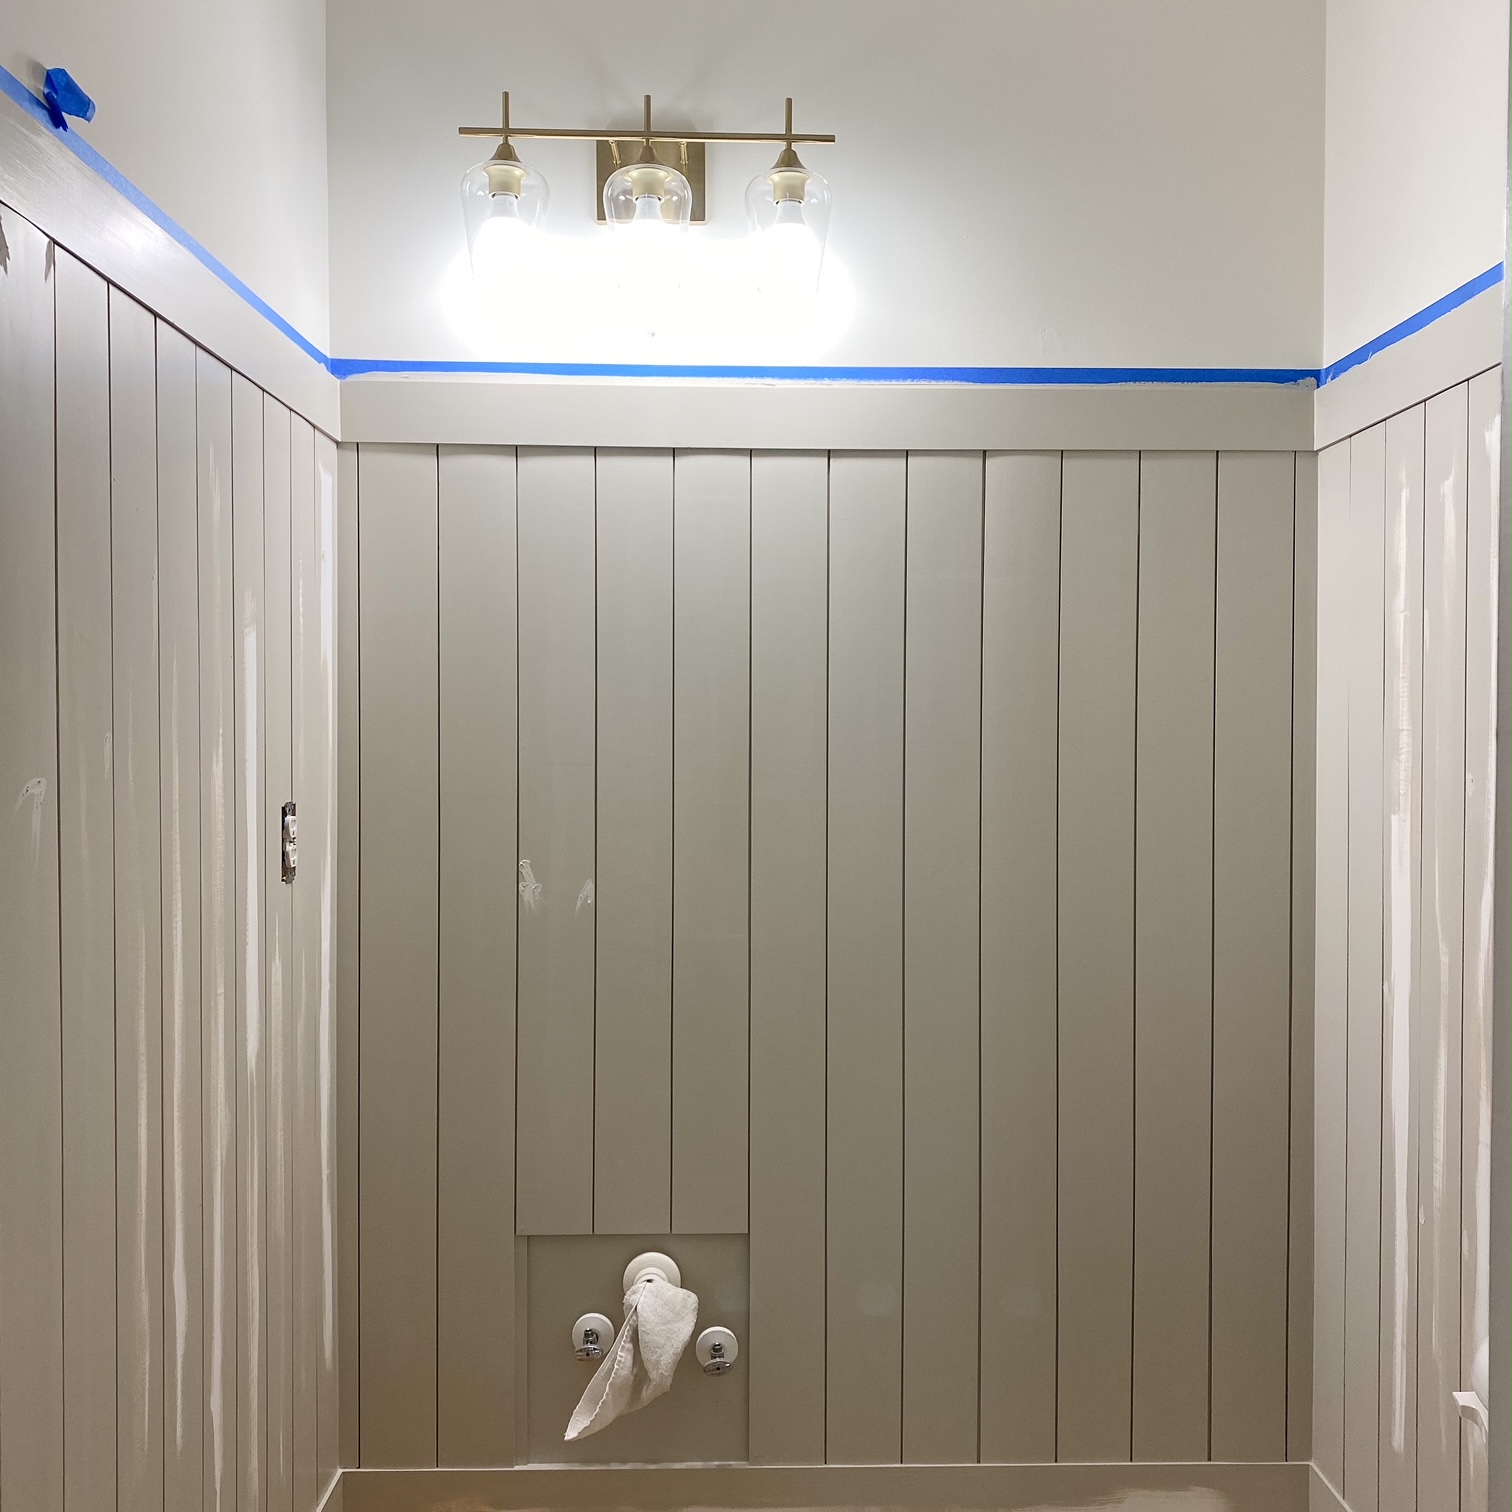
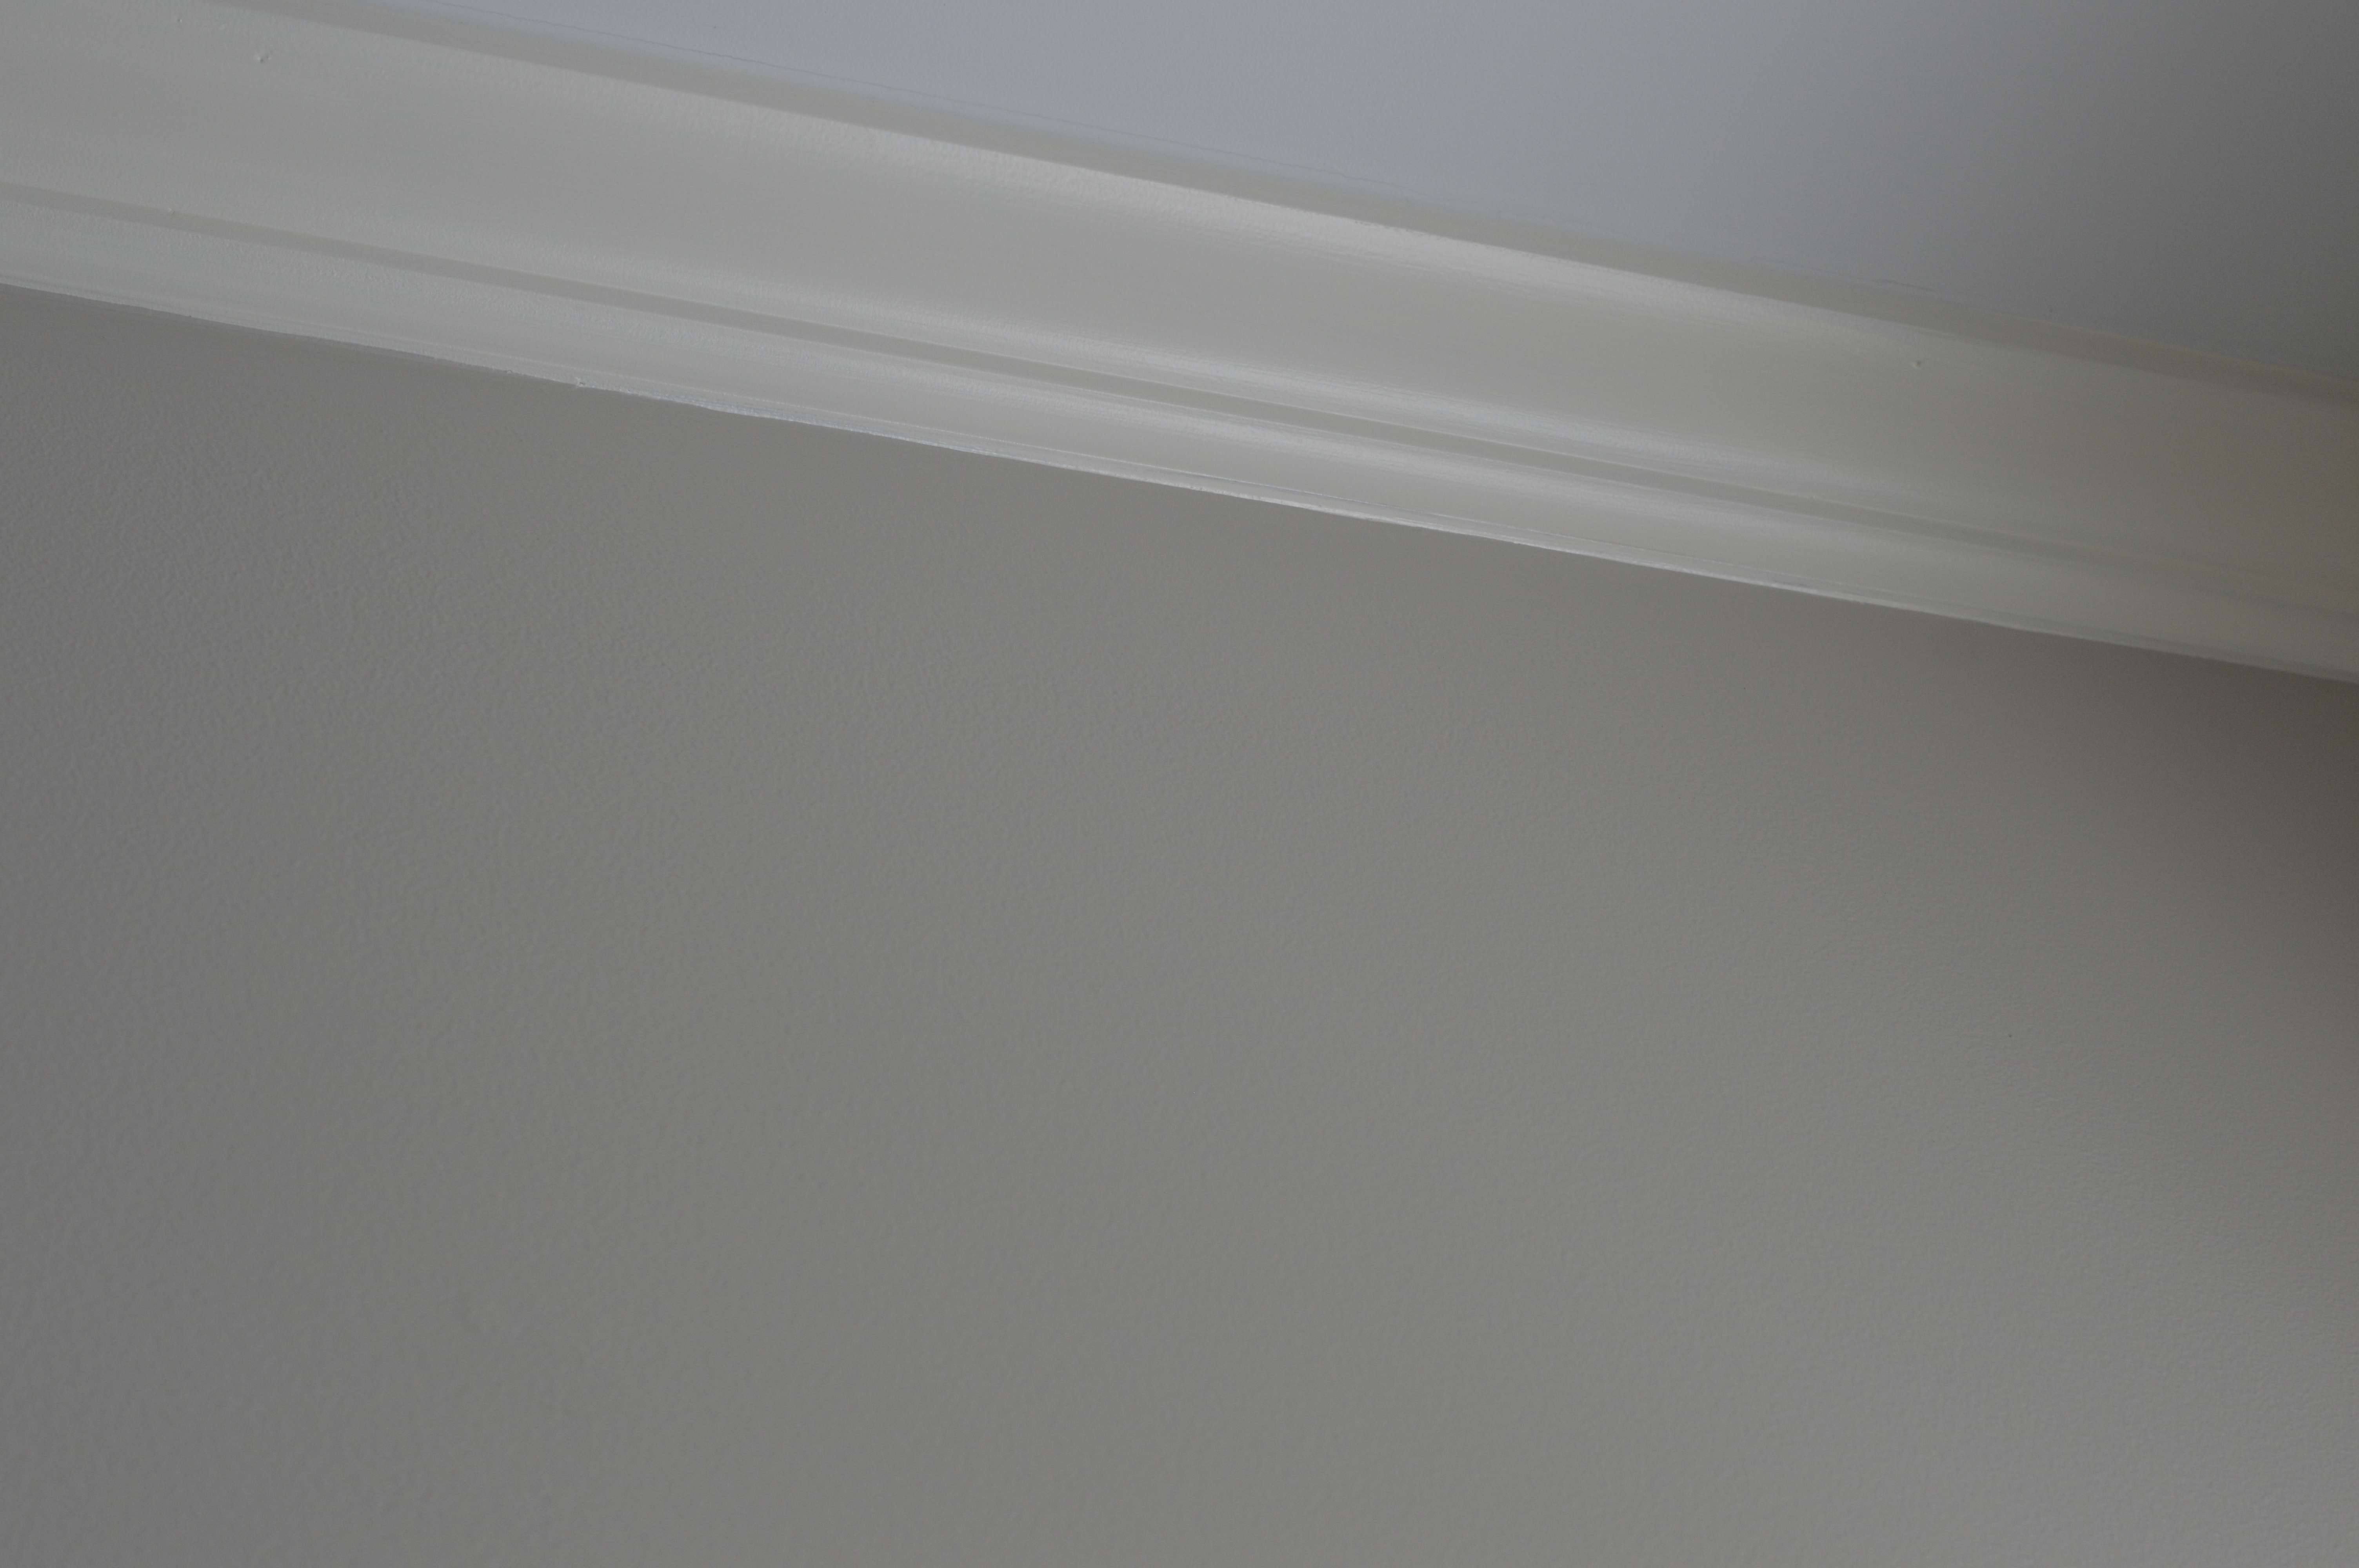
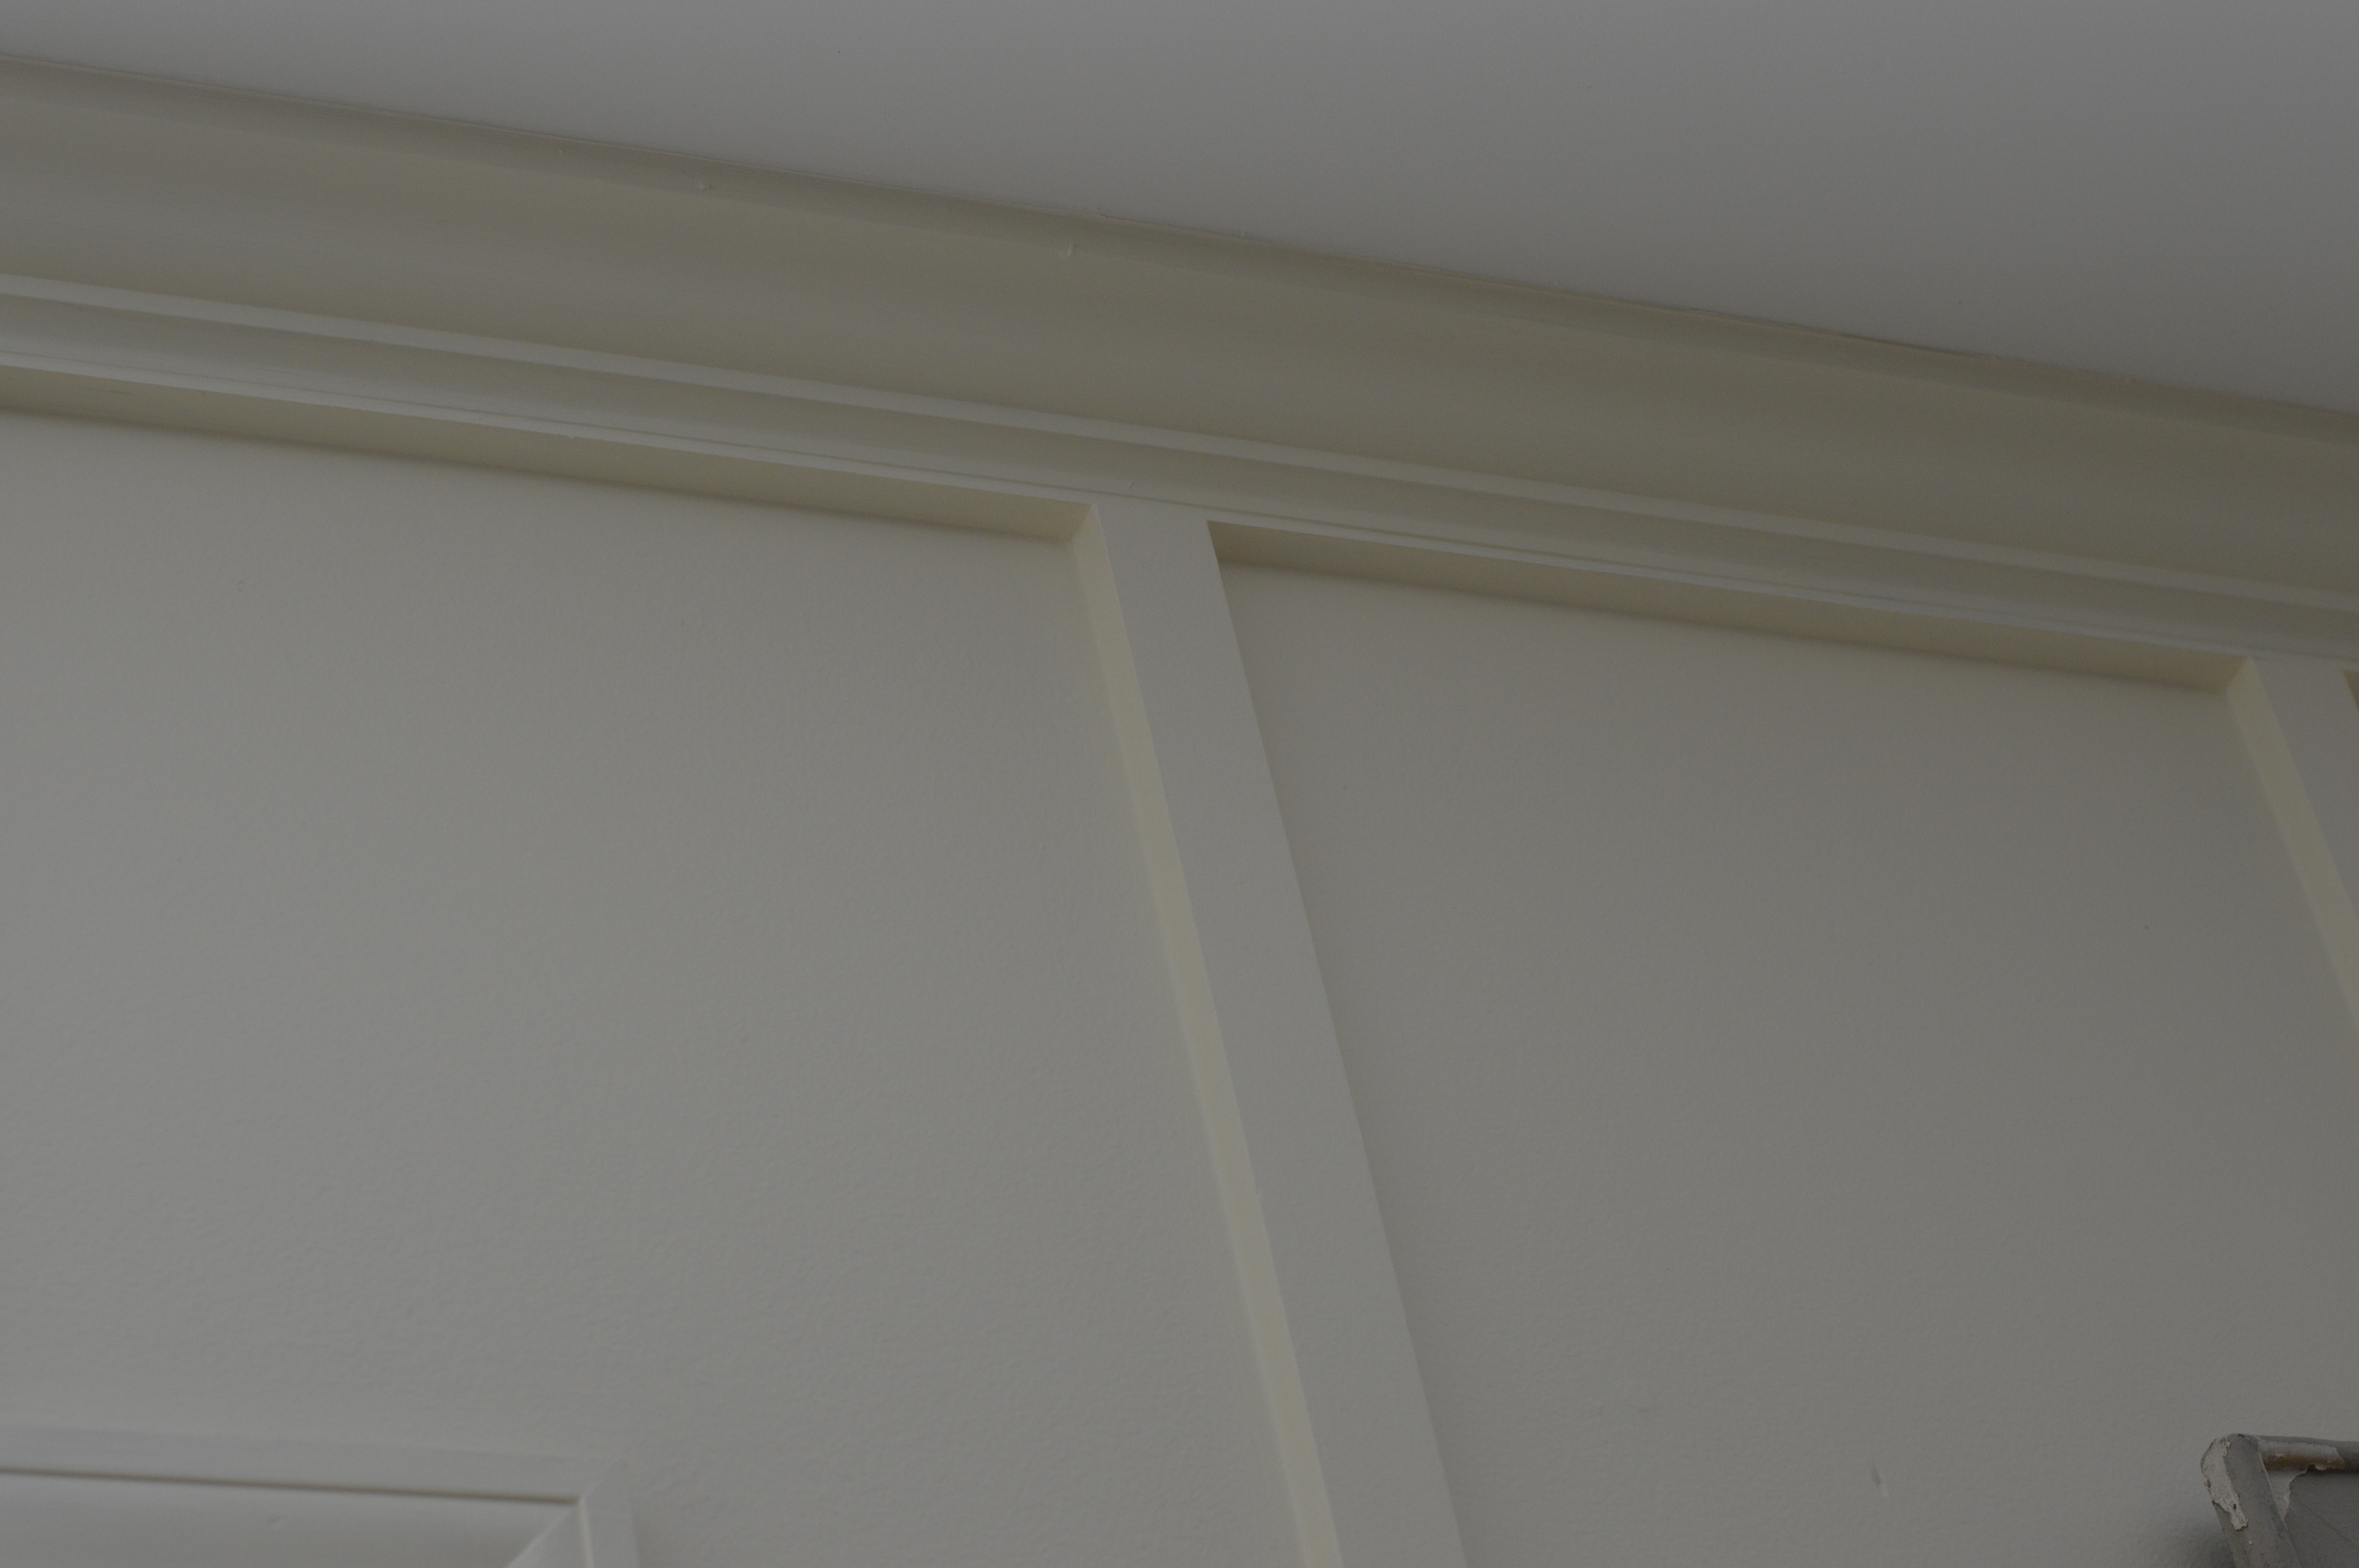
After the space was cleared out, I painted the top 1/4 section of the walls White Dove and the crown molding, and ceiling. Then we added in new baseboards, 1×8 primed pine as the MDF was limited for us.
After baseboards and paint, we added a 1×4 piece of trim that was our finishing cap and would act as the point where we measured for each vertical shiplap board.
At this point in the project, I had also switched out the light fixture but had not yet purchased new light bulbs that were a softer lume.
Once we both cut down our shiplap to size for our first wall, I painted the edges of each piece prior to nailing them to the wall. As I did this, my husband marked the studs on the walls.
As paint was drying on the walls, I decided to update the existing vanity and strip the brown stain. I saw this inspirational photo which solidified my decision. Our granite was very similar in coloring.
I first tried a couple rounds of oven cleaner as stripper but I didn’t love the results. You can see the beginning process in the left photo. Next, I went the route of Citri Strip and it did much better. I also coated the doors with Citri Strip and wrapped them in plastic wrap to let them sit overnight before scraping off the product and stain. The result revealed a beautiful color that was very similar to what I was hoping for.
With a little grit, I cleaned up the corners to get it to match using steel wool and 220 grit sandpaper.
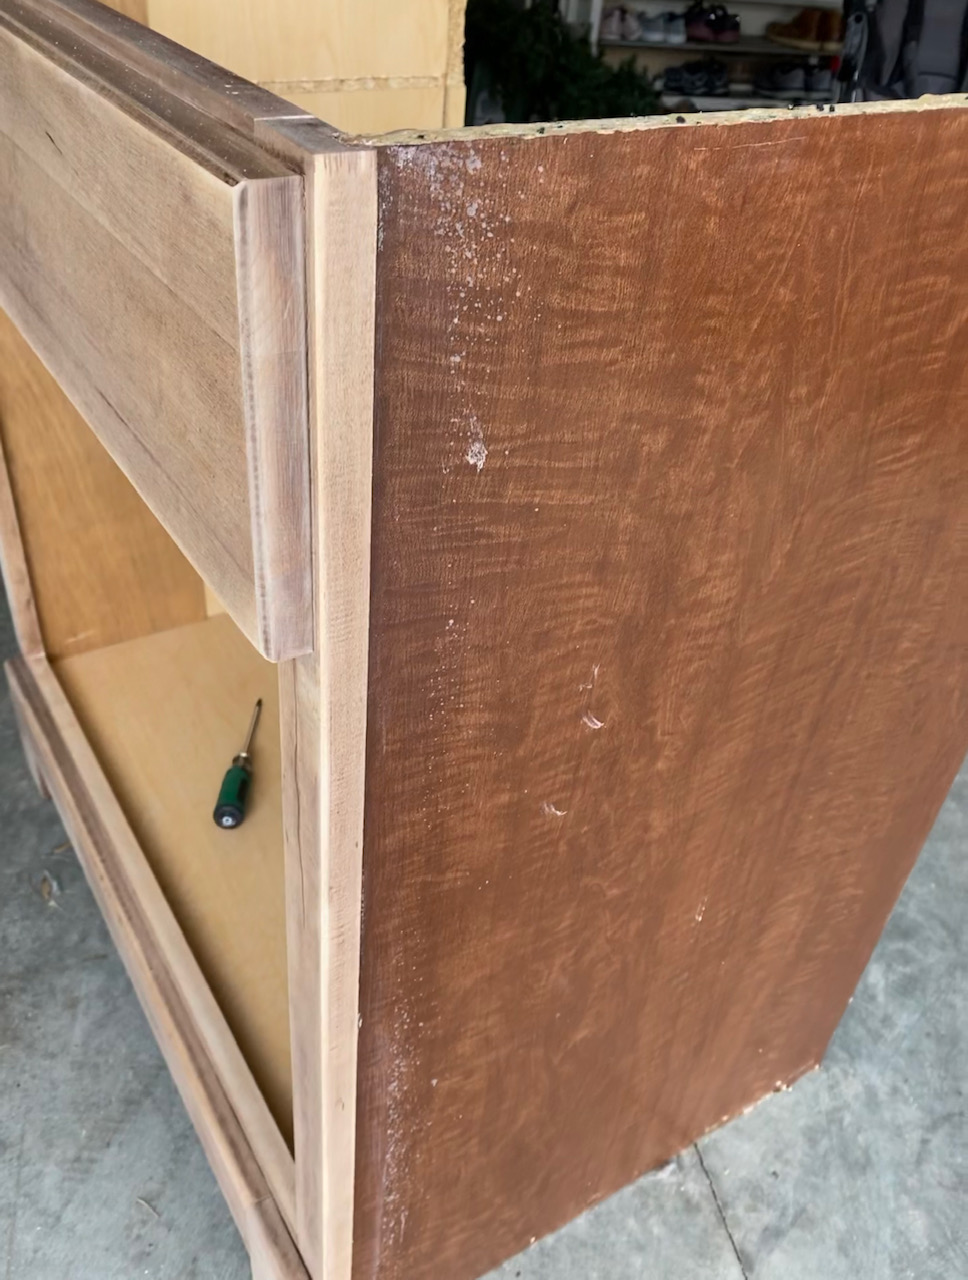
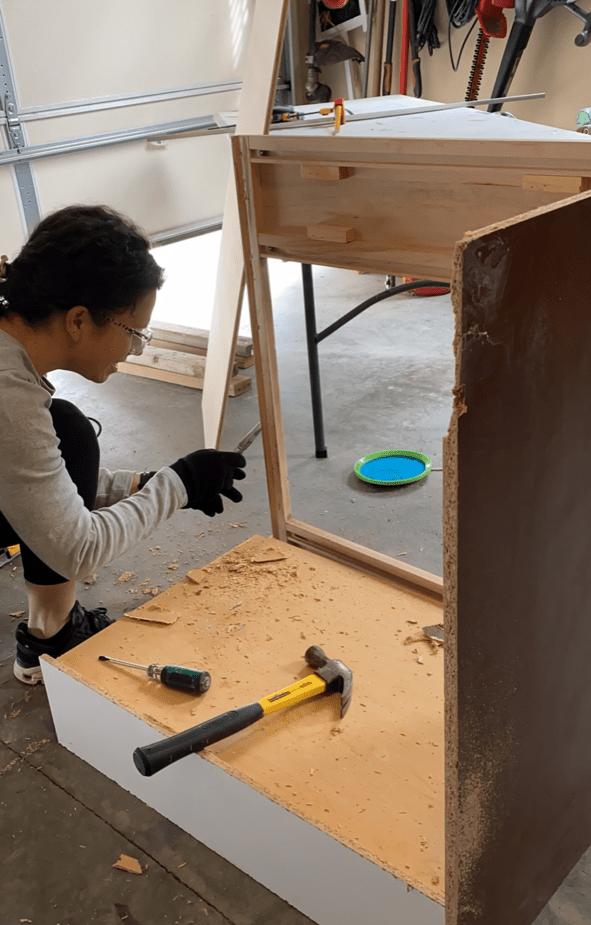
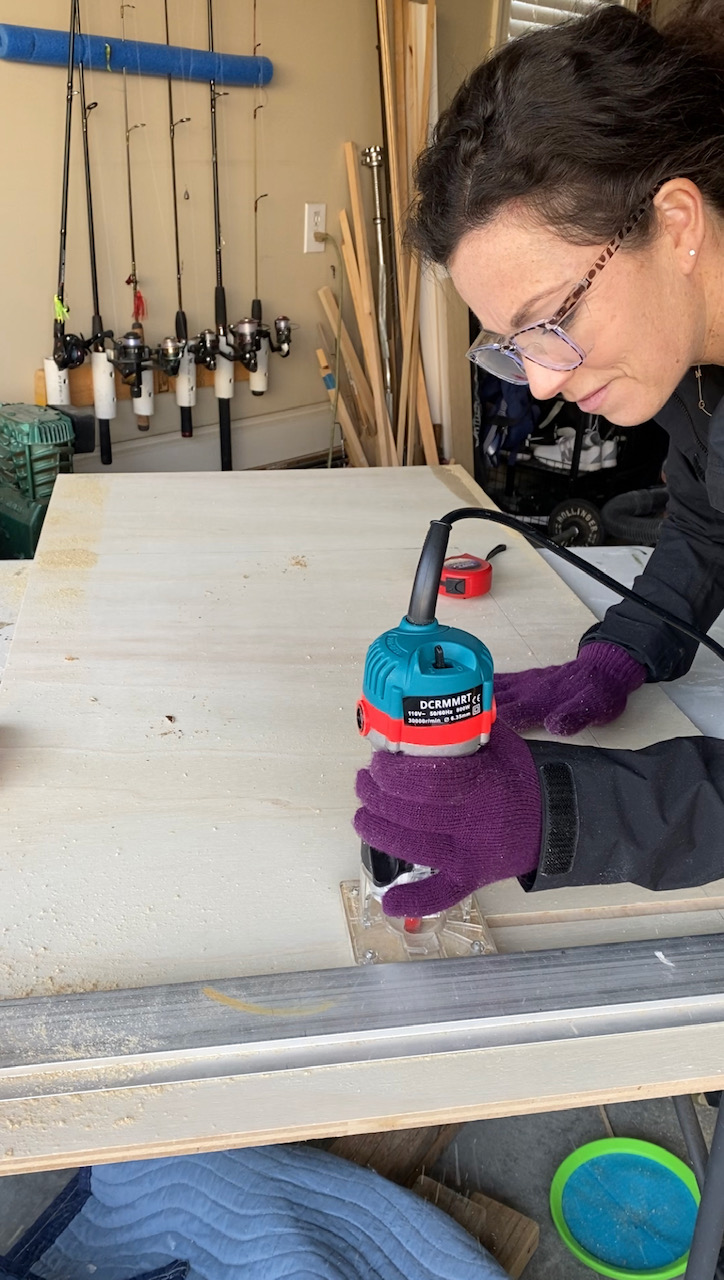
Where this vanity got tricky was the fact that I had to update the side panels. They were not made of real wood but had a veneer finish; therefore, stipping them of stain wasn’t an option. I had to replace the side panels with new 1/2 inch sheets of plywood. We were out of scrap wood that met the size requirements so I purchased 2×4 sheets from Home Depot and cut those down to size. Without using a table saw, I used a guide, clamps and my skill saw to trim it to size. I feel much more comfortable with this tool vs. a table saw.
This also allowed me to try out my new router tool to create a ledge for the cabinet shelf to rest in, just as it did on the original side panels. This was such a fun tool to use. I look forward to future projects when we can try out different bits that it came with.
After the new side panels were cut to size and the ledge routed, I had the task of matching the stain to the stripped down vanity color. I did this with a combination of Special Walnut, watered down white paint as a white wash, and Dark Walnut. I ended up doing 2 more additional coats of dark walnut to darken it up more and found the perfect match.
After stain, the side panel was attached with wood glue and 1 inch brad nails. I then finished it off with 1 coats of clear Matte Polycrylic. This is my favorite poly and is easy to work with. Tip: Between coats, you have to use 220 grit sandpaper to get the smoothest finish.
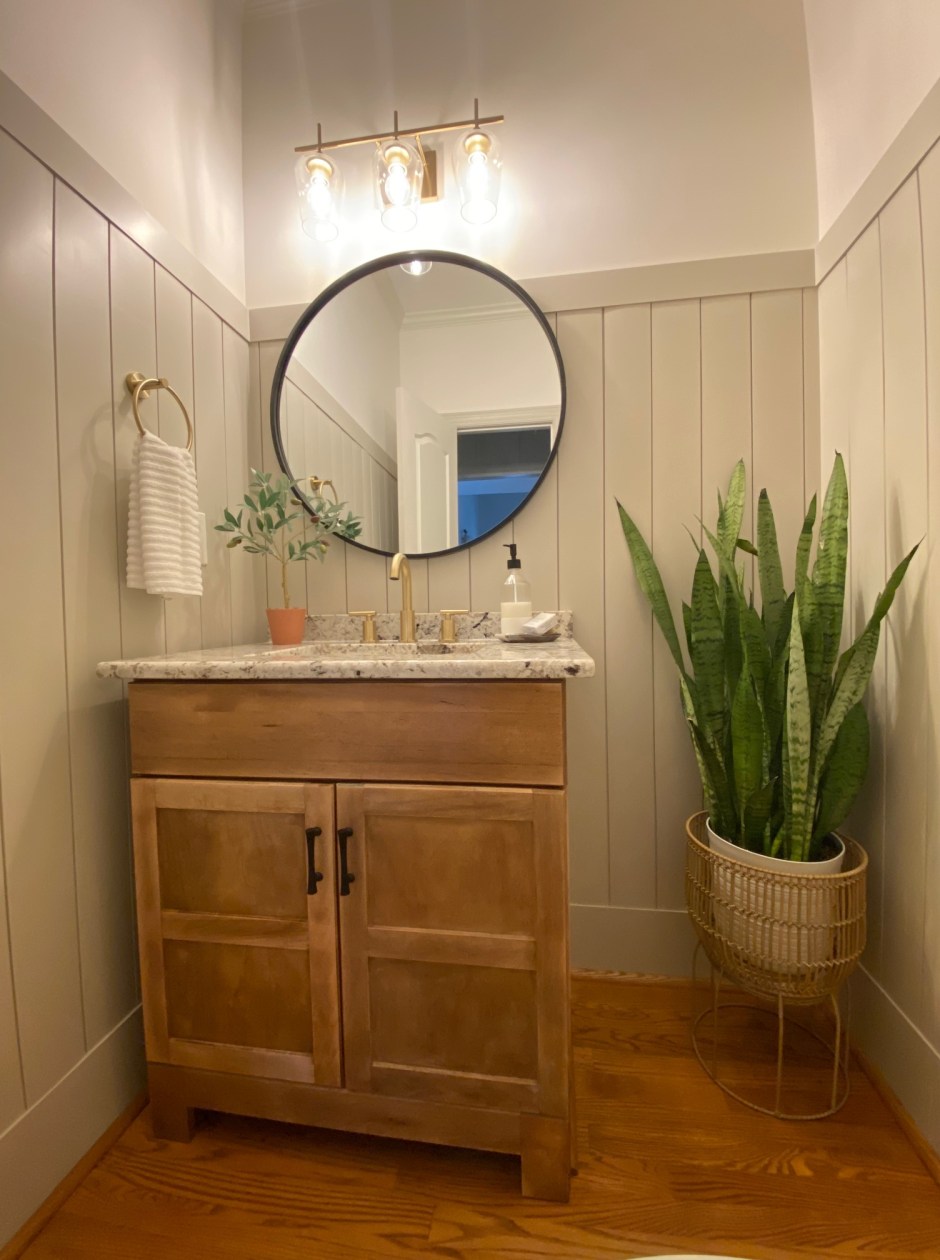
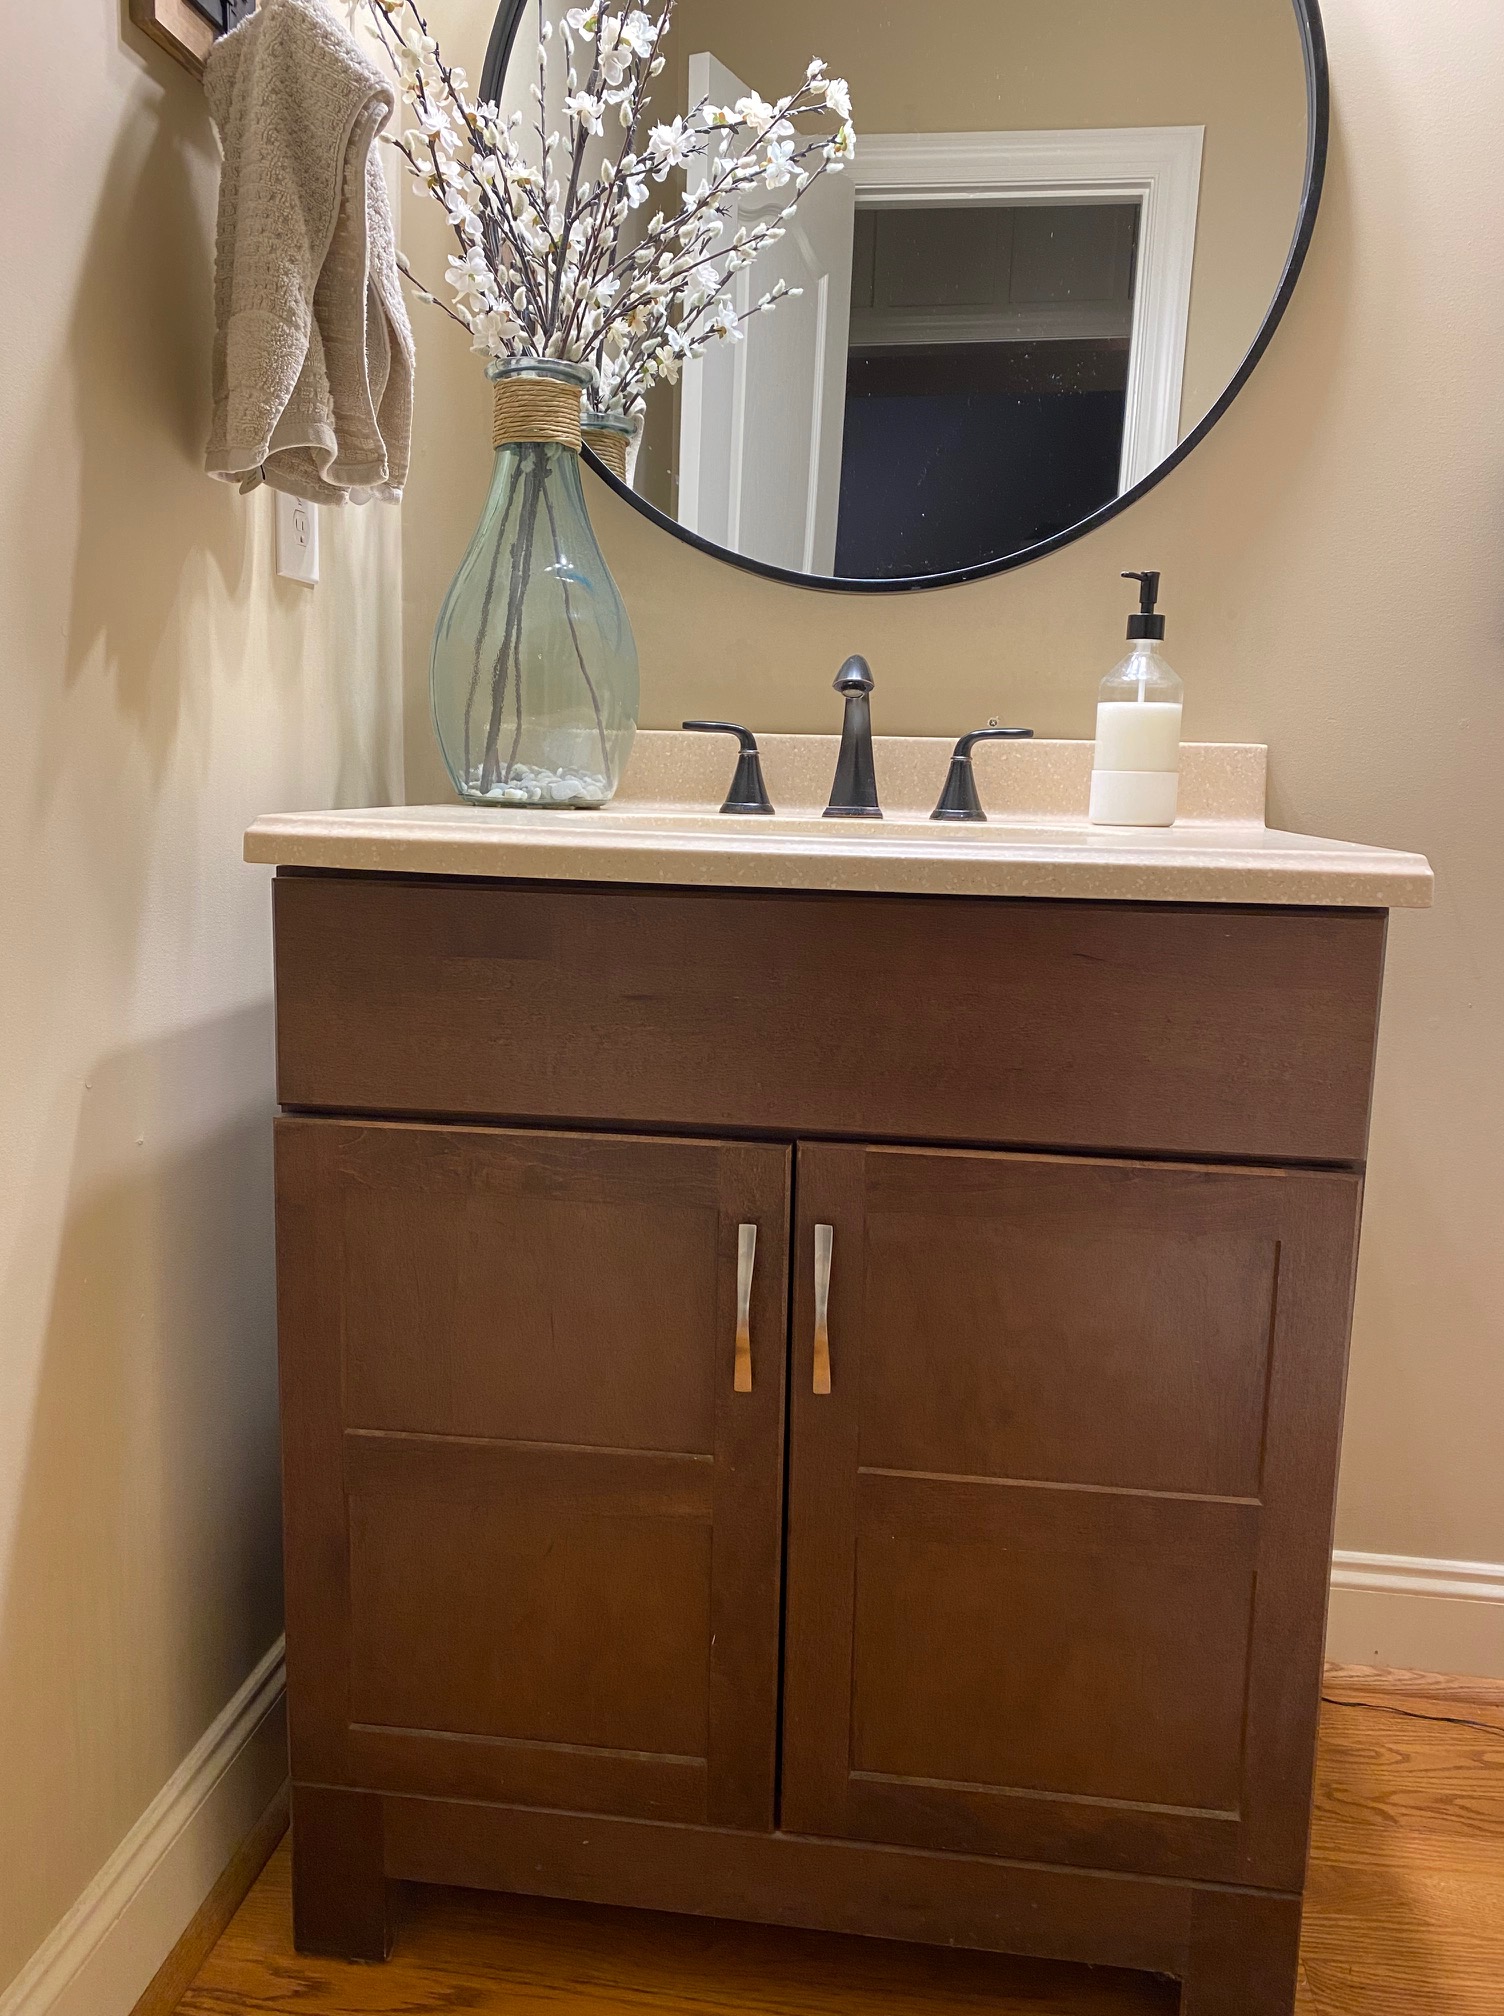
Check out the progression of adding the vanity back into the space, the counters, doors, faucet and new handle pulls.
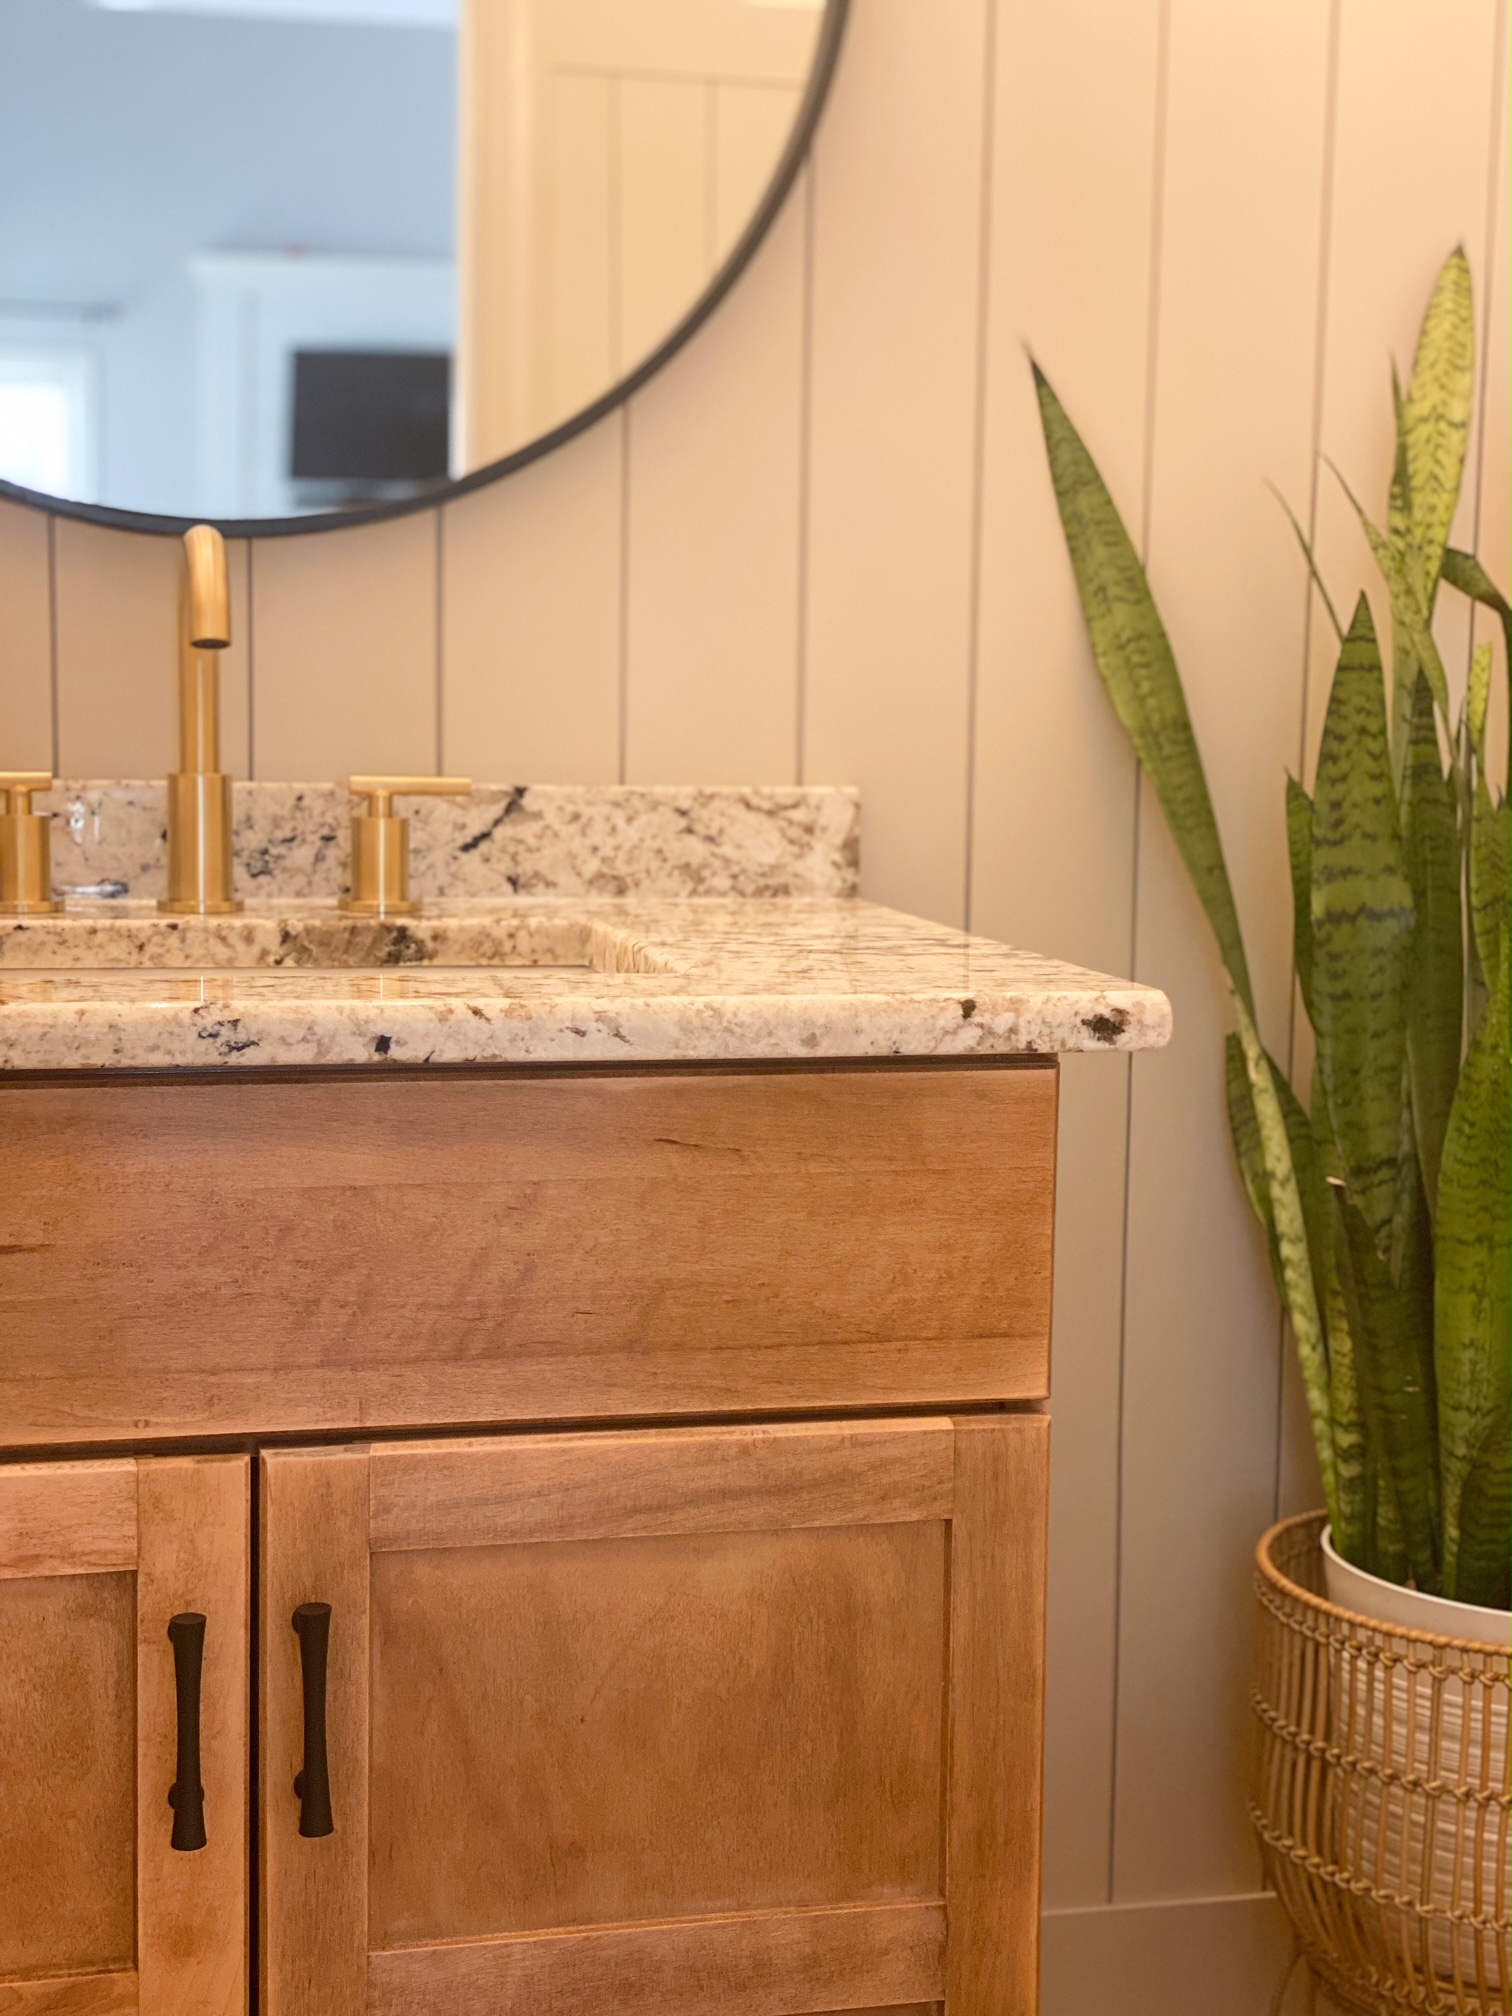
Adding in the finishing touches was one of my favorite parts. To fill the dead corner space, I found this giant snake plant at Home Depot for $22! The plant stand was an awesome find at Marshalls.
My favorite piece is the room is this watercolor lily. It was a gift to my grandparents by one of their church members. They had is framed by a local business who made a special pocket on the backside to hold the card that was handwritten and included with the art. The special note is a reminder of the impact they had on so many lives and that motivates me to live life to the fullest.
Before we look at the completed space in its entirety, let’s remember where we started again:
What do you think about the Powder Room transformation? Would you believe it was completed for less than $600? Most of that cost went to lumbar because we went with primed pine vs primed MDF.
I hope this inspires you to make the most of your space and transform it with a little paint and a little elbow grease. The before and after can be exactly like your mood board.
The Grinch made me do it. Who knew our traditional Friday family movie night would result in my favorite Christmas decor addition in our home? Contrary to the Grinch’s view of Christmas, the movie put me in the Christmas spirit early which I’m not complaining about. Whoville is so whimsical and unique which inspired me to doodle a few Christmas trees.
A few doodles later, I then turned them into a printable with a imple Christmas saying that I wanted to share with others. If you like to add simple holiday decor to your home, you can download the printables below.
These are made to fit an 8×10 frame and/or a 5×7 matte for an 8×10 frame if you wish to add a layered look to the frame.
I’d love to see how you style your printable. Be sure to comment on this post how you plan to use it and also tag @4havenssake on Instagram and Facebook!
For $40 in material, you can update any room with a simple accent wall.
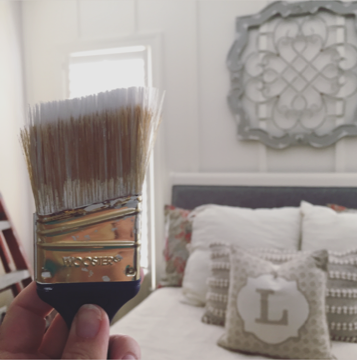
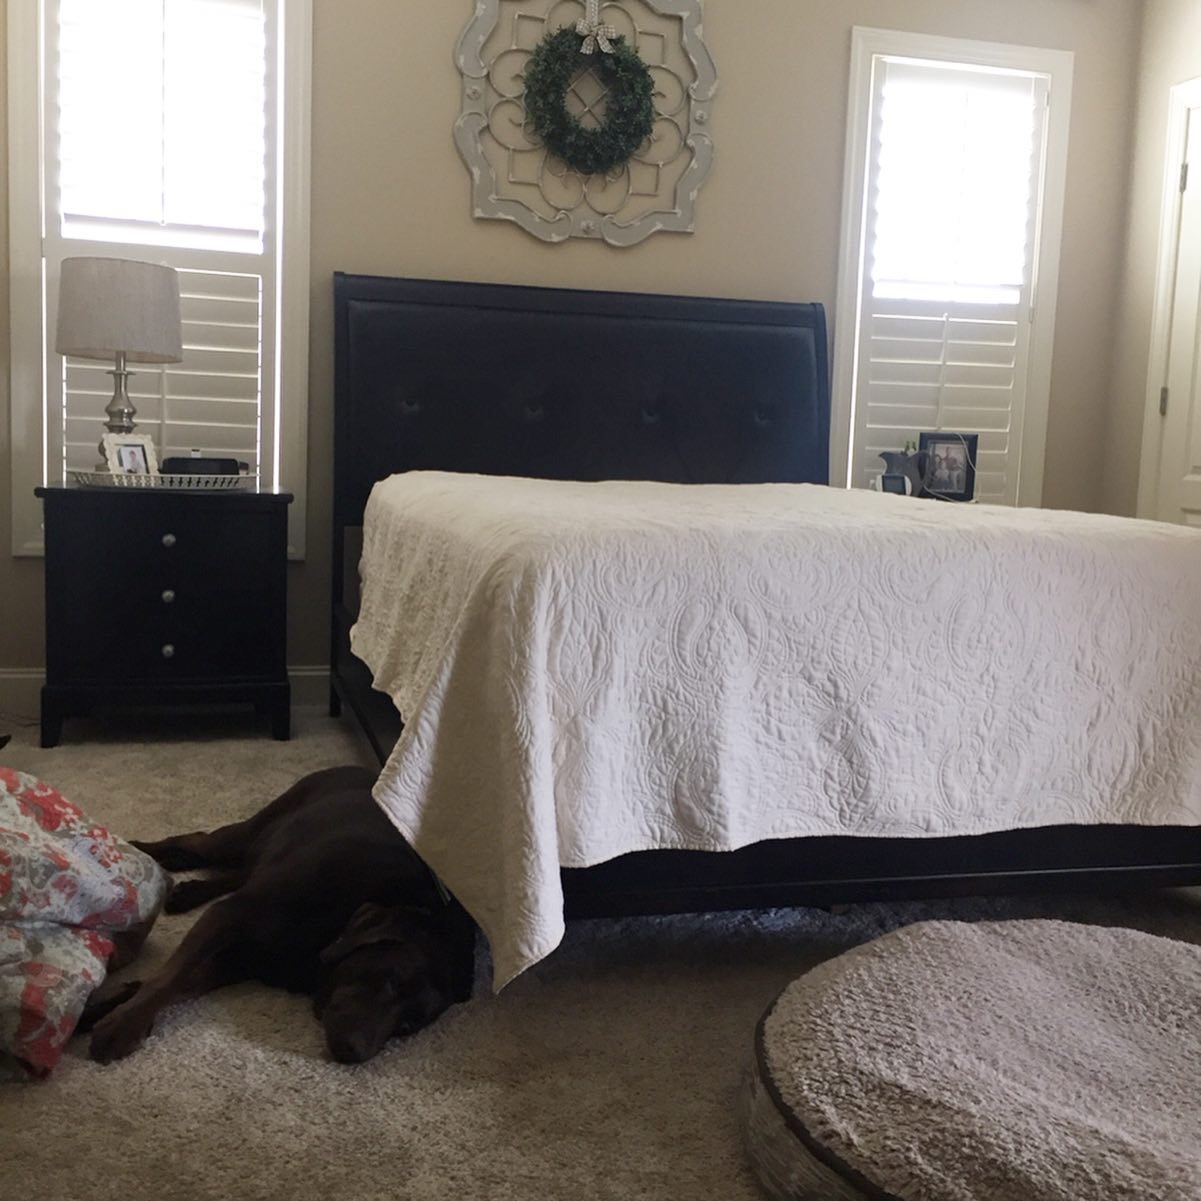
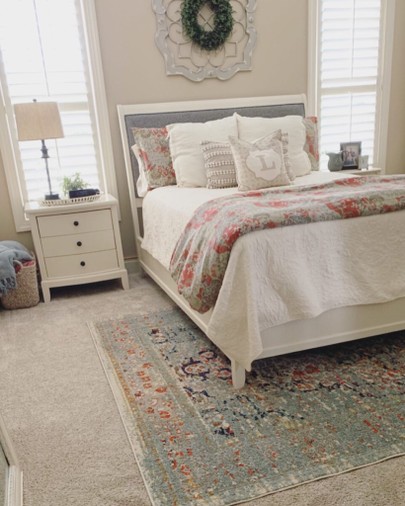
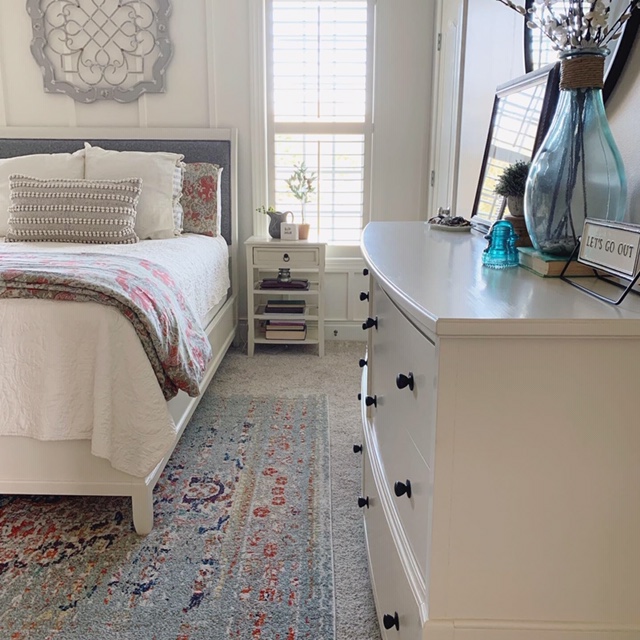
The motivation behind our master bedroom refresh was my vision to lighten up the space completely. Some of my favorite rooms have been spaces we stayed at on vacations. The retreat-like ambiance always relaxes us the most so having that in our room where we sleep every night & wake up every morning became my goal.
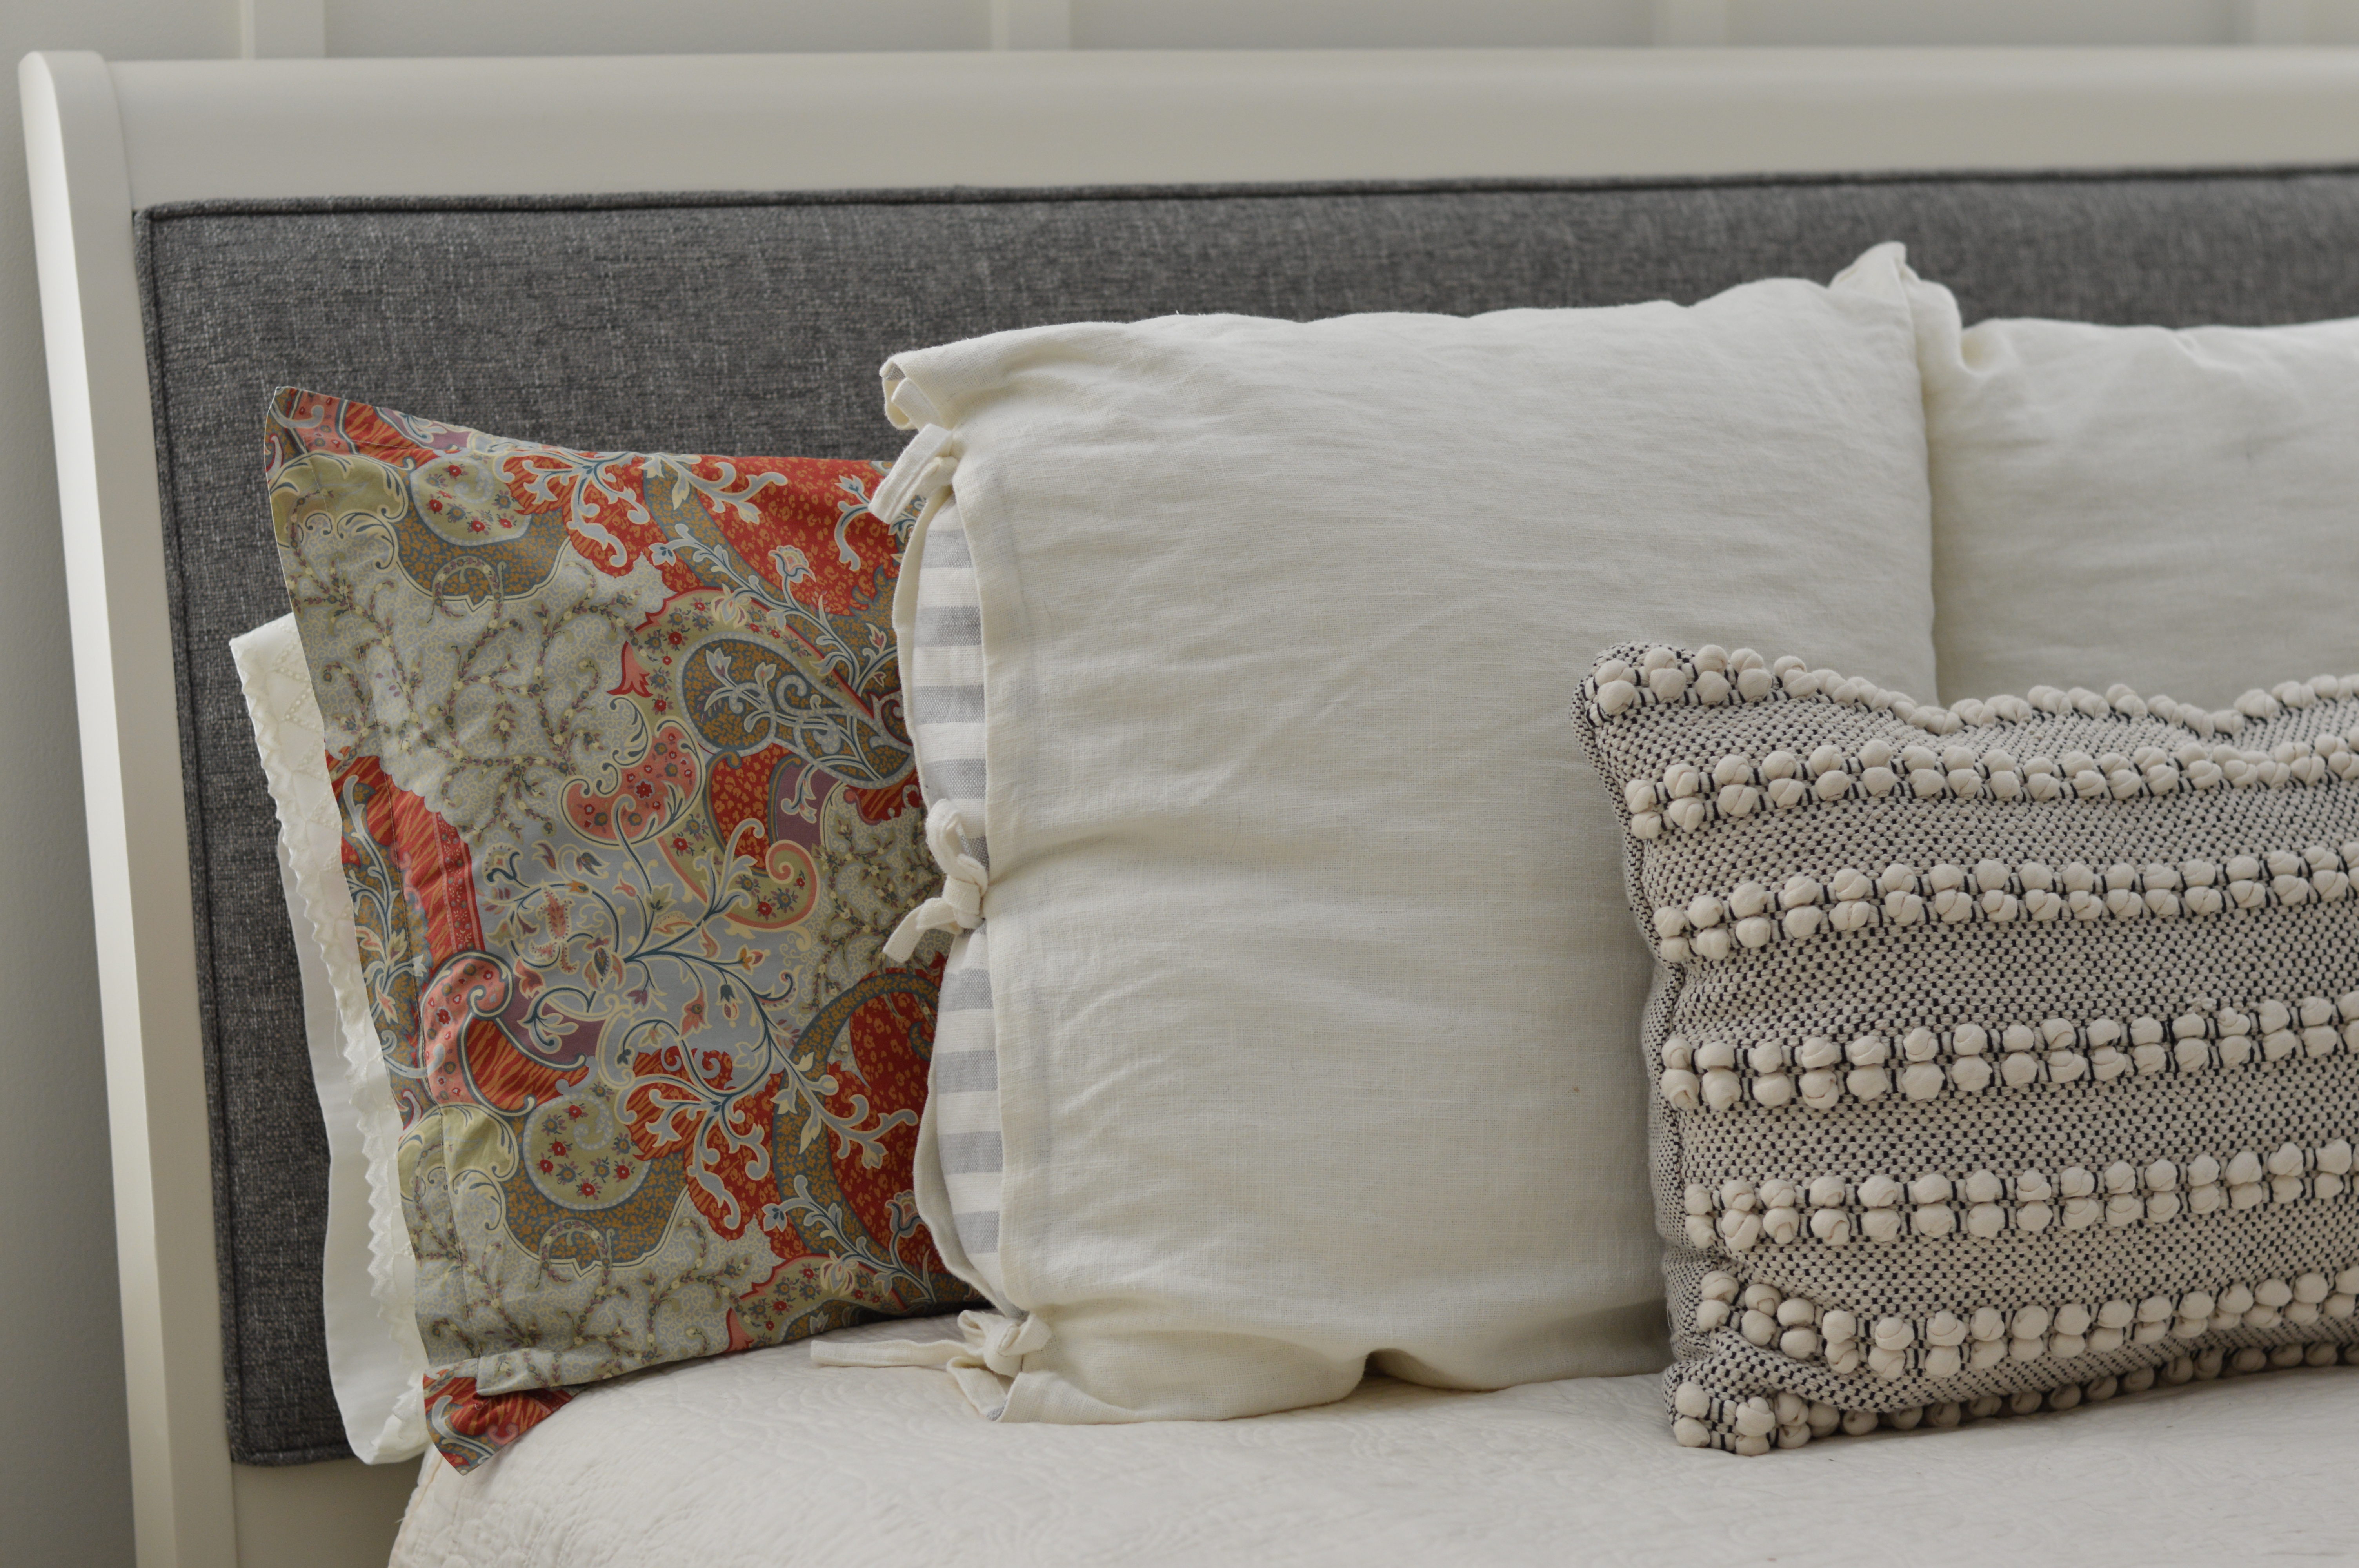
First, I started by refinishing our dark, black furniture with this chalk paint recipe and by updating the black leather headboard insert with a beautiful gray twill fabric.
You can watch my step by step for recovering the headboard insert in highlights here.
Refinishing the furniture alone was a major update to the room. We’ve never been a big fan of the tan walls, partly because our first home had so much of that color before we made the change over to agreeable gray.
The accent wall was going to be behind our bed, on the main wall. This wall also happens to be the only one in the room with windows. A couple of years ago, we updated the windows with plantation shutters which we absolutely LOVE but something about them looked unfinished on that wall. I wanted the shutters and new accent wall to blend and look like one big statement.
Adding floor to ceiling board & batten and painting it the same color as the shutters and trim became the vision for the space.
We agreed on using 1×2 primed MDF.
The first thing I had to do was add trim to the crown and baseboard on this wall that allowed for the MDF to bump up flush to the edge.
Once it was painted to match the existing trim, it made the crown and baseboard look like a chunkier piece of trim.
See the before and after:
Notice how the after picture shows the MDF boards are flush to the added cove moulding?
After measuring the length of the wall, we determined an approximate number of 1×2 boards needed, 10 (4 of which were not full length due to the two windows) and approximately 15.5-16 inches apart.
The spacing had to be adjusted slightly because the wall length wasn’t 100% exact on either side of the windows. Thankfully, my mom was at the house when I was struggling to make these adjustments. Simple math sounded like the logical solution but then the boards weren’t centered evenly over the windows. Long story short, we finally worked out the spacing solution, adjusted when needed and overall, you don’t notice there are any differences in spacing between any of the MDF strips.
The BEST part about this project was getting to use my father-in-laws nail gun.
It’s not just any nail gun. It’s cordless, doesn’t require an air compressor and uses CO2 cartridges. (I’m going to need one for myself.) Most air compressors are loud so it was nice using this nail gun as I was DIYing this project during toddler naptime. The nail gun was fairly quiet, quiet enough to not wake said sleeping toddler.
If you’re in the market for a finish nailer. I encourage you consider this one as an option and compare as you won’t also have to buy an air compressor.
Simple Steps for adding board & batten when you have existing crown and baseboards that you don’t want to remove.
Add cove moulding with a finish nailer to the length of the existing crown and baseboards.
Caulk seams, putty nail holes with wood putty, let it dry then sand lightly with 220 grit block
Now you can paint this newly updated trim and the wall the intended color of your accent wall. (I recommend doing this before adding the board & batten strips as it will make painting easier when they are added.)
Add the first board and batten strip flush to the edge of the wall. Don’t worry about any gaps that may exist due to wall inconsistencies, you will be caulking this prior to painting once the strips are up.
Measure out spacing for each strip of your board and batten.
Add liquid nails to the back of the strips, then nail to the wall using your finish nailer. Liquid nails are recommended as you likely won’t be adding each strip where the studs are located.
After adding each board, fill holes with wood putty, caulk all seams at the added boards and wall (you want to do this to fill any gaps that may exist), wait to dry, sand puttied holes then vacuum up all debris.
Now you’re ready for paint! If you painted the wall the accent color prior to adding the B&B strips, you’ll just have to paint the seams and newly added trim.
In full transparency, it’s been a lot of work updating this room soley because of my project to repaint ALL of our bedroom furniture. It’s an easy process, just time consuming due to the coats of paint and polycrylic finish.
In the end, all of the labor is worth it. You eventually forget about how much it hurts during the process, then you do it all over again for the next project.
I want to hear if you are planning to add an accent wall. Share in comments if you’re adding a pattern or keeping it classic with a floor to ceiling board and batten addition.
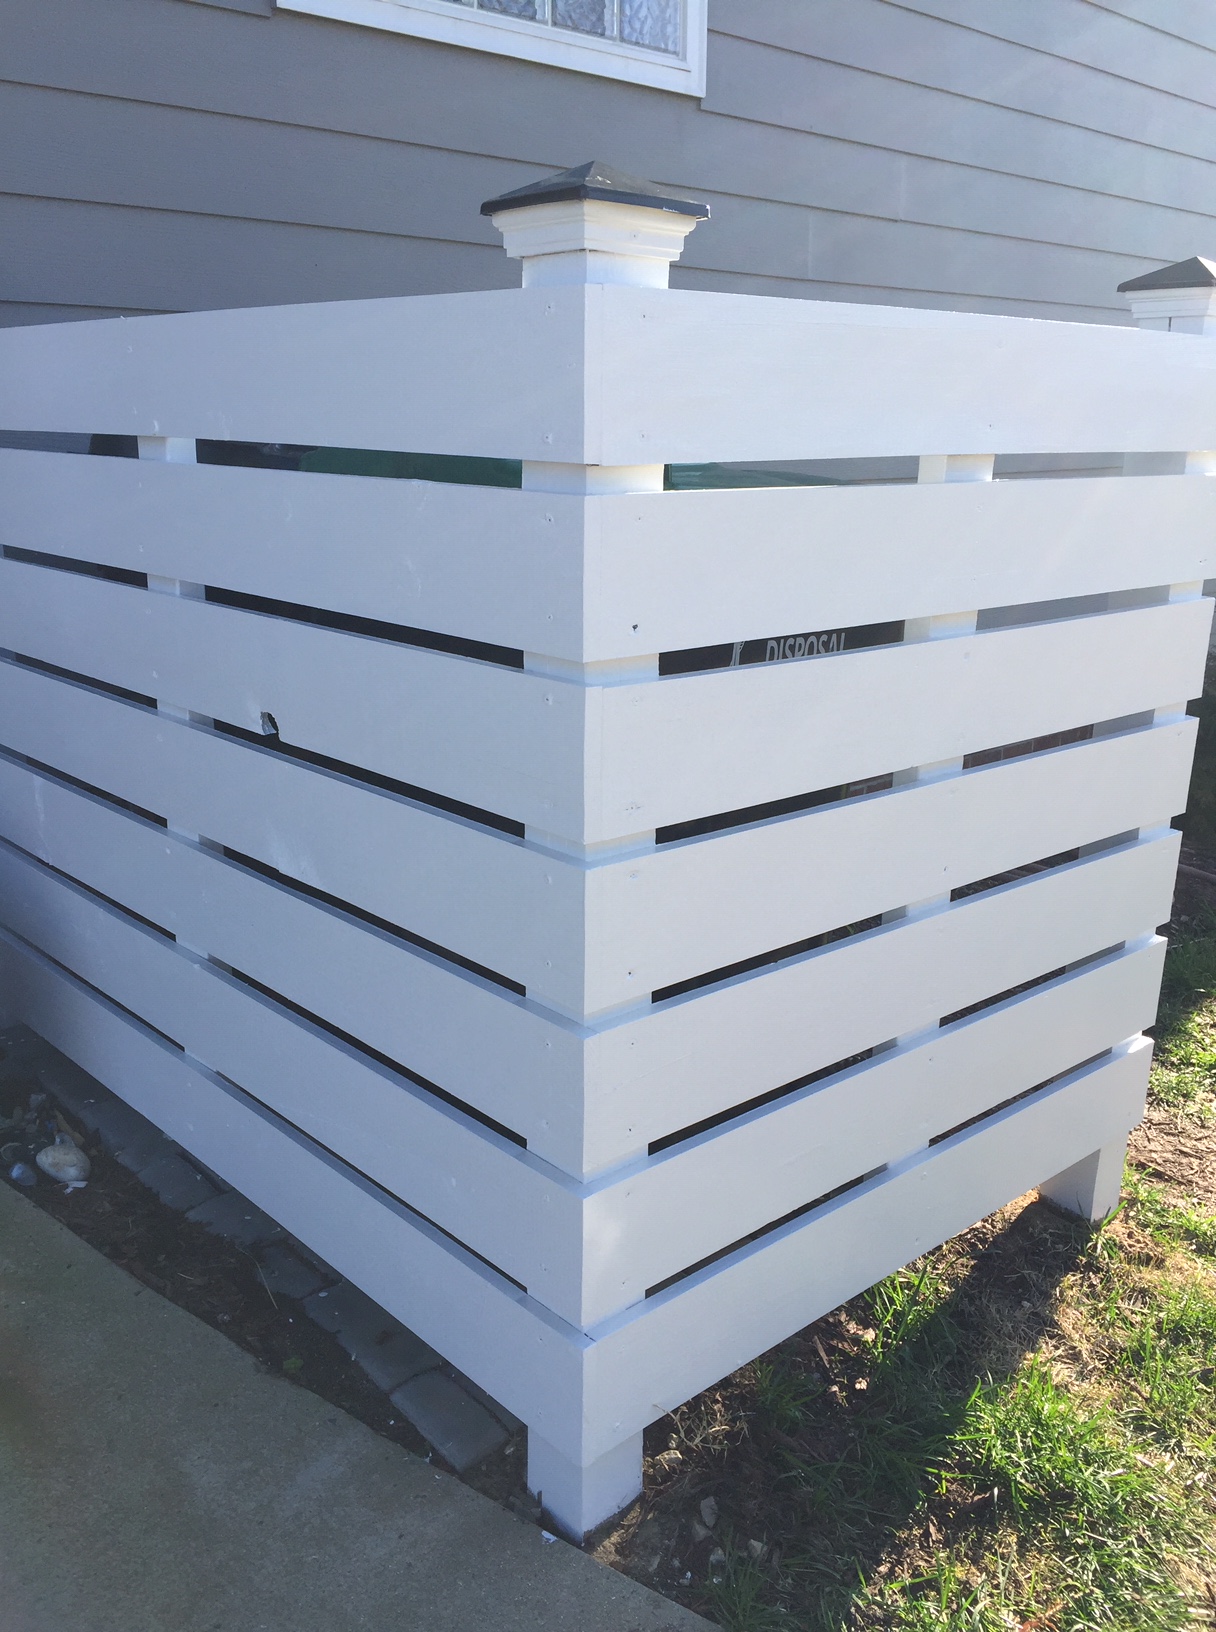
Pavers (color and size of your choice) – we used left over pavers from our patio
This project is pretty quick and simple. The first step is to make the holes for your 3 posts. We used 4x4x6 posts and felt that 1.5 feet in the ground was sufficient without mortaring around the posts.
Second, attach the post caps on top of your 4×4 posts so you can appropriately start your first board spaced the same distance that each board will be apart from each other. Ours are approximately 1 inch apart.
Next, measure your 1×6 board from the far edge of one post to the edge of the second post. Attached the first board 1 inch from the base of the post cap with galvanized wood screws. I recommend starting on the side of the hideaway so that the front view won’t show the seam where the boards meet at the center post.
Use a spacer (we used scrap wood, 1 inch in height), to place under your first board, place the second board flush to this spacer and attach one side. Move the spacer to the second side and attach. Continue this process on this side of the hideaway.
For the second side, you’ll measure from the edge of the post to the edge of the first board you attached to the side. We recommend you take measurements of each board and make cuts accordingly as there are slight differences per wood inconsistencies.
If you want a natural look, allow the treated wood to dry out (approximately 1 month) and clear coat or stain. If you wish to paint, also allow for the wood to dry out and first prime with an oil based kilz prior to painting it to match your trim.
Lastly, level out the ground area within the trash can hideaway and lay out your pavers for a smooth surface for your trash and recycle to rest.
Please see this DIY deck skirt tutorial if you want to carry over this look of shiplap to create a storage space under your deck.
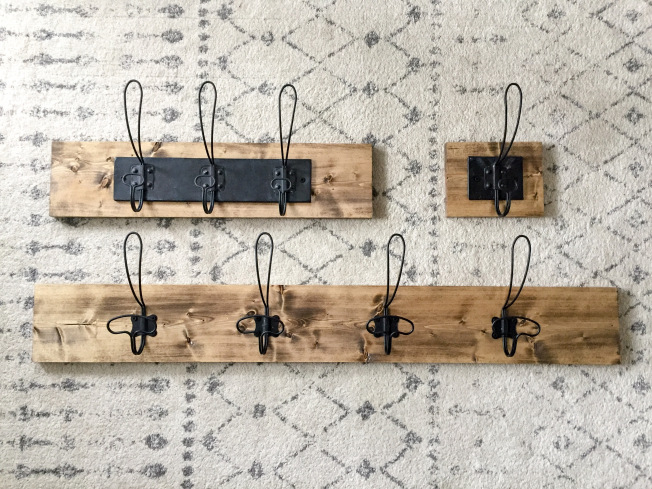
This simple DIY project is perfect for a rainy day. You can plan ahead and snag these hooks for 1/2 off when they are in the sale rotation at Hobby Lobby.
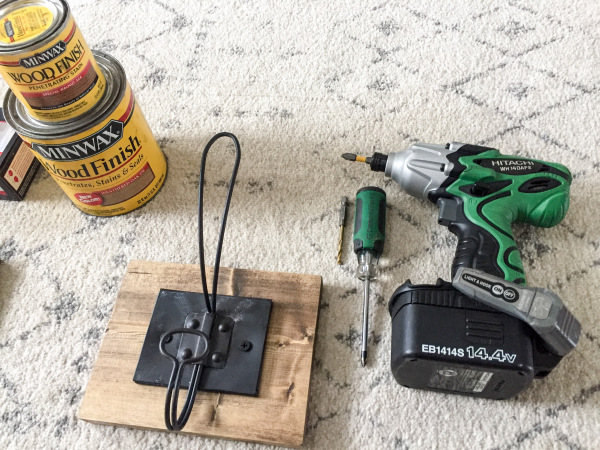
Materials:
1- 1×6 Pine Board (1 board allowed for the 3 different wall hooks you see pictured)
Wall Hooks – sourced from Hobby Lobby (they are frequently 50% off)
1 inch black screws (quantity dependent on how many hooks you plan to make)
Stain color of choice (we used Special Walnut by Minwax)
1/4 inch drill bit (attachment for your drill to make a hole in the metal wall hook)
2 inch black screws (quantity dependent on number of wall hooks you make)
This budget friendly DIY can cost as little as $40 for all 3 wall hooks. Hobby Lobby frequently offers their drawer pulls and metal wall hooks at 50% off. You can find each hook at these links – Single Retro Iron Hook, Triple Retro Iron Hook, single iron hook (not available online). If you don’t want to wait for the hooks to go on sale, you can use a 40% off mobile coupon for one item.
Steps:
Stain the board and allow to dry. Do not discard the towel used for staining as you will need it again to stain edges after you cut your board
While your board is drying, you will drill the holes in the metal hooks to allow for ease of attaching them to the wood board. Attach the drill bit to your power drill, mark where you want the holes for the screws, leverage the metal hook on an sturdy surface to allow for some overhang for your drill, securely hold the hook with one hand on the surface while you drill a hole, discard metal shards and repeat until you have 2 holes in each of the larger metal hooks. No drilling is required for the individual hooks.
Measure out the size you want for each wall hook. To utilize one board as we did, measurements are as follows: 1 Single Hook – 7 inches, 3 hook – approx. 23 1/4 inches & 5 hook – approx 41.5 inches.
Stain raw edges after you cut each piece
Center metal hooks on board and attach them using the 1 inch black screws
Once boards have completely dried, you can attach them to your wall using the 2 inch screws. We recommend finding the stud in the wall to ensure they are secure and withstand holding the weight of your goods over time.
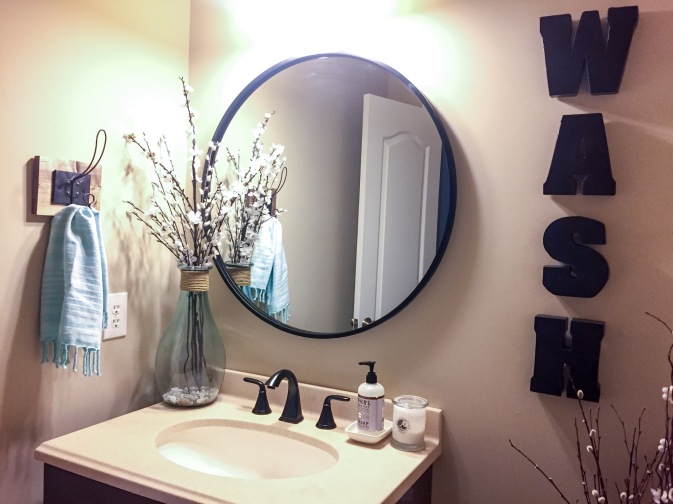
Our 5 hook set was added above a shoe bench in our garage to create a simple hall tree and catch all for jackets & book bags.
If you love the look and just don’t have the time or tools to make these, you can send us a message at The Homestead Haven as we have them in our shop inventory ready to ship. (They’re currently not online in our Etsy shop and solely made for our vendor markets.)